Google Navigation SDK standalone
Add Google Maps maps turn by turn directions to your Android or iOS app with the new Google Nav SDK.
The Google Navigation SDK delivers the familiar Google Maps turn by turn directions experience as a standalone software package, allowing you to integrate and customize a navigation module within your own mobile app. Finally, one of Google Maps's most requested features is now available to everyone as a ready to use solution that can be implemented with just a few lines of code. In this blog post, we’ll break down how the Navigation SDK (Nav SDK) works, what it costs, who it’s for, and how you can get it up and running in no time at all.

Part 1: Google Navigation SDK standalone (this article)
Part 2: Getting started with the Google Navigation SDK
Part 3: Adding a Place Autocomplete text box to your Android app
Part 4: How to draw a route on Google Maps for Android with the Routes API
Part 5: Styling the Navigation SDK with custom UI and branding
Part 6: Custom Google Maps markers on the navigation view
Part 7: Customize your vehicle icon with the Navigation SDK
Part 8: Custom polygons, boundaries and base map styles in the Navigation SDK
Part 9: Using the Navigation SDK for multi waypoint navigation
Part 10: Passing a GMPRO or Routes API route token to the Navigation SDK
Part 11: Listening for events and detecting arrival at destination
Part 12: Google Navigation SDK vs Mapbox vs HERE Maps
Introducing the Google Navigation SDK
If you drive, chances are you’ve used the turn-by-turn navigation feature in the Google Maps app at least once before. You search for a destination or enter an address, review the route, hit the start button and get on your way.
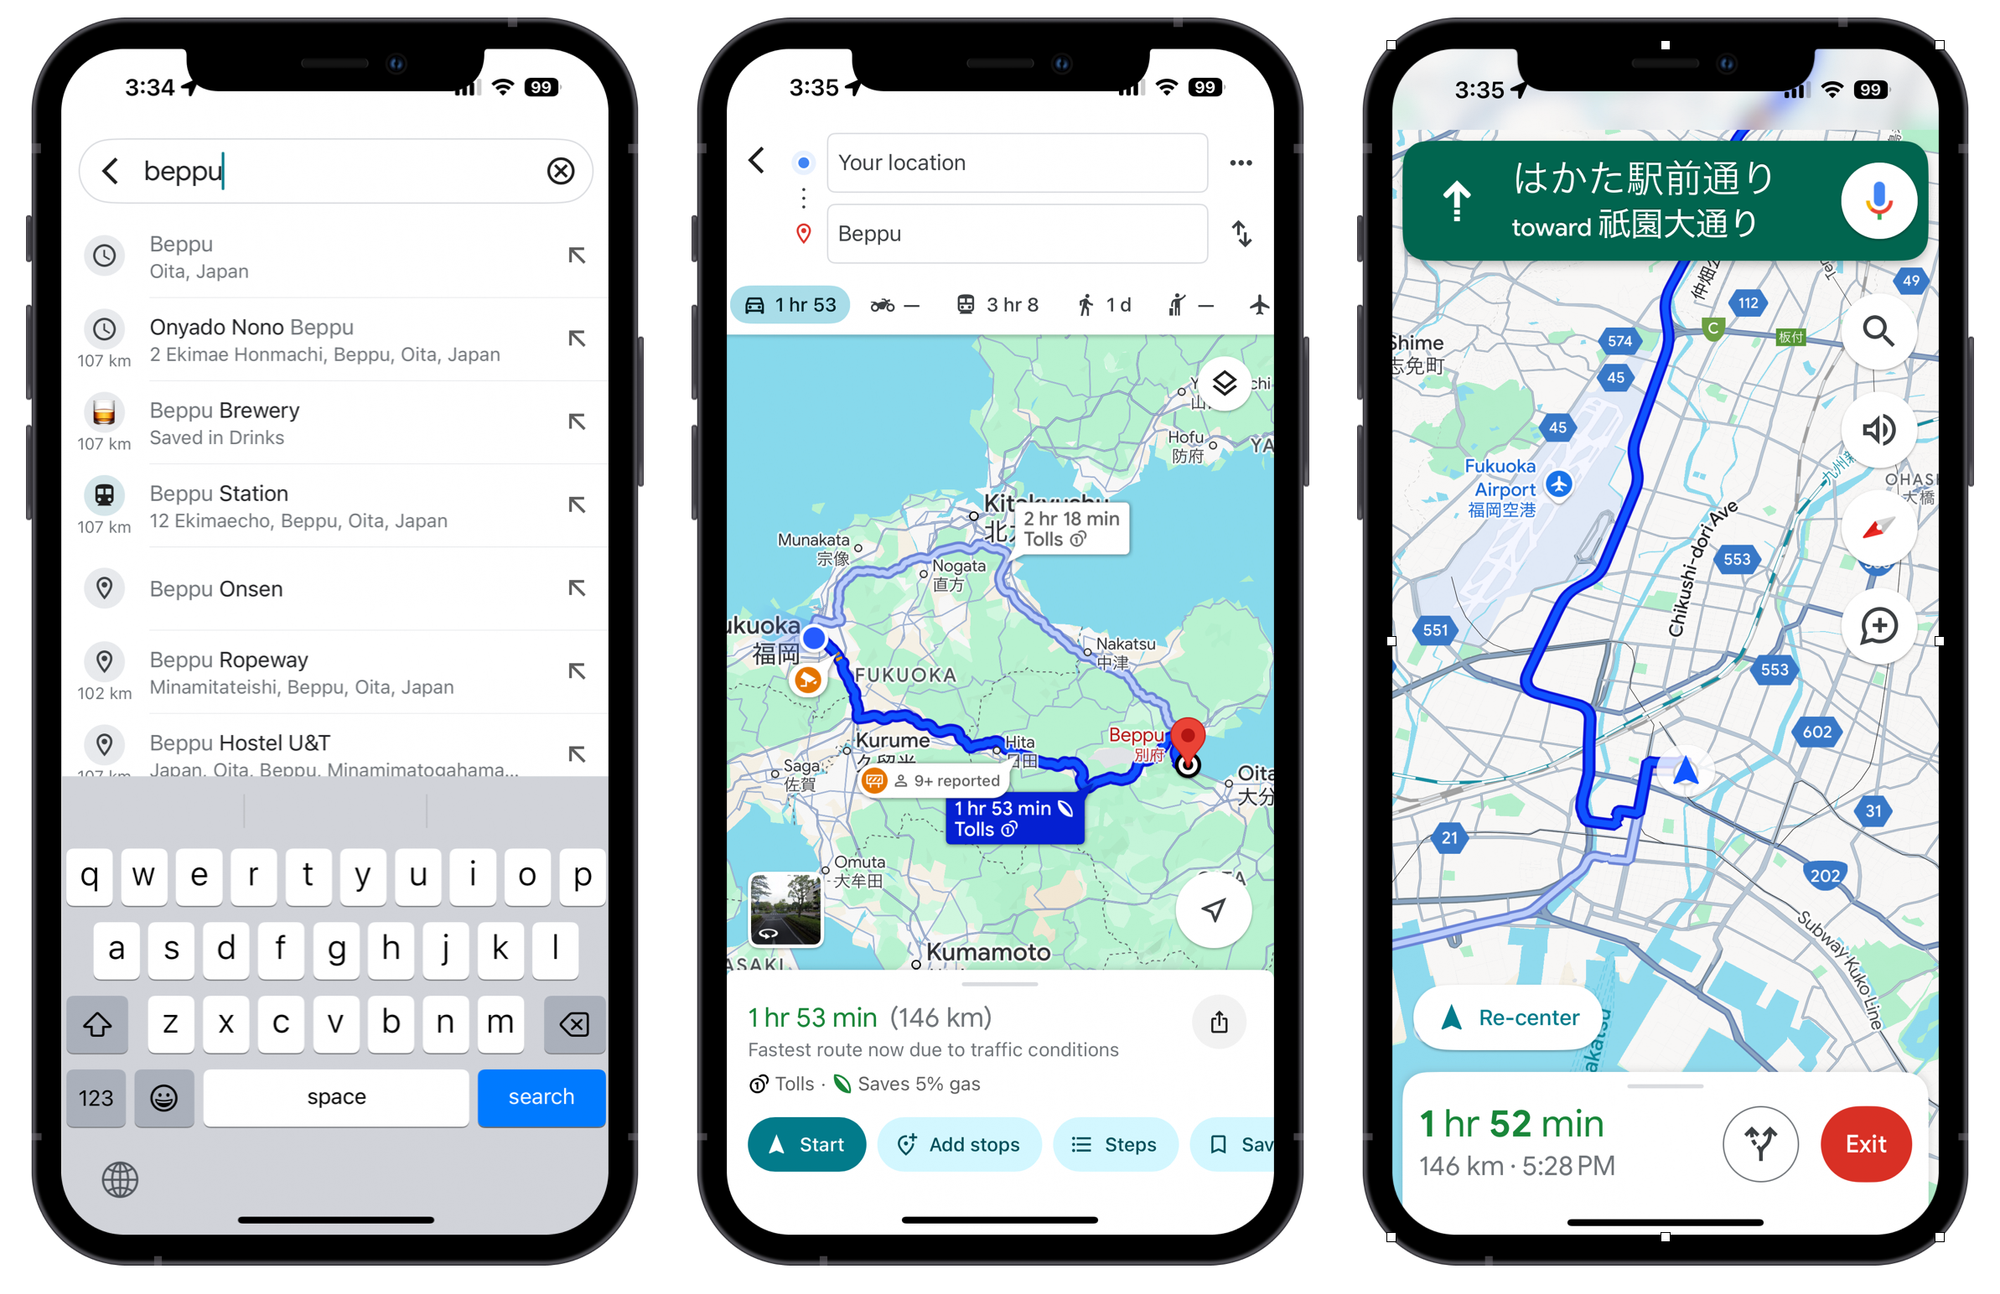
The Google Navigation SDK lets you do all of this directly in your app. It delivers the trusted Google Maps navigation experience while allowing for complete customization over the user interface and driver experience, ensuring it aligns perfectly with your brand and business goals.
The Nav SDK should prove useful to any company or business operation that has a "driver app". It is particularly well-suited for last mile delivery providers like FedEx, UPS, and other parcel delivery services, as well as ride-sharing platforms such as Uber and Lyft. It can also benefit field service companies, like cable providers scheduling technicians for installations, or even non-emergency medical transport services. It's the perfect fit for any company with dedicated driver fleets, where accurate and dependable navigation is essential for operational success.
Why use the Google Navigation SDK?
Aside from customization, the main benefit of the Nav SDK is that it can show your users how to get from point A to B safely and accurately, without leaving your app. There are four main components to this:
Location tracking
The Nav SDK lets users keep your app in the foreground (the first app that loads when you unlock your phone) so that you can track the location of your drivers in real time. Using a third-party turn-by-turn navigation app pushes your app into the background, stopping location tracking and making it cumbersome to deal with real time updates and notifications.
Driver safety
Drivers can navigate directly within your app, eliminating the need to switch to external apps like Google Maps, Waze, or Apple Maps. This helps them stay focused on the road and reduces distractions.
Real time traffic
The Nav SDK also uses the same real time traffic information that powers the consumer Google Maps app, so traffic conditions and ETAs (Estimated Time of Arrival) are very accurate. This feature helps drivers navigate around traffic congestion and select the quickest route to their destination. If a driver misses a turn or gets lost, the Nav SDK automatically recalculates a new route to guide them back on track.
Consistency across Google Maps APIs
The Nav SDK provides the option to pass a route token instead of specifying origin and destination waypoints. This enables you to generate a route using a different Google Maps API, such as the Routes API or GMPRO, based on business-critical metrics such as lowest cost, avoid tolls, or side of road preference. Once the route is created, you can pass it to the Nav SDK to make it clear to your drivers that they are supposed to follow the exact path you’ve defined. Additionally, any deviations from the route can be detected and tracked using the RouteChangedListener, allowing for detailed logging and analysis as needed.
How does the Google Navigation SDK work?
The Nav SDK lives inside your app as a self contained module that holds a 3D version of Google Maps. When you pass the Nav SDK an origin (typically the user's current location) and a destination, it retrieves the route polyline and driving directions from the Routes API (this is handled internally by the Nav SDK and you are not charged separately for it) and displays it on the map as a blue line. As you drive, the Nav SDK dynamically updates your location on the map and adjusts the route to reflect your progress, effectively shortening the remaining distance in real time.
When you deviate from the original route, for example if you miss a turn, it calls the Routes API again and recalculates a new one. If a route with a similar ETA is available, it is shown as a grayed out polyline on the map, and following this new route automatically turns it blue.
Customization options with the Google Navigation SDK
The Nav SDK's customization capabilities allow you to create a navigation experience that is both intuitive and consistent with your brand identity. Key user interface (UI) elements you can customize with the Nav SDK include:
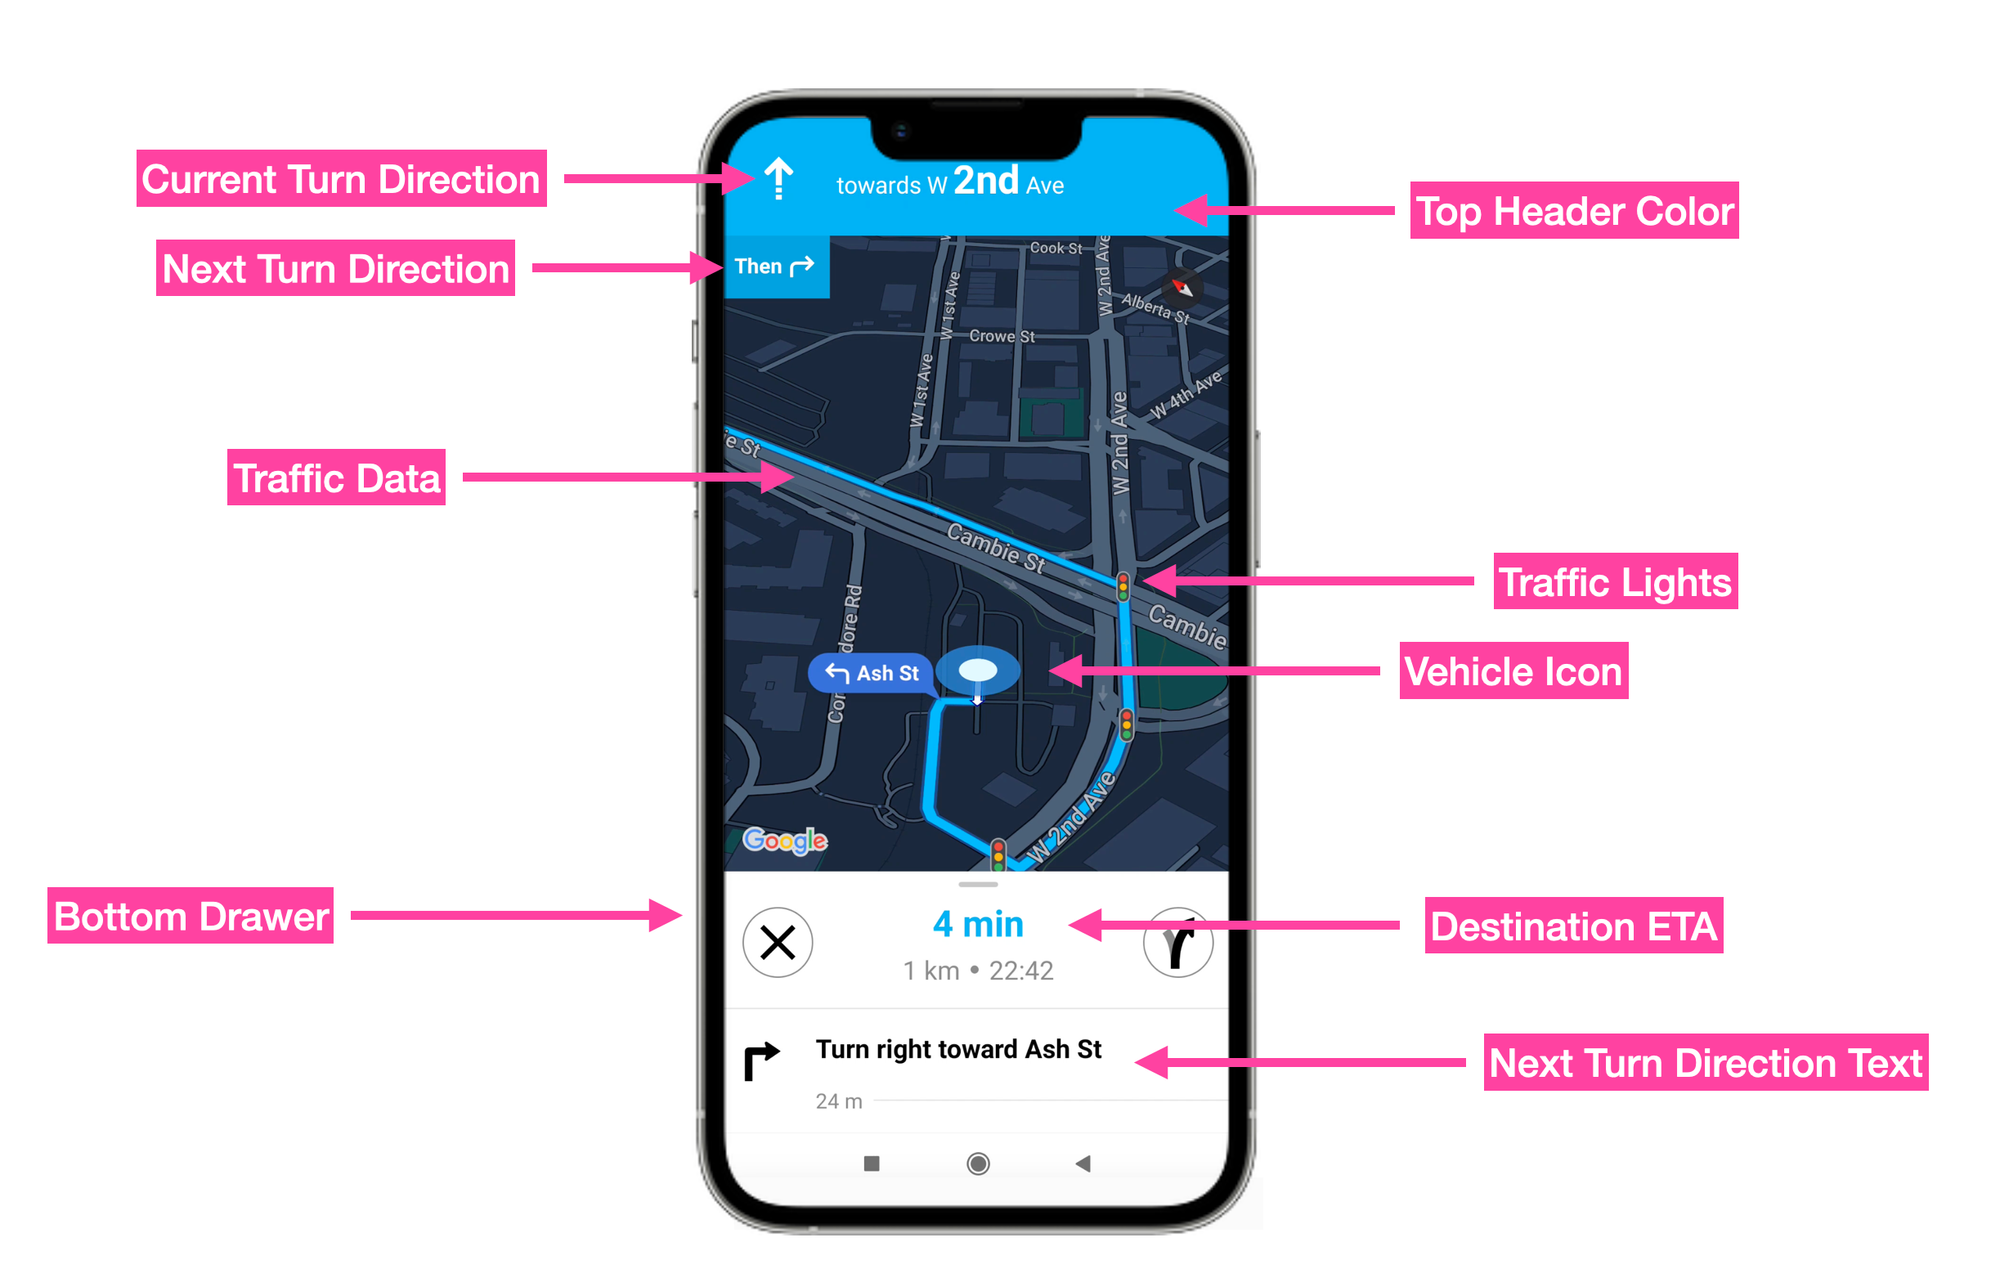
Turn cards: Modify the text and color of upcoming turns and directions, to match your app's design.
Map UI controls: Determine which built-in controls and elements appear on the map, such as zoom buttons, compass, and user location indicators.
Navigation header: Adjust the visual appearance of the navigation header, including background colors, text elements, and maneuver icons, to ensure consistency with your app's theme.
Traffic lights and stop signs: Toggle traffic lights and stop sign icons on or off.
Lane guidance indicators: Customize the color and style of lane guidance indicators to improve clarity and user comprehension during navigation.
Custom controls: Add custom UI elements at predefined positions on the navigation view, such as secondary headers, footers, or overlays, to provide additional information or functionality.
It is probably easier to list down what can't be customized:
- Route polyline. You can turn real time traffic on the polyline on or off, but you can't change its color or style.
- Road name text size. You can't adjust the text size of road names on the Google base map for better visibility.
Please message me on LinkedIn if you find a component that you want to customize, but can't.
Google Navigation SDK Pricing
The Google Navigation SDK uses a pay-as-you-go pricing model consistent with other Google Maps Platform services. Customers are billed based on the number of destinations sent to the SDK. The first 1,000 destinations each month are free, and beyond that, the cost per 1,000 destinations (CPM) depends on the total monthly volume.
| Monthly destinations | Cost per 1,000 destinations |
|---|---|
| Up to 1,000 | Free |
| 1,000 to 4.2 mil | $50.00 CPM |
| 4.2 mil to 16.8 mil | $39.50 CPM |
| 16.8 mil to 84 mil | $28.00 CPM |
| 84 mil + | $20.00 CPM |
The starting price of $50 CPM ($0.05 per destination) might seem high, but its comparable to the Mapbox Navigation SDK and there are no additional charges for route changes after a destination has already been fetched. For example, you don't pay extra if you miss a turn and the Nav SDK recalculates the route for you. Furthermore, there are no additional fees for using the Google base map within the SDK.
Obviously, $50 CPM (or $0.05 per destination) is not for everyone. Most logistics businesses in the US try and keep third party API costs under $0.10 per delivery, so $0.05 takes up half their budget. It's also not a good fit for automative or device manufacturers that want to bundle the Nav SDK for free (like Tesla does), because Google does not offer per device pricing (unless you're Elon Musk).
If you are dealing with high usage volumes, you can work with a Google Maps partner for volume discounts. See the official pricing page for details.
How to set up the Google Navigation SDK
To start using the Nav SDK, the first thing you need to do is set it up it in your Google Cloud console.
Create new Google Cloud project
First, create a new project from the console dashboard at https://console.cloud.google.com/ and name it nav-sdk-proj. Click [CREATE].
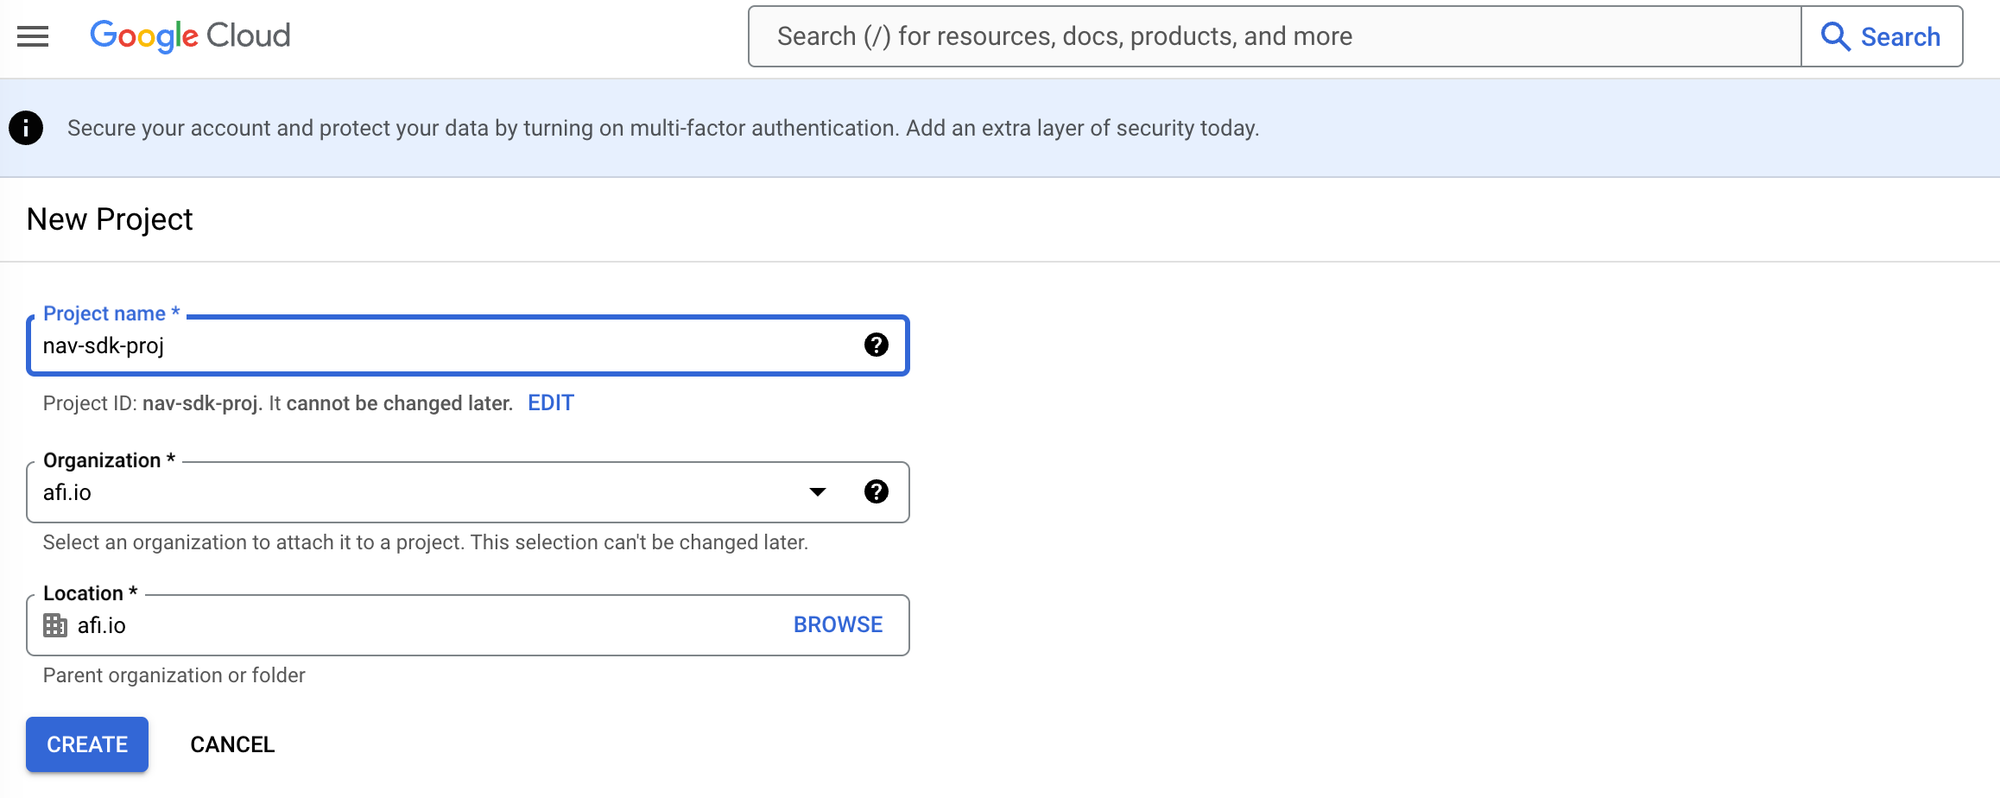
To enable the Google Navigation SDK, go to the APIs & Services page by selecting it on the left hand menu. Once there, choose [+ Enable APIs and Services] and search for the "Navigation SDK".
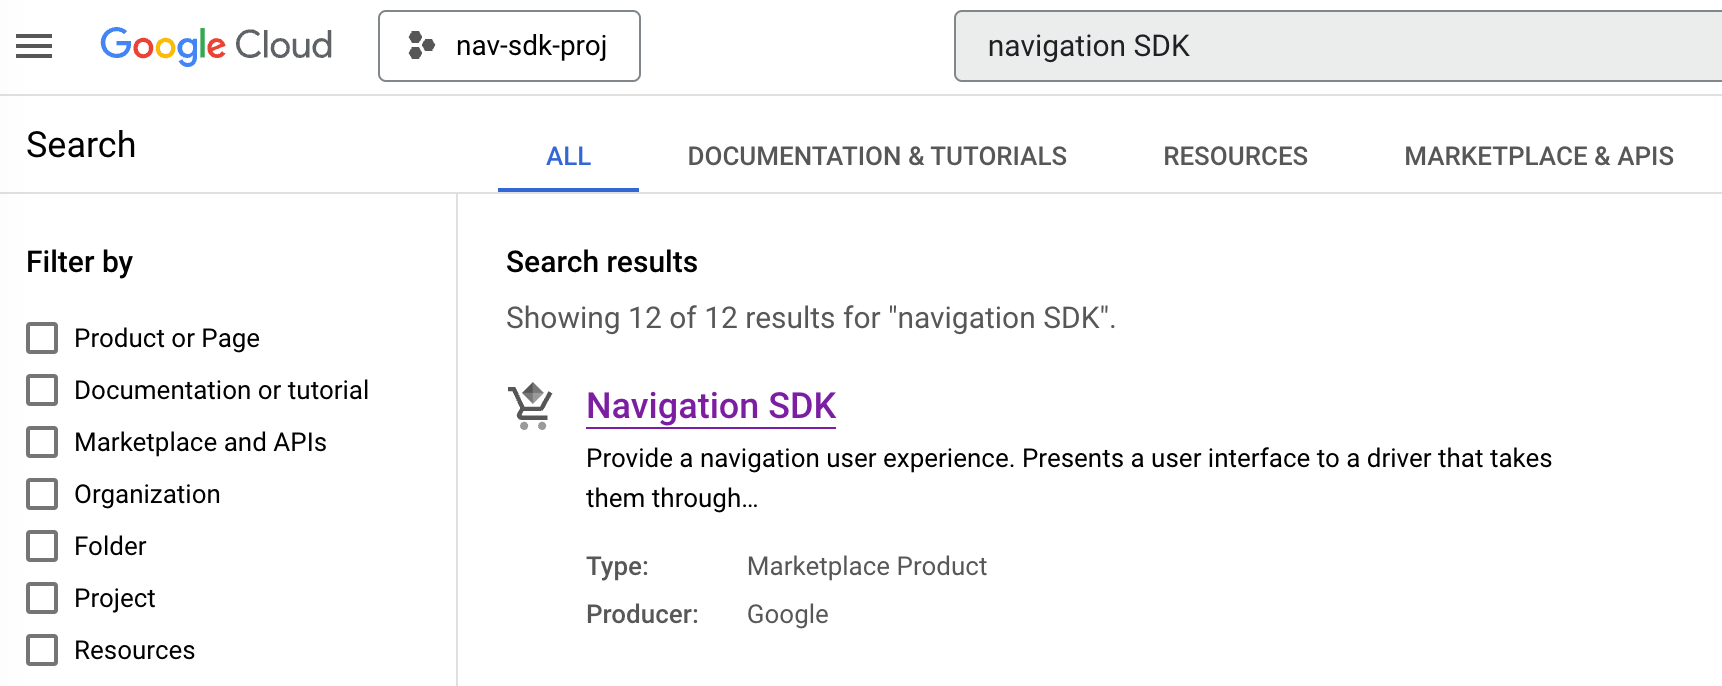
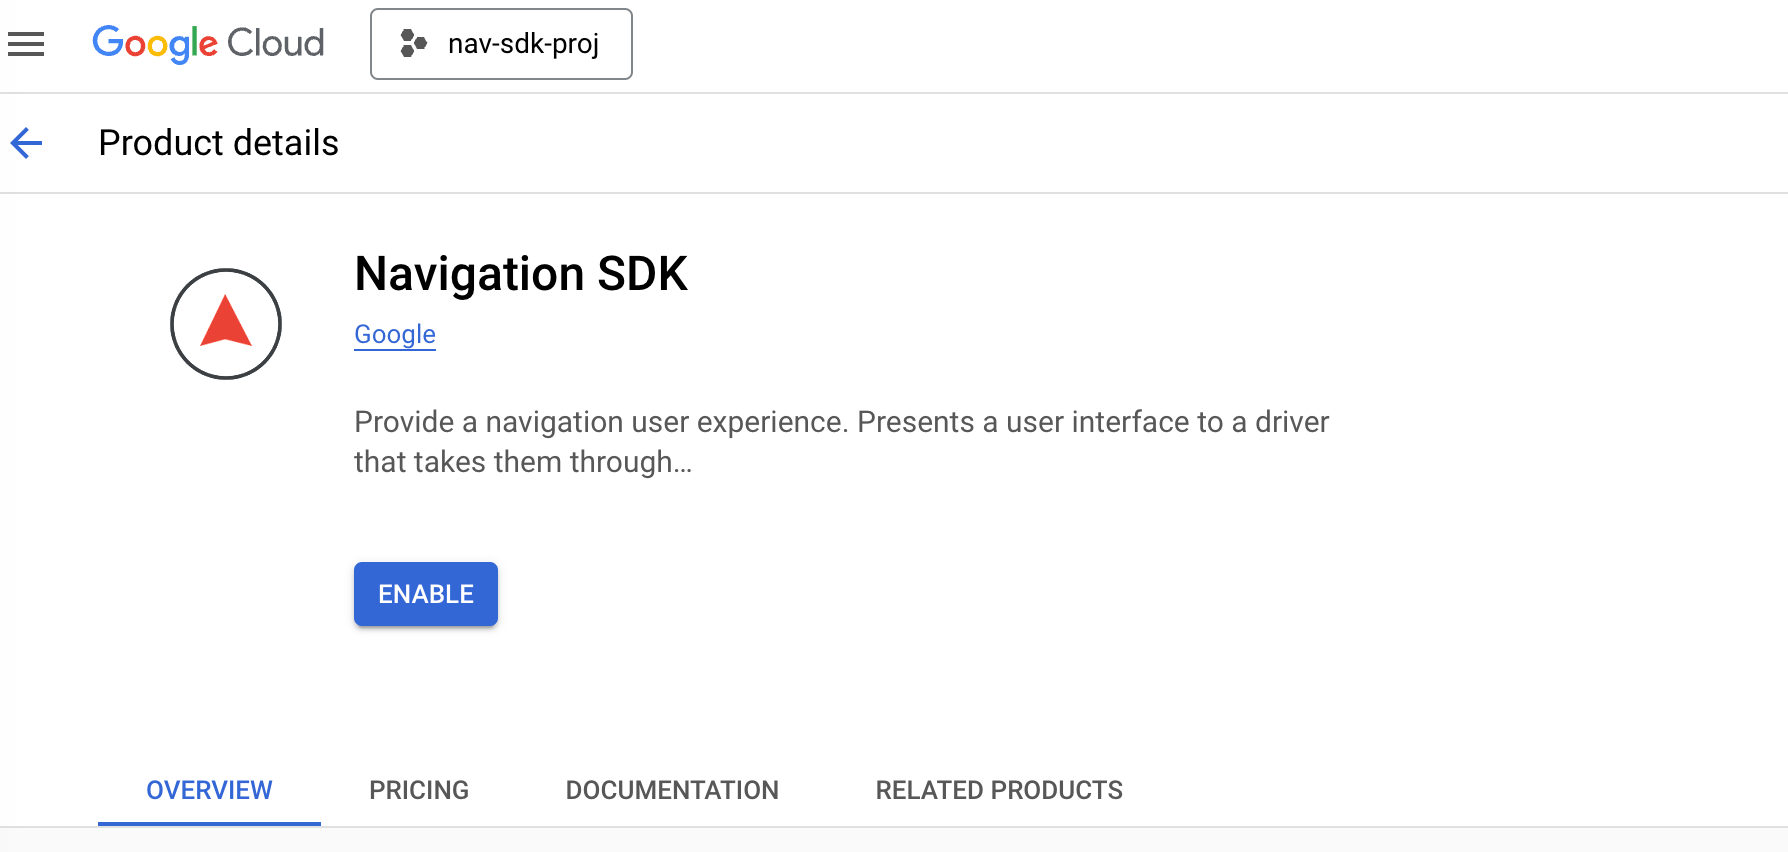
Click on the [Navigation SDK] link and press the [Enable] button.
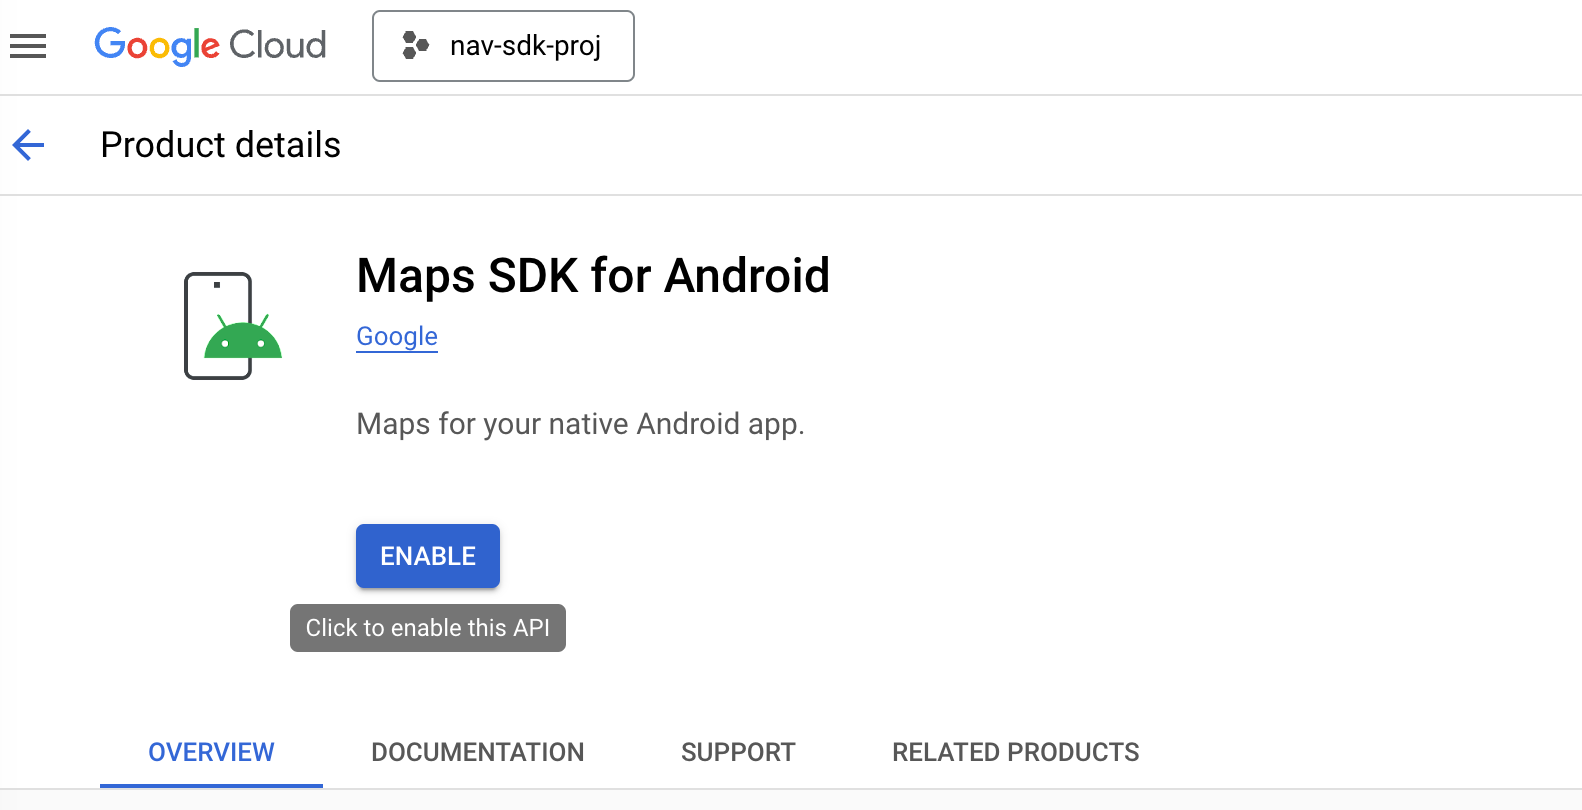
Repeat this for "Google Maps SDK for Android" (or iOS, if you are developing an iPhone app) because we'll need to give the Nav SDK access to the Google base map.
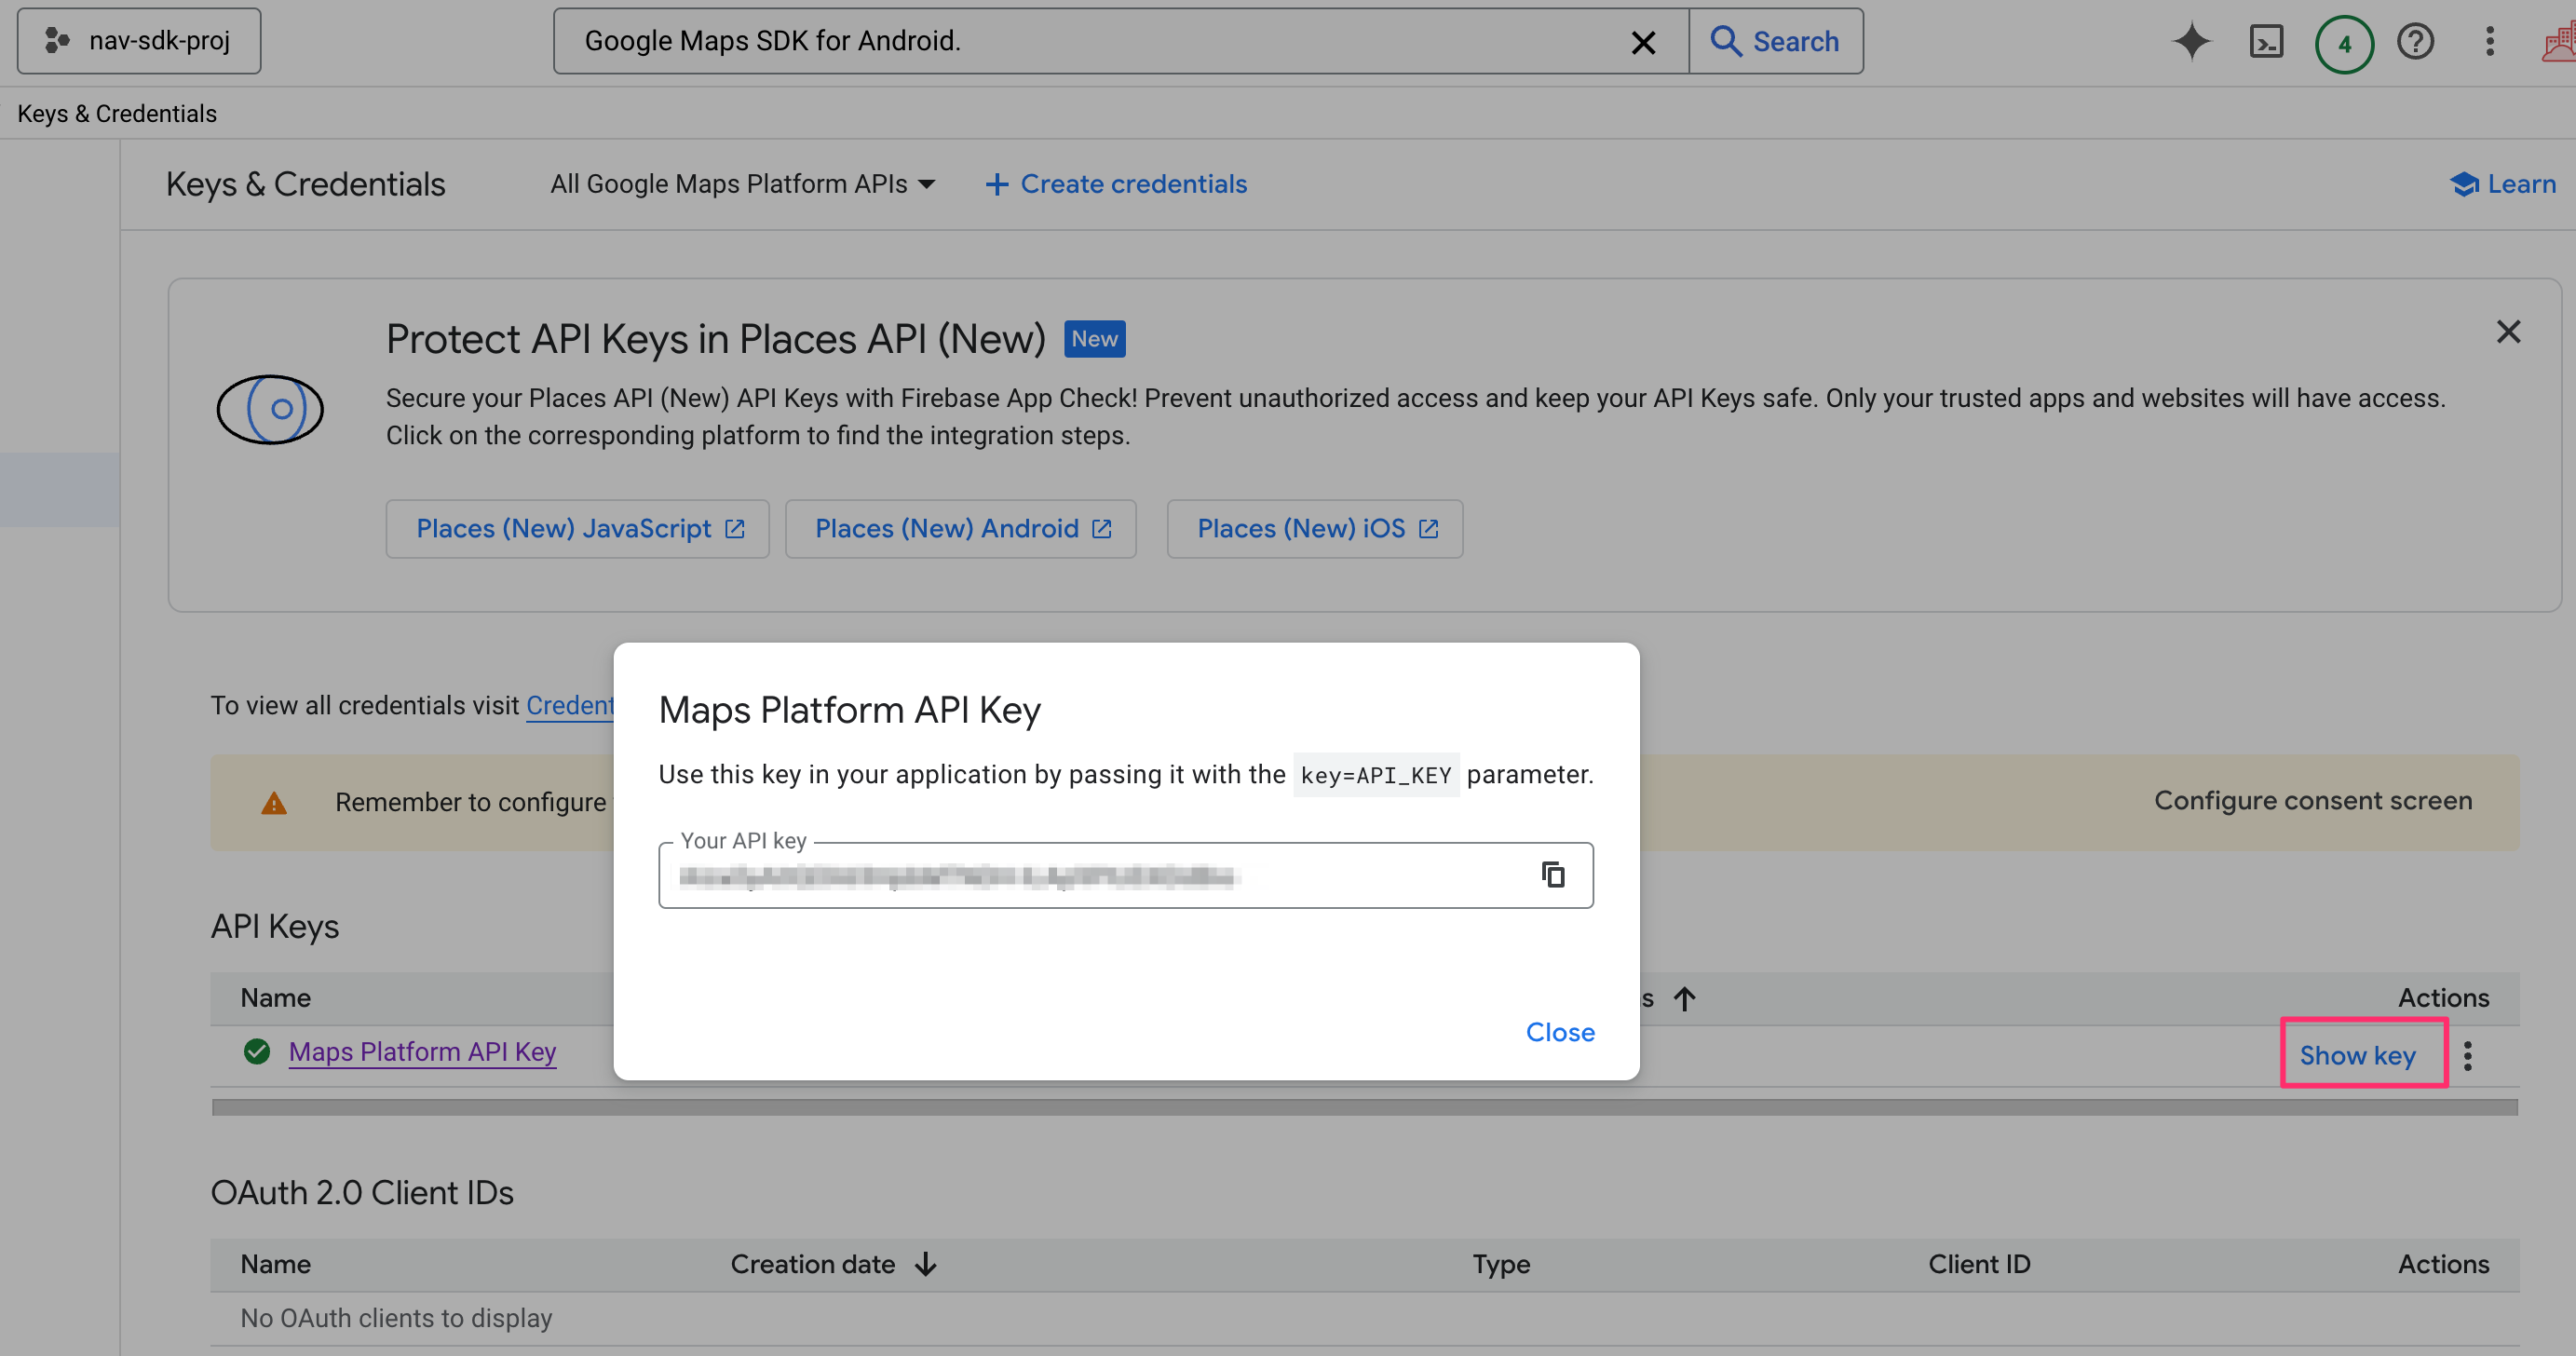
Next, while still in the nav-sdk-proj project, use the left hand navigation bar to head to the Credentials page. Click on the [+ Create Credentials] button and choose the [API Key] option. On the next page, use the drop down menu to make sure that Navigation SDK and Google Maps SDK for Android are both enabled.
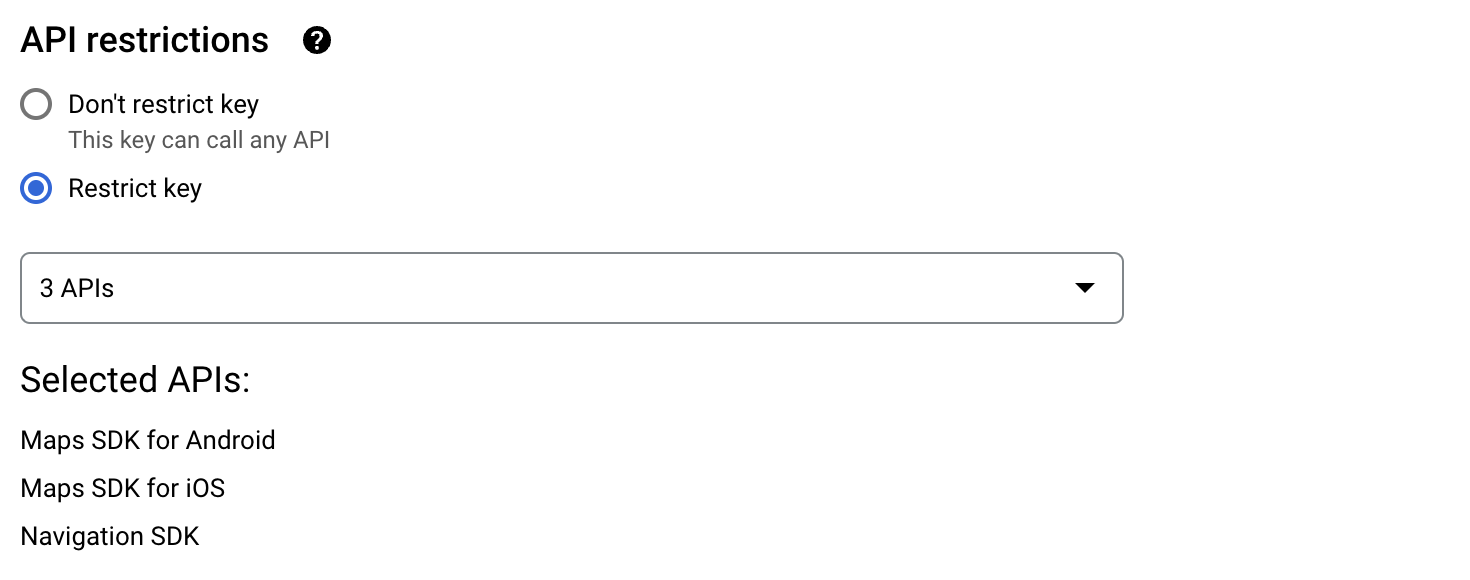
Click [Save]. If you return to the Keys and Credentials page, you can find your new API key by clicking the [Show Key] link on the right.
How to run the Google Navigation SDK in Android
Getting the Nav SDK up and running takes more than just adding a few lines of code (see our Google Navigation SDK tutorial for a detailed walkthrough), but here's a quick overview of what it takes to integrate it into an Android app.
First, ensure you have Google Play Services and Maps SDK enabled by listing it as a dependency in the build.gradle.kts file.
api("com.google.android.libraries.navigation:navigation:5.2.3")Second in AndroidManifest.xml, allow your app to access location services while running in a foreground service.
<uses-permission android:name="android.permission.ACCESS_FINE_LOCATION" />
<uses-permission android:name="android.permission.ACCESS_COARSE_LOCATION" />
<uses-permission android:name="android.permission.FOREGROUND_SERVICE_LOCATION" />
Third, import the required libraries into your MainActivity.kt file.
import com.google.android.libraries.navigation.NavigationApi
import com.google.android.libraries.navigation.Navigator
import com.google.android.libraries.navigation.NavigationView
import com.google.android.libraries.places.api.model.Place
Finally, simply execute the startGuidance() command to begin turn by turn navigation.
private var mNavigator = SuspendRef<Navigator>()

val place: Place = Place.builder()
    .setName("685 Pacific Blvd")
    .setAddress("Vancouver, BC, Canada")
    .setLatLng(LatLng(37.8199, -122.4783))
    .build()


val navigator = mNavigator.await()
        val waypoint = getWayPoint(place)
        val pendingRoute = navigator.setDestination(
            waypoint,
            RoutingOptions()
                .travelMode(TravelMode.DRIVING),
            DisplayOptions()
                .showStopSigns(true)
                .showTrafficLights(true)
        )
navigator.startGuidance()
Google Navigation SDK starter code
Google offers extensive documentation and starter code, but you'll still need an engineer experienced in Android, iOS, or cross-platform development (React Native or Flutter) to implement turn by turn navigation in your driver app and get the app approved for distribution in the iOS App Store / Google Play Store.
| Platform | Github Link |
|---|---|
| iOS | https://github.com/googlemaps/ios-navigation-sdk |
| Android | https://github.com/googlemaps-samples/android-navigation-samples |
| React Native | https://github.com/googlemaps/react-native-navigation-sdk |
| Flutter | https://github.com/googlemaps/flutter-navigation-sdk |
As always, feel free to reach out to me if you need help implementing the Nav SDK in your project.
What's next in this Google Navigation SDK tutorial series
The Google Navigation SDK is not just an API, its a set of libraries, documentation, and code samples that allow you to integrate Google Maps turn by turn navigation features directly within your own app.
Although in-app turn by turn navigation has been one of Google Map's most requested features, the success of the Nav SDK is far from certain. Established navigation and mapping companies like Tom Tom, HERE Maps and Mapbox have been offering similar solutions for years, often with per-device pricing that Google cannot match. Additionally, Google faces competition from its own free turn by turn navigation available in the consumer Google Maps app.
Despite these challenges, I believe the Nav SDK will find its niche and remain an essential component of Google Maps technology that is worth getting comfortable with. Upcoming topics in this tutorial series will include:
- Setting up the Nav SDK to enable in-app driving directions to a preset destination.
- Allowing users to select their destination using a Place Autocomplete text box.
- Personalizing the navigation interface to match your branding, and
- Fine-tuning the position and visibility of key UI elements for enhanced usability and control.
👋 As always, if you have any questions or suggestions for me, please reach out or say hello on LinkedIn.
Next: Part 2: Getting started with the Google Navigation SDK

