Building a free geocoding and reverse geocoding service with OpenStreetMap
How to build and deploy a free geocoding and reverse geocoding API on Google Cloud.

The two main endpoints used in OpenStreetMap Nominatim are: /search for turning addresses into geographic coordinates (geocoding), and /reverse for the opposite process (reverse geocoding). In this guide, I'll explain how to use both using simple examples of geocoding and reverse geocoding. Additionally, I'll show you how to launch your new geocoding service online on Google Cloud for free.
Part 1: OpenStreetMap OSM Nominatim API tutorial
Part 2: Run a free geocoder with Nominatim Docker
Part 3: Building a free geocoding and reverse geocoding service with OpenStreetMap (this article)
Part 4: How to draw and view boundary data with OpenStreetMap OSM
Throughout this blog post, we'll primarily use API endpoints from OpenStreetMap's (OSM) free debugging tool, found at https://nominatim.openstreetmap.org/. This approach lets me demonstrate the workings of the Nominatim API without the need for initial setup or deployment to the web.
OpenStreetMap geocoding example
There are plenty of reasons why you might want to geocode an address. For example, package delivery companies use geocoding to convert customer addresses into geographic coordinates that can be fed into a route optimization engine to produce fuel-efficient driving routes for drivers, enhancing operational efficiency and reducing costs. Real estate companies use geocoding to locate properties on a map, analyze property values based on geographic location, and assess proximity to amenities and infrastructure.
Here's how to convert an address into latitude and longitude in OSM Nominatim:
Endpoint GET https://nominatim.openstreetmap.org/search?q={address_string}&format={output_format}
{address_string} is the address you are trying to geocode. Try to include as much information as you can including the country, city, and postal code.
{output_format} determines the structure of the response and must be one of xml, json, jsonv2, geojson, geocodejson, the default being jsonv2.
Next, we'll attempt to geocode the location of Canada Place (999 Canada Place), the downtown cruise terminal in Vancouver, Canada."
Method: GET
https://nominatim.openstreetmap.org/search?q=999+canada+place&format=jsonv2Output
[
    {
        "place_id": 31884938,
        "licence": "Data © OpenStreetMap contributors, ODbL 1.0. http://osm.org/copyright",
        "osm_type": "way",
        "osm_id": 223635729,
        "lat": "49.2883954",
        "lon": "-123.11208860930246",
        "category": "tourism",
        "type": "attraction",
        "place_rank": 30,
        "importance": 0.3599727592188058,
        "addresstype": "tourism",
        "name": "Canada Place",
        "display_name": "Canada Place, 999, Canada Place, Gastown, Downtown, Vancouver, Metro Vancouver Regional District, British Columbia, V6C 3C1, Canada",
        "boundingbox": [
            "49.2874363",
            "49.2896384",
            "-123.1145547",
            "-123.1077303"
        ]
    },
    // ... removed similar entries
    {
        "place_id": 32018970,
        "licence": "Data © OpenStreetMap contributors, ODbL 1.0. http://osm.org/copyright",
        "osm_type": "node",
        "osm_id": 3285109761,
        "lat": "49.2877059",
        "lon": "-123.1133343",
        "category": "amenity",
        "type": "cafe",
        "place_rank": 30,
        "importance": 0.00000999999999995449,
        "addresstype": "amenity",
        "name": "Starbucks",
        "display_name": "Starbucks, 999, Canada Place, Gastown, Downtown, Vancouver, Metro Vancouver Regional District, British Columbia, V6C, Canada",
        "boundingbox": [
            "49.2876559",
            "49.2877559",
            "-123.1133843",
            "-123.1132843"
        ]
    }
]
Note that the result is not a single unique entry; it is an array containing all the locations that correspond to the address you attempted to geocode. For 999 Canada Place, this includes a Starbucks, the Philippine Embassy, and the cruise terminal itself. The key detail in each place object is the lat and lon of the address, which enables you to pinpoint and display its location on a map.
OpenStreetMap reverse geocoding example
Let's try the same thing but backwards, and reverse geocode the coordinates "lat": "49.2883954", "lon": "-123.11208860930246" that were returned in the earlier example.
Endpoint GET https://nominatim.openstreetmap.org/reverse?lat={lat}&lon={lon}&format={output_format}
{lat} and {lon} are the latitude and longitude of the point you are trying to reverse geocode.
{output_format} determines the structure of the response and must be one of xml, json, jsonv2, geojson, geocodejson, the default being jsonv2.
Method: GET
https://nominatim.openstreetmap.org/reverse?lat=49.2883954&lon=-123.11208860930246&format=jsonv2Output
{
    "place_id": 371176246,
    "licence": "Data © OpenStreetMap contributors, ODbL 1.0. http://osm.org/copyright",
    "osm_type": "relation",
    "osm_id": 16528592,
    "lat": "49.28878265",
    "lon": "-123.11097460596298",
    "category": "man_made",
    "type": "pier",
    "place_rank": 30,
    "importance": 0.00000999999999995449,
    "addresstype": "man_made",
    "name": "",
    "display_name": "Canada Place, Gastown, Downtown, Vancouver, Metro Vancouver Regional District, British Columbia, V6C, Canada",
    "address": {
        "road": "Canada Place",
        "neighbourhood": "Gastown",
        "suburb": "Downtown",
        "city": "Vancouver",
        "county": "Metro Vancouver Regional District",
        "state": "British Columbia",
        "ISO3166-2-lvl4": "CA-BC",
        "postcode": "V6C",
        "country": "Canada",
        "country_code": "ca"
    },
    "boundingbox": [
        "49.2875024",
        "49.2898258",
        "-123.1143917",
        "-123.1067207"
    ]
}
Again, the output is a place object (or an array of places) that matches the given latitude and longitude.
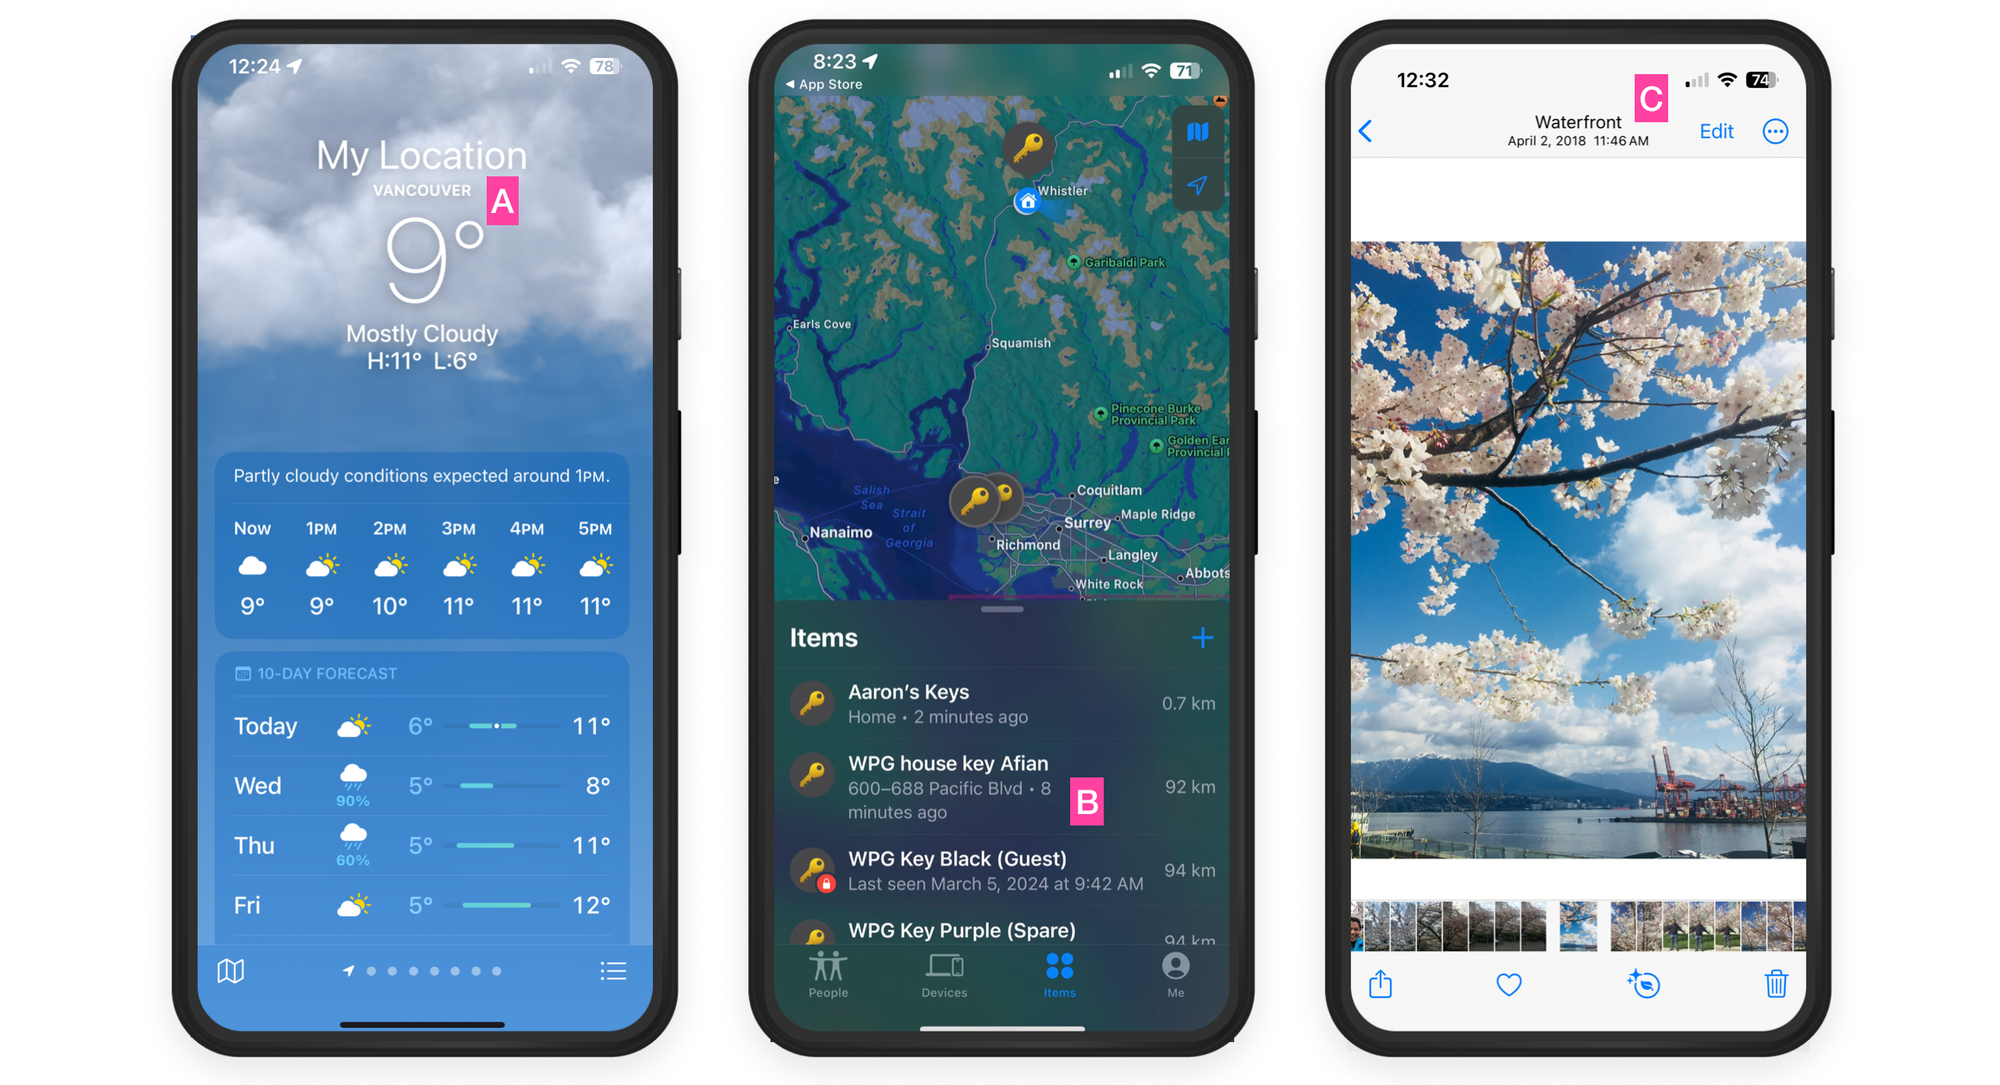
Reverse address geocoding isn't as popular as address geocoding. It's mainly used when you need to convert geographic coordinates into a human-readable address or place name. Here are the three main applications of reverse geocoding:
What is reverse address geocoding used for?
Location based services (A): A weather app might extract the real time GPS location from your phone and convert that to an area name for display.
Asset tracking (B): The Apple FindMy App uses reverse geocoding to track the physical location of air tags. By converting GPS data into addresses, the app can show you exactly where you left your keys and other valuables.
Geotagging (C): Social media and photo sharing services use reverse geocoding to tag images and posts with specific locations, enriching user content and allowing others to search for images based on location.
OpenStreetMap vs Google Maps geocoding quality
There is no contest - Google Maps wins hands down when it comes to geocoding quality. If you run a logistics or delivery business that depends on getting the address right every time (e.g. if you operate a ride share service and need passenger pickup and drop off locations mapped correctly), the Google Maps geocoding API is well worth the $0.005 ($5 per 1000 addresses) you pay per geocoded address. The case for Google Maps is even stronger if you operate in a country such as Indonesia or Vietnam where OpenStreetMap coverage is poor.
In my tests, I evaluated around 100 addresses in Vancouver, BC, that I knew personally. OpenStreetMap (OSM) accurately located about 85% of these addresses, whereas Google Maps had a 100% success rate. My test sample was made up of restaurants and well-known local businesses. The accuracy on Google Maps was likely higher because it's widely used for navigation, giving business owners a strong reason to ensure their addresses are correctly listed.
However, if you do not have the funds to pay for geocoding or if geocoding accuracy is not super important (e.g. if you are starting a research project to understand how house location and price trends change over time), the OpenStreetMap Nominatim API is perfect for your needs, and budget!
Running the OSM geocoding / reverse geocoding API on Google Cloud
In the previous post, I showed how to run the OSM Nominatim API locally on your machine. Here, I'll explain how to run it on the web using Google Cloud.
Google Cloud, also known as Google Cloud Platform or GCP, is a suite of cloud computing services offered by Google. It's the Google equivalent of Amazon Web Services (AWS). We'll be using Google Compute Engine (GCE), which allows you to rent virtual servers, known as "instances," in the cloud. You only pay for what you use, and can spin servers up or down as needed.
To run Nominatim on GCP, we need to do three things:
- Provision a GCP Compute Engine instance
- Install Docker
- Install and run Nominatim Docker (follow the same steps from my last post)
Google Compute Engine setup for Nominatim Docker
Here's what you need to do to install Nominatim on Google Compute Engine using Docker:
Create a VM virtual machine
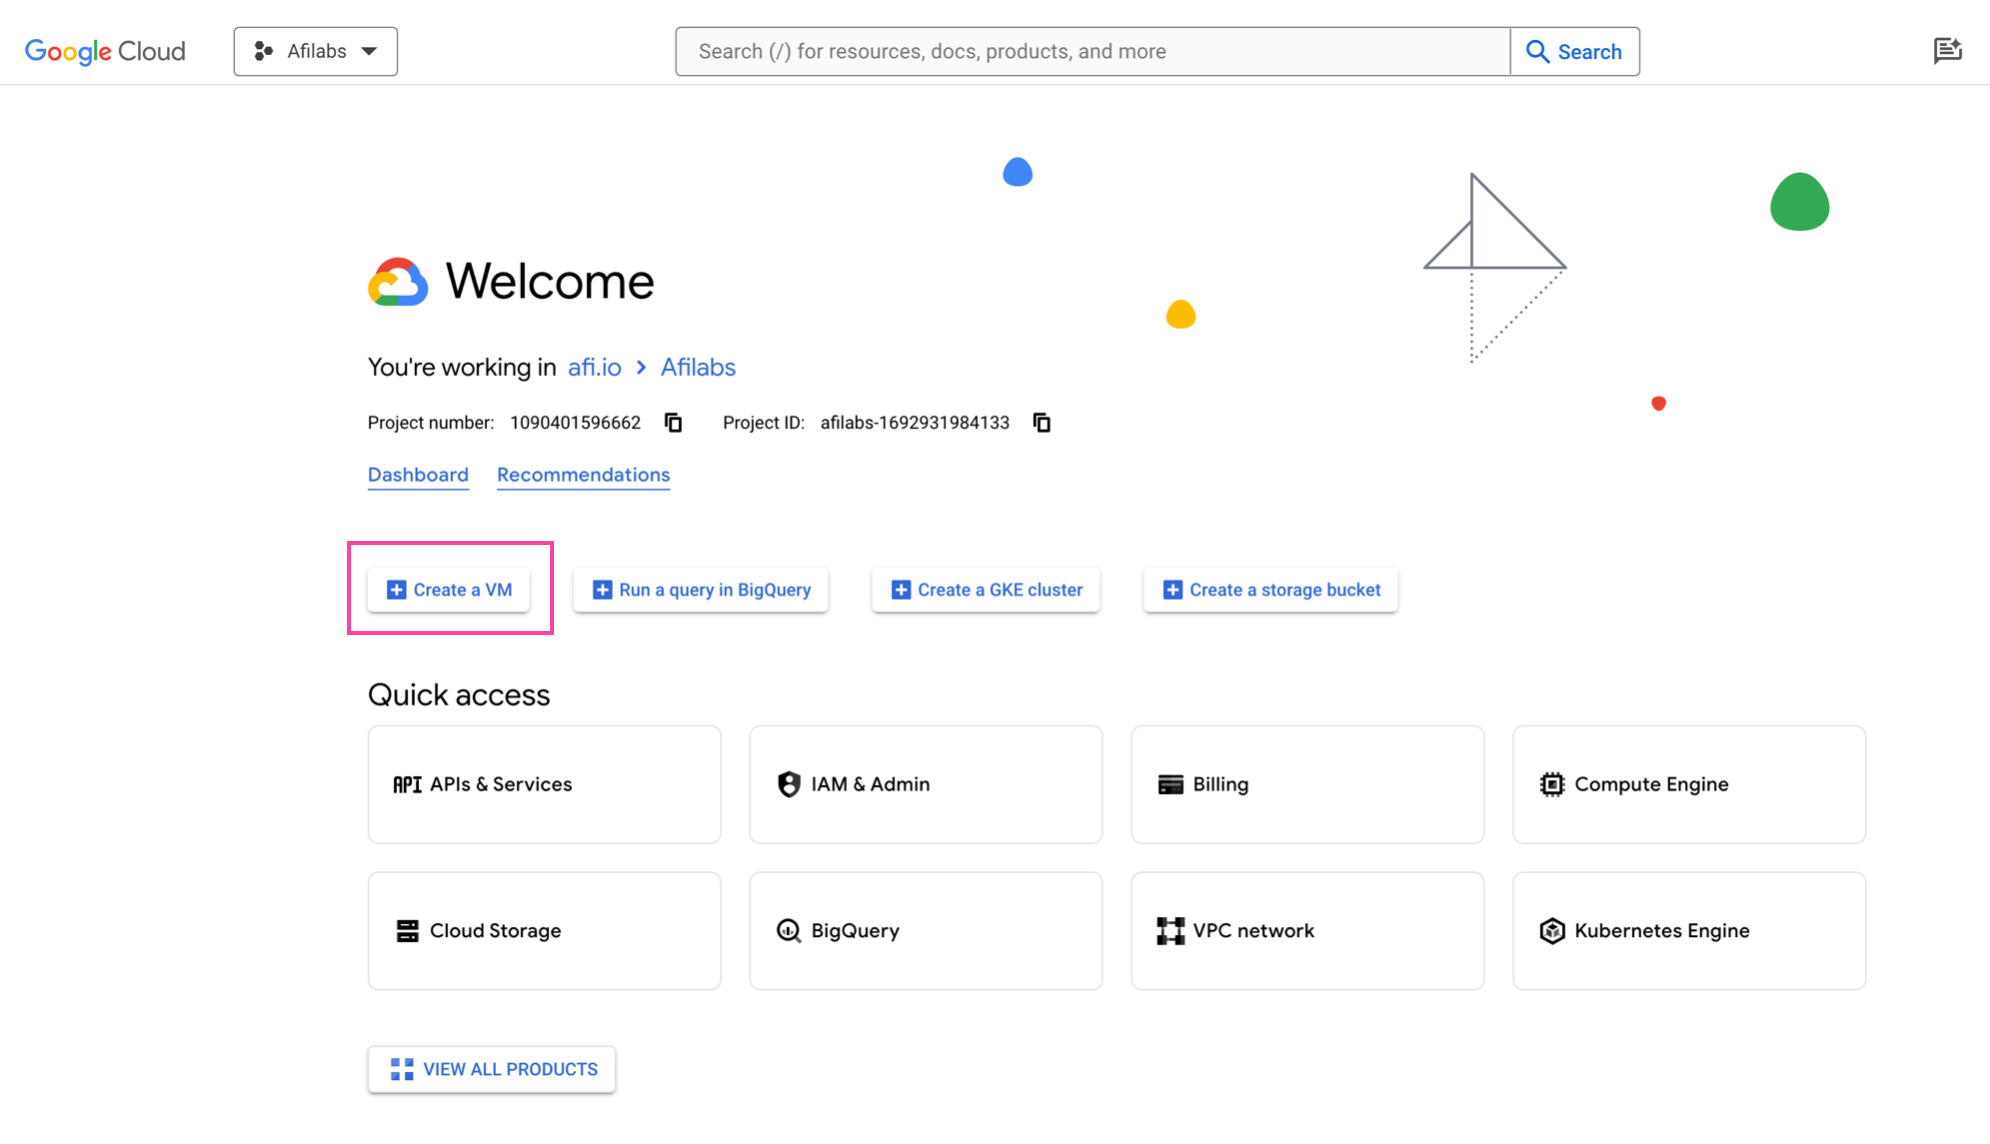
After creating a Google Cloud account (there's a free trial - no credit card needed), go to https://console.cloud.google.com/ and click the [+ Create a VM] button. Give your instance a descriptive name - "nominatim-api" works well.
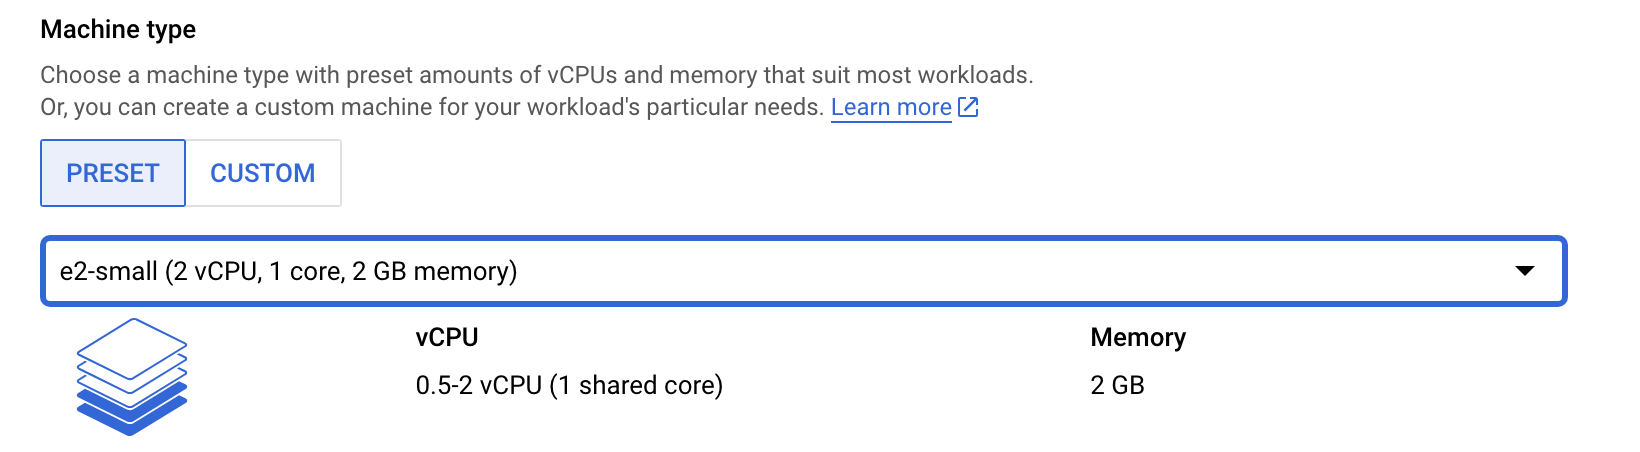
On the next page, under Machine Type, choose e2-small (this is the AWS EC2 equivalent of t2.small).
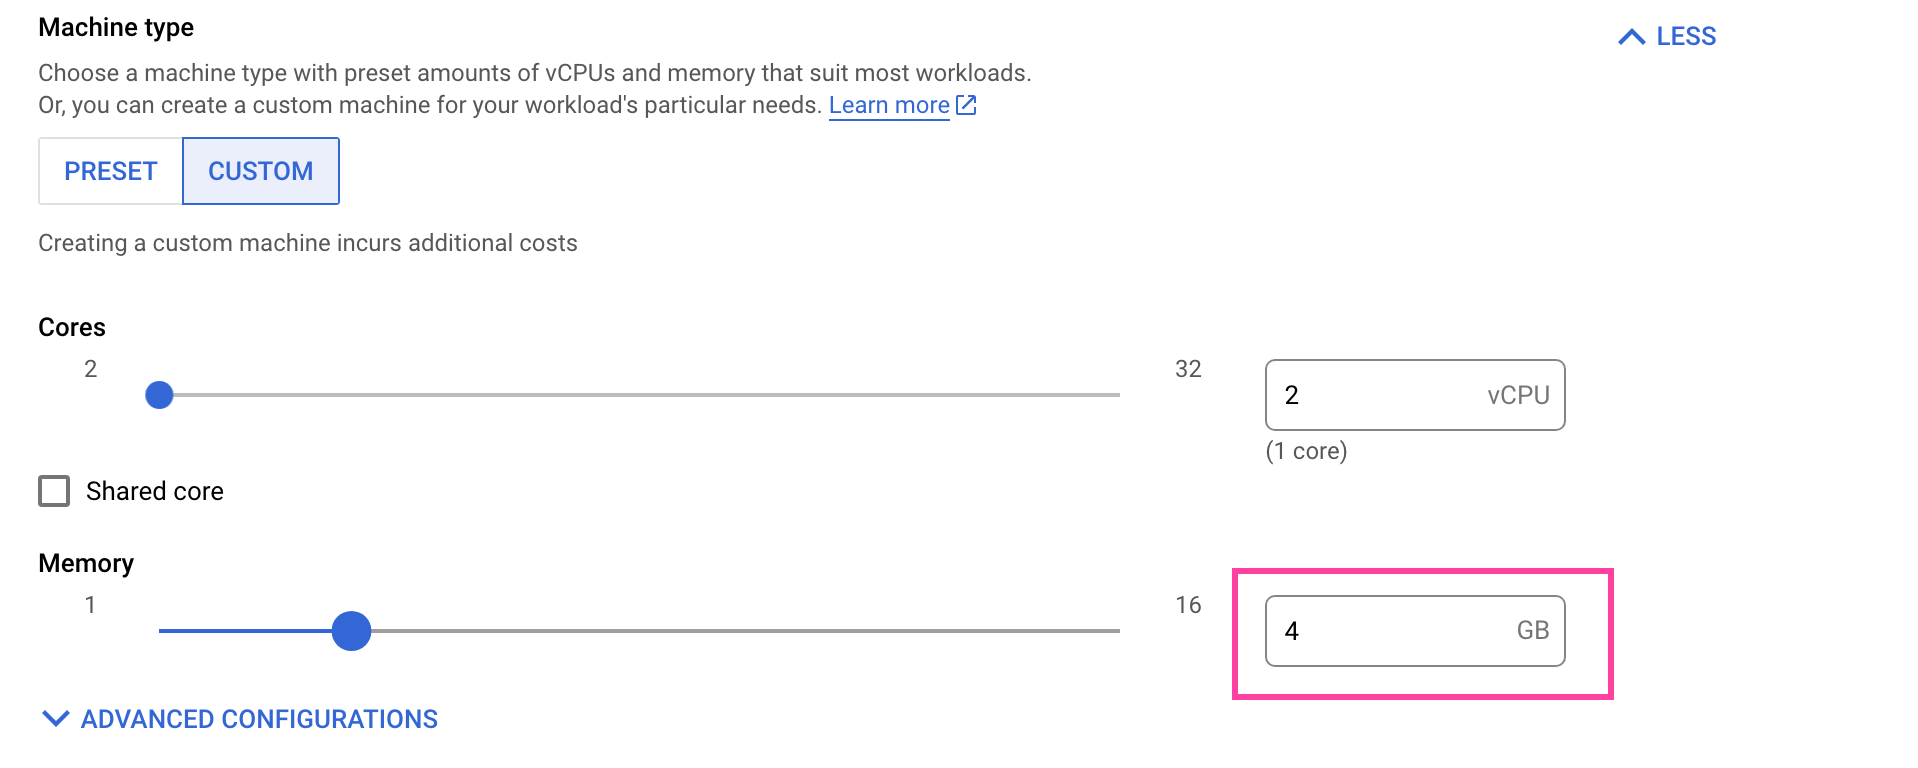
Click on the [CUSTOM] tab and increase the memory to 4GB (trust me, you'll need it).
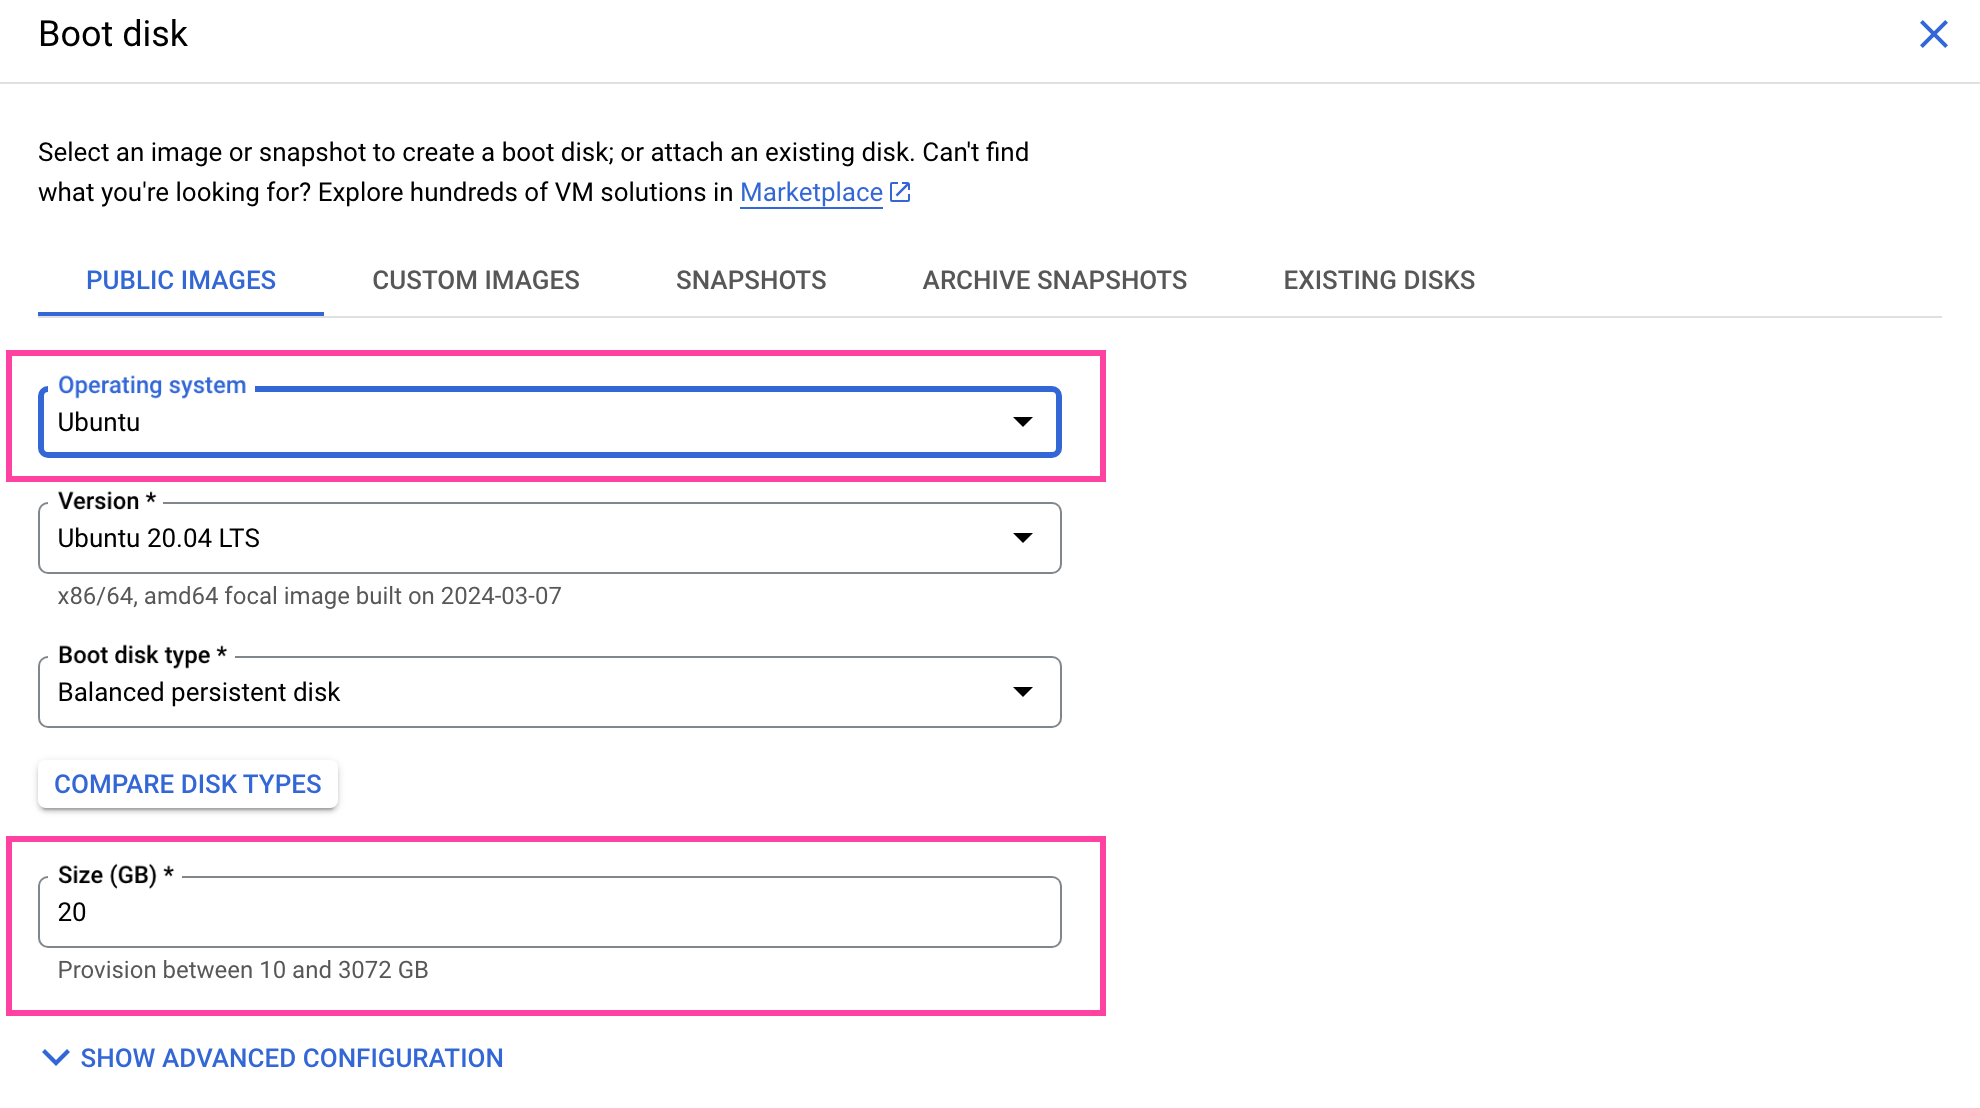
Next, we need to choose our operating system. In the Boot Disk section, select Ubuntu as your operating system and provision it with 20 GB of hard disk space.
Almost done! Let's make sure that we can send data to and receive data from Nominatim. Under Firewall, check [Allow HTTP traffic]. We'll configure our firewall rules later.

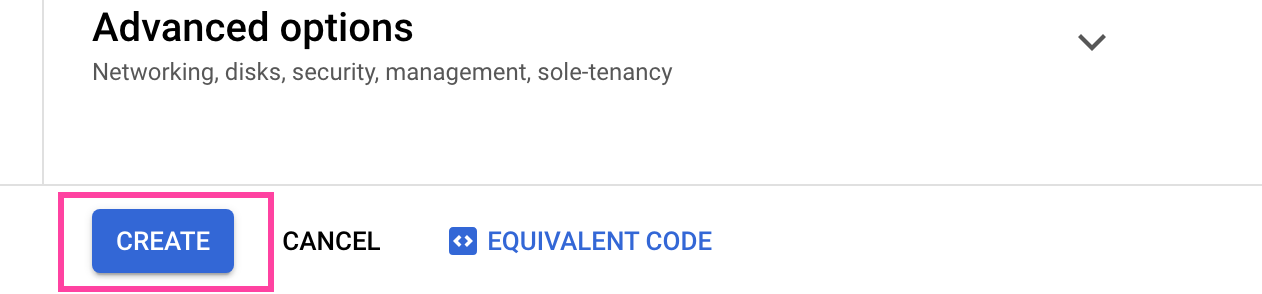
That's it! Click [CREATE] to spin up your new virtual machine (VM).
Once the instance is created it's time to configure our firewall properties. The default Nominatim setup sends and receives data on port 8080, so we need to make sure that our VM allows that.
Click the name of your newly created instance (in the screenshot below, mine is called "nominatim-api").

Scroll down and look for the Network Interfaces section. Click on the "default" network.

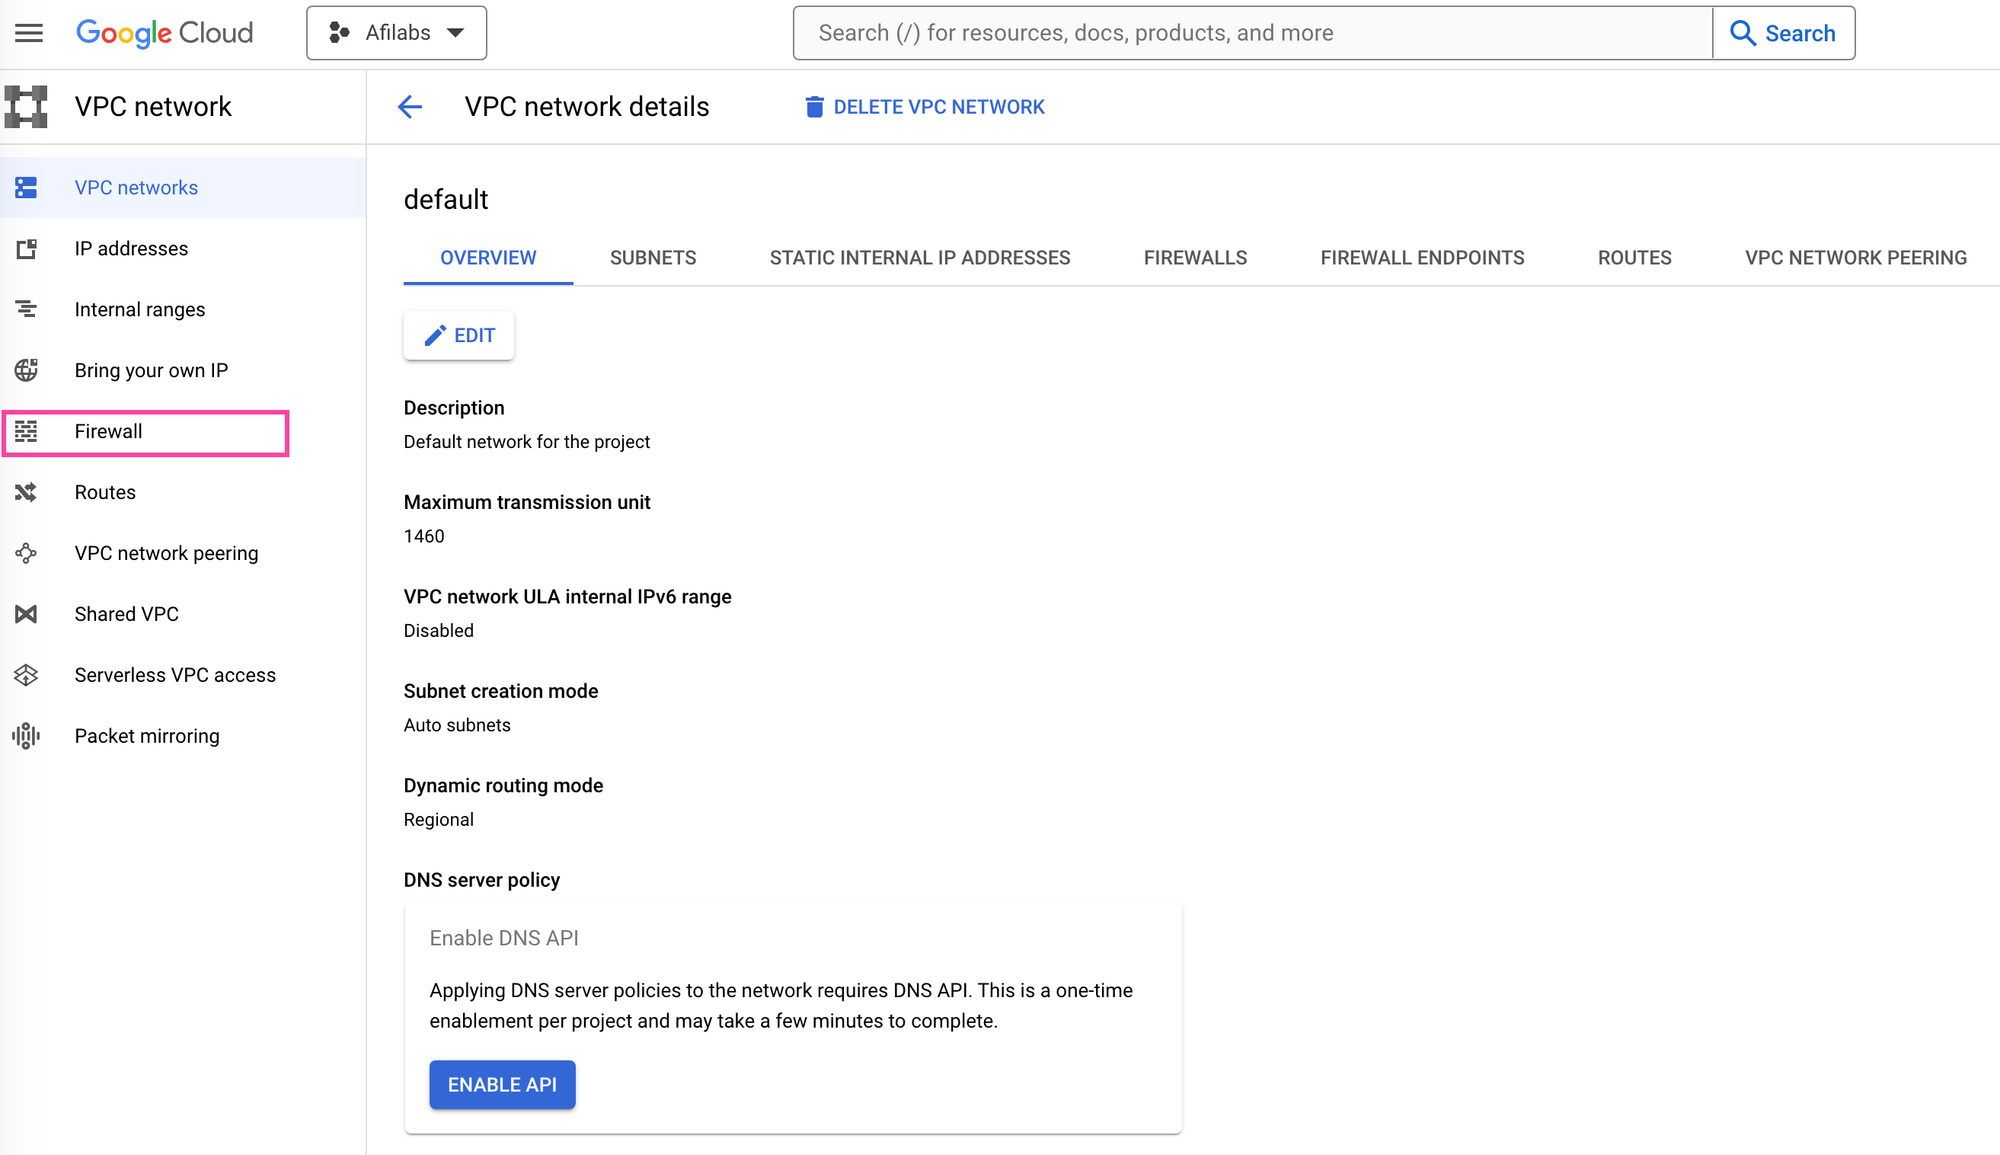
This takes you to the virtual private cloud VPC Network Details page. Select the [Firewall] menu item on the right.
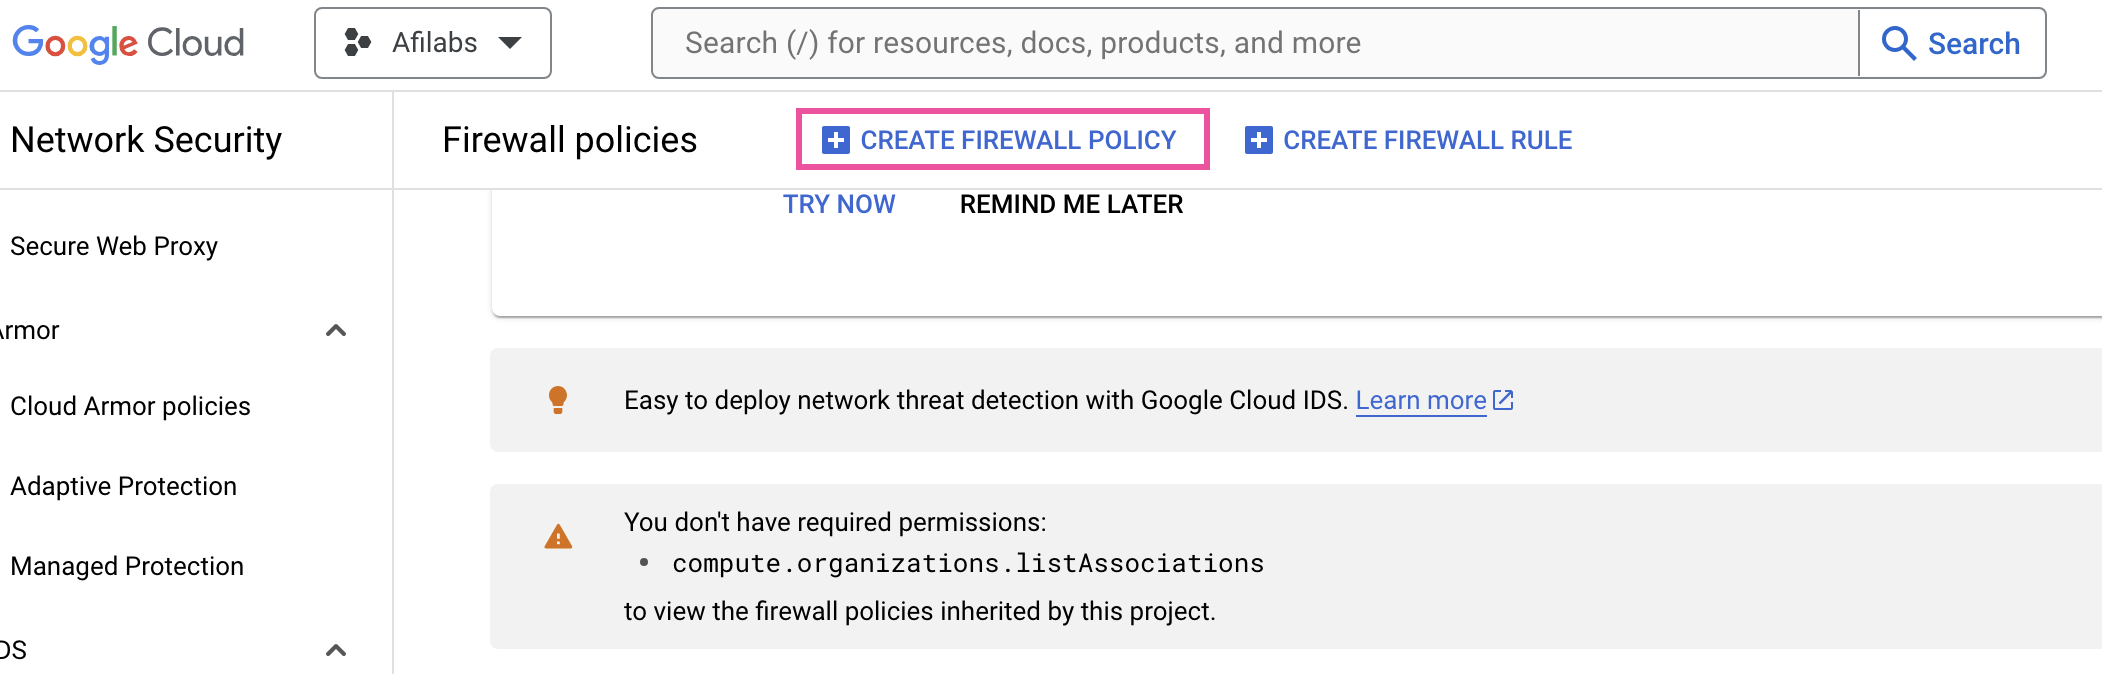
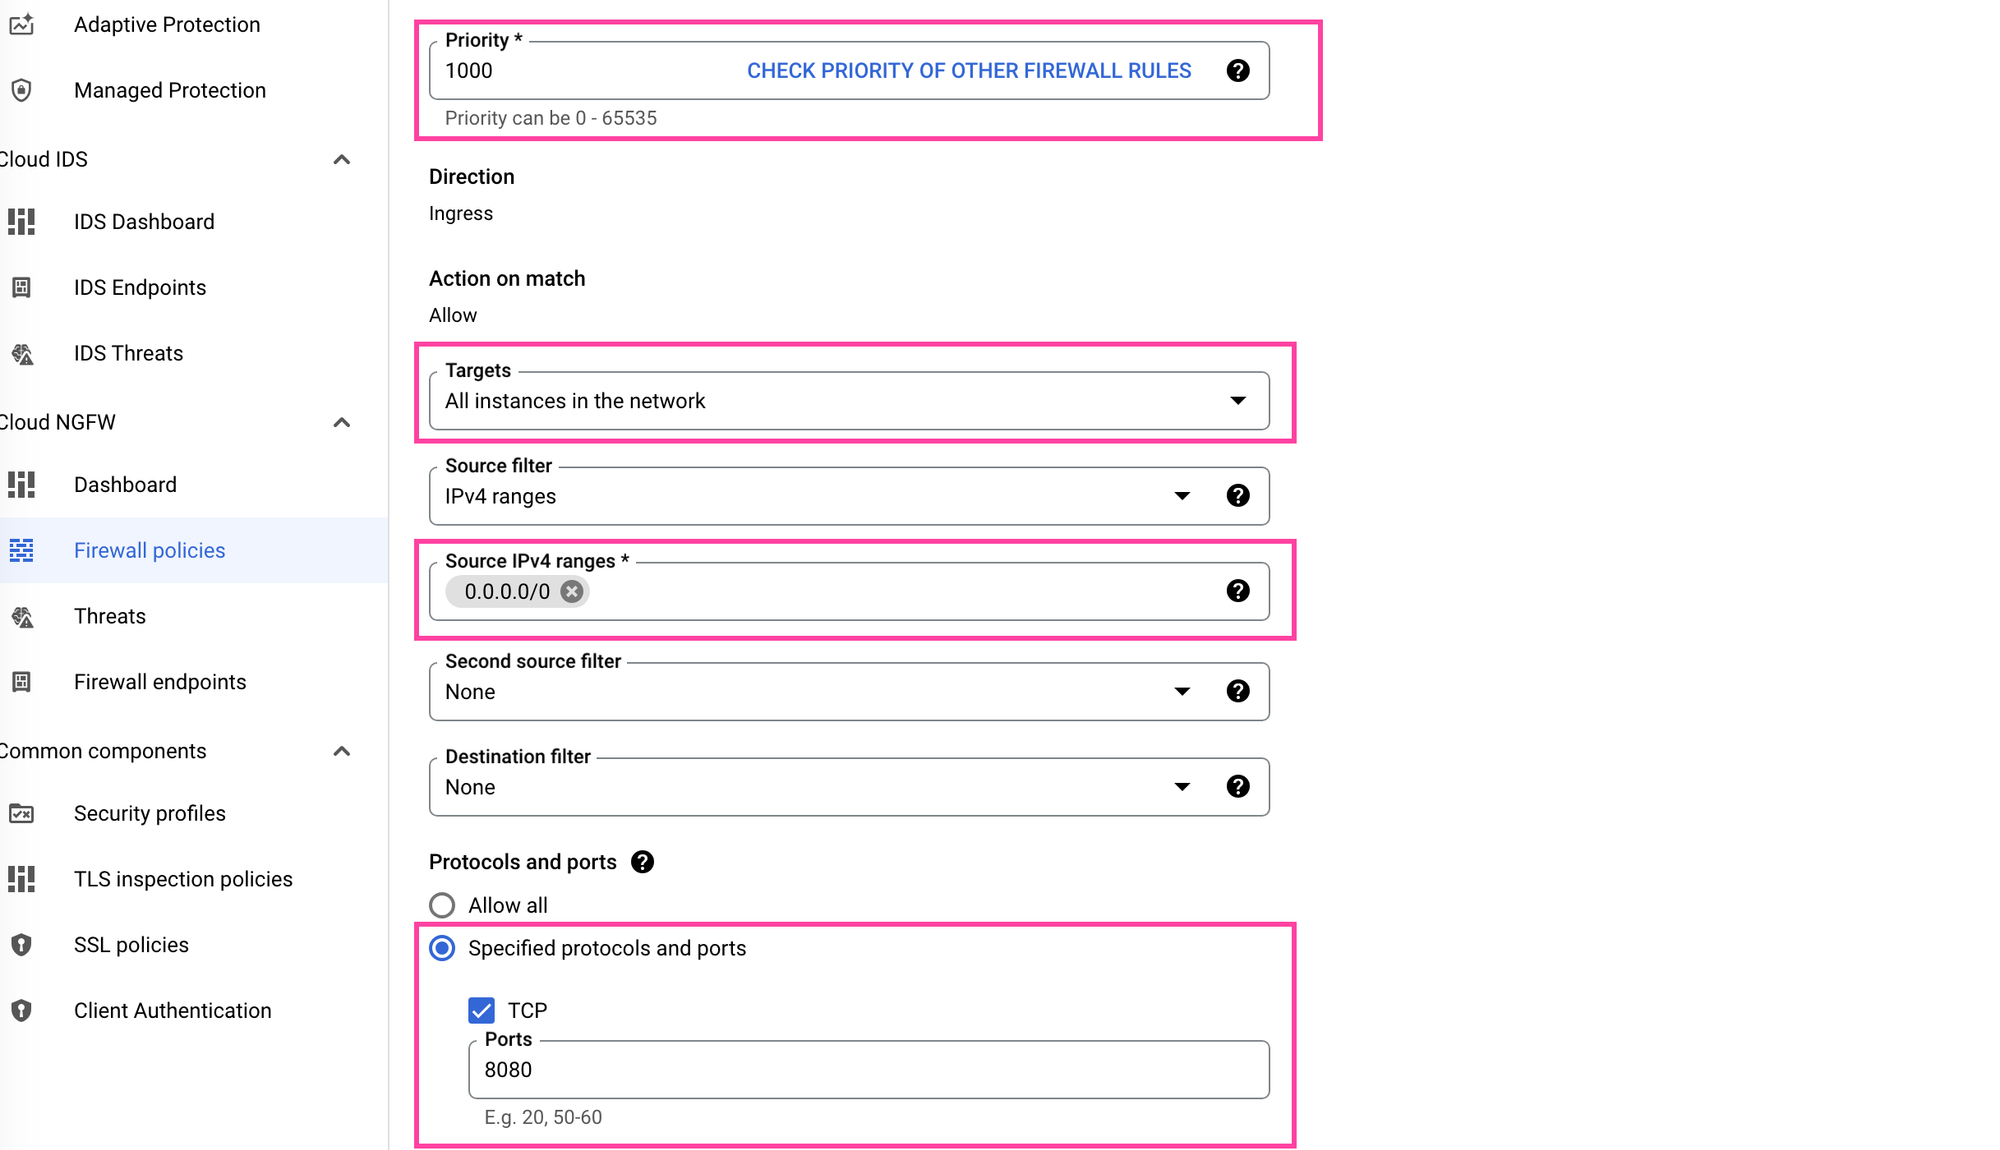
Click on [CREATE FIREWALL POLICY] to create a new firewall policy.
Set priority to 1000, targets to "all instances in the network", source IPv4 ranges to 0.0.0.0/0 and most importantly, check TCP and set ports to 8080.
Great! Here's what we've done so far. We've provisioned a VM with enough memory and hard disk space to run Nominatim, allowed it to send and receive data on port 8080 and mounted the Ubuntu operating system on it.
Install Docker
The next step is to install and run Docker on our VM. I'll be honest - I'm not an expert at Docker so I entered "How to setup docker ubuntu" into ChatGPT and got the instructions below (which work, by the way):

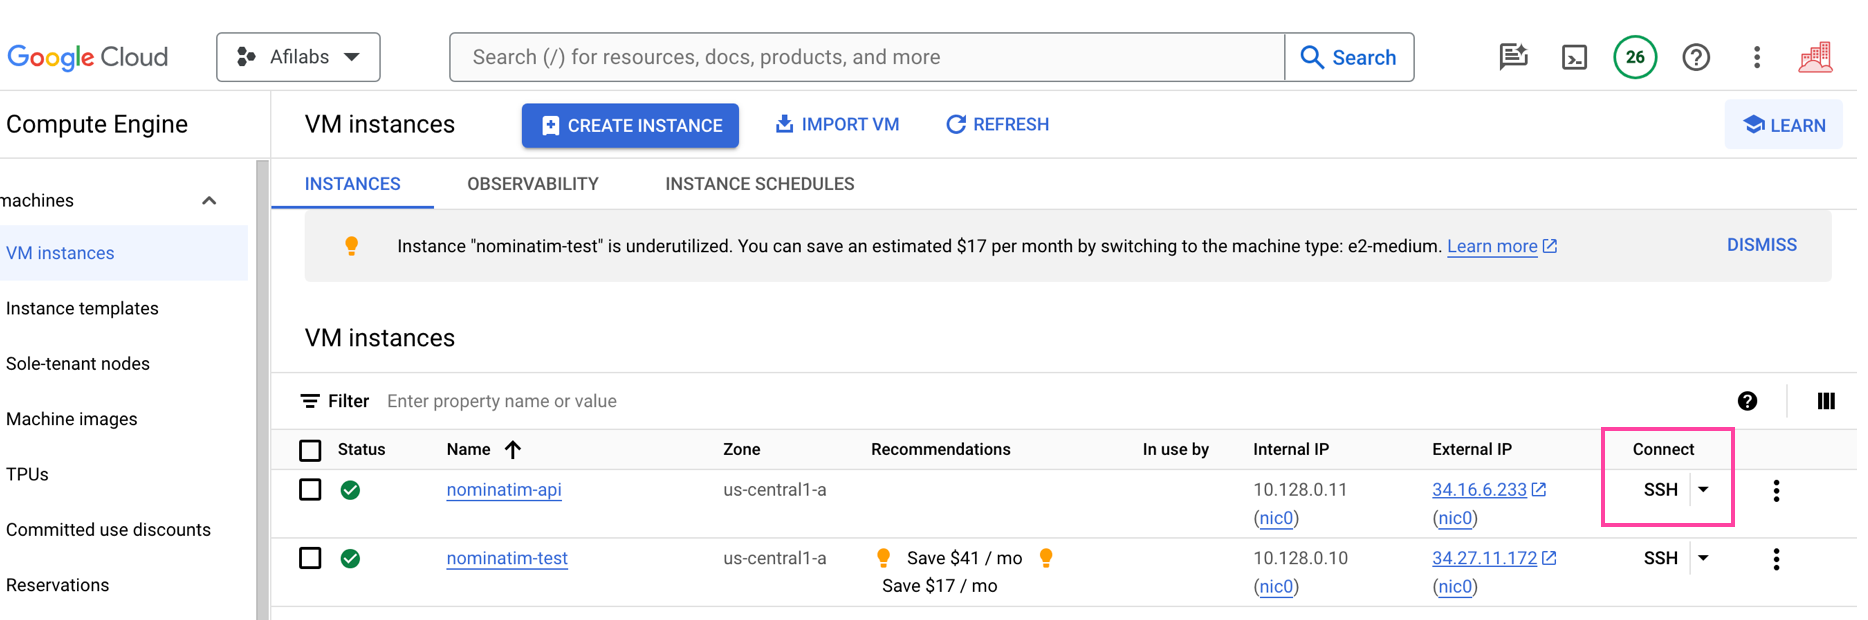
To get to the command line we are going to use Google Cloud's interactive terminal. Access it by clicking the [SSH] link on your VM.
This will open terminal in a new pop up window.

Once you're in, update your system's package index:
sudo apt-get updateInstall packages to allow apt to use a repository over HTTPS:
sudo apt-get install apt-transport-https ca-certificates curl software-properties-common
Add Docker's official CPG key to ensure the software you're installing is authentic.
curl -fsSL https://download.docker.com/linux/ubuntu/gpg | sudo apt-key add -
Add the Docker repository to get the latest Docker package. Update your package index again with sudo apt-get update if needed.
sudo yum-config-manager --add-repo https://download.docker.com/linux/centos/docker-ce.repo
Now, you're ready to install Docker Community Edition.
sudo apt-get install docker-ce
Verify that the Docker install works.
sudo docker run hello-world
If it does, you'll get the message "Hello from Docker!" shown below:
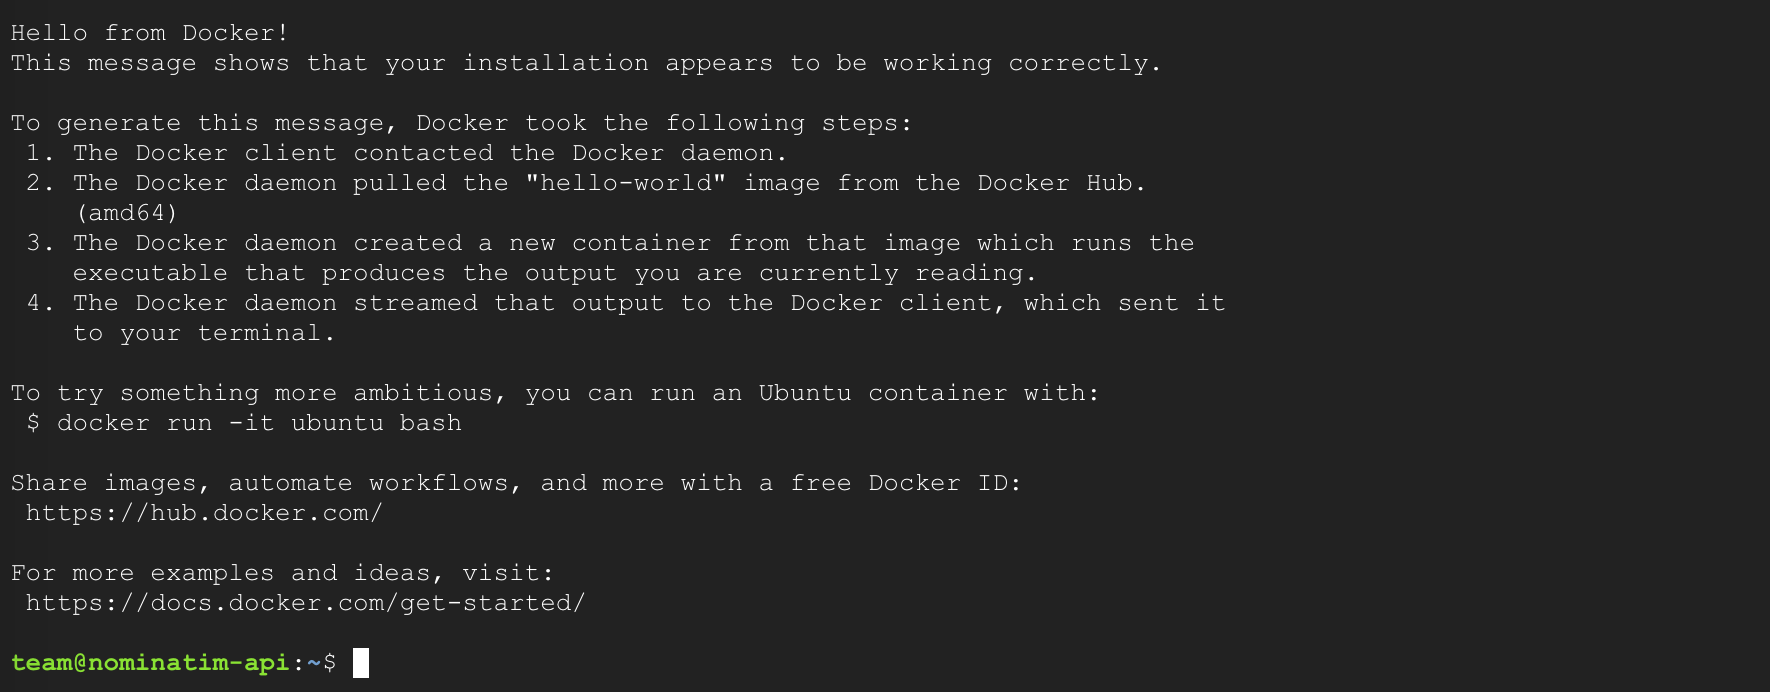
Congrats! Now we are finally ready to install and run Nominatim.
Install and run Nominatim Docker
From this point on, we're going to follow the same instructions in my last post, Run a free geocoder with Nominatim Docker.
Now execute:
docker run -it \
  -e PBF_URL=http://download.geofabrik.de/north-america/canada/british-columbia-latest.osm.pbf \
  -e REPLICATION_URL=https://download.geofabrik.de/north-america/canada/british-columbia-updates/ \
  -p 8080:8080 \
  --name nominatim \
  mediagis/nominatim:4.3
This could take about 15 minutes or so - grab a coffee, check your email and when Nominatim is installed, you should see a success message waiting for you:

Almost done! Let's make sure our Nominatim geocoding and reverse geocoding API is working.
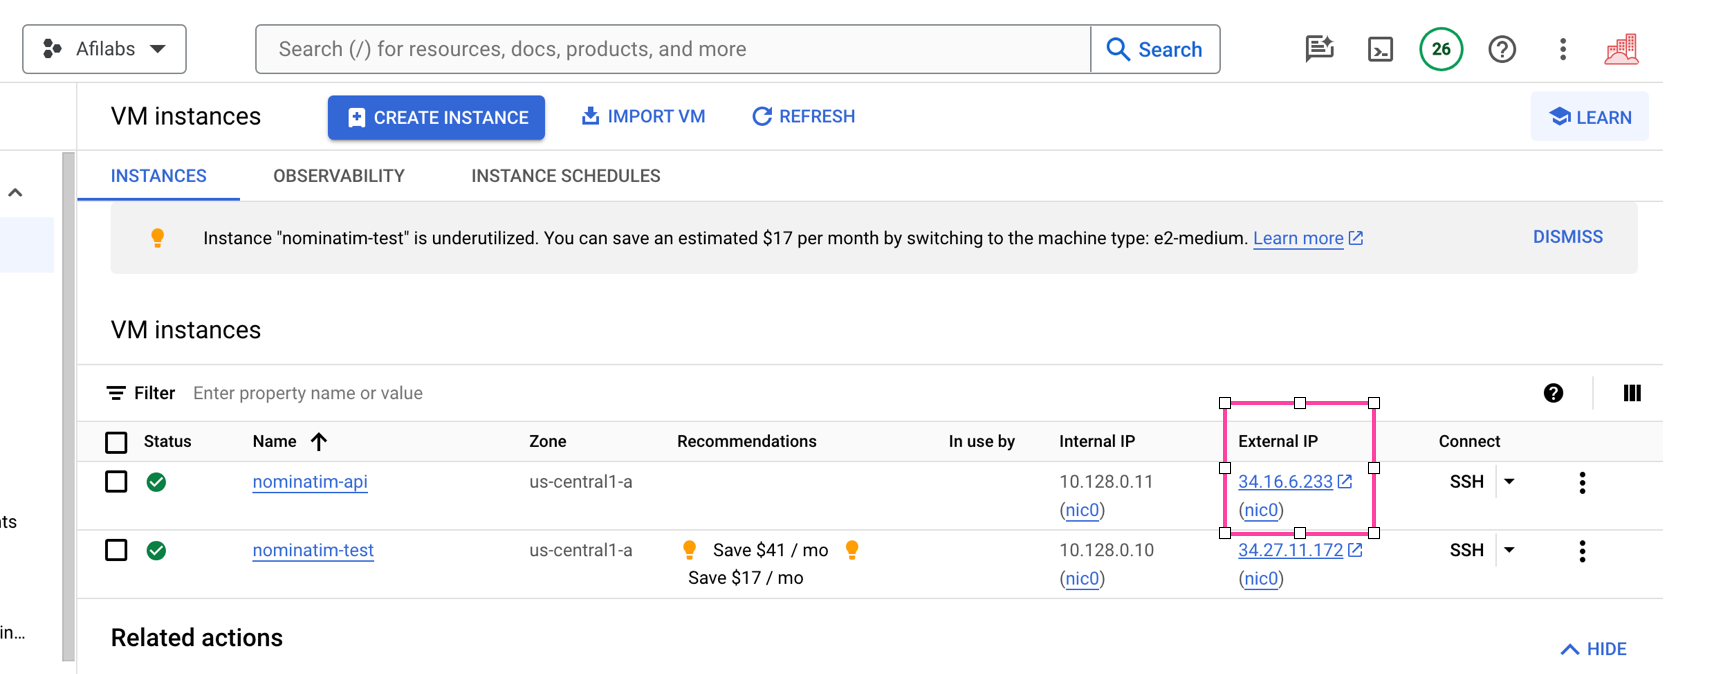
Return to the Compute Engine main page and look for the IP address of your VM (in my example, it's 34.16.6.233).
Go to your browser and enter:
http://34.16.6.233:8080/search?q=canada+placeIf you get a response:

Congratulations! You've successfully hosted your very own free geocoding and reverse geocoding API on the web. In the next (and final) section of this OSM Nominatim tutorial series, I'll show you how to extract geospatial data from OpenStreetMap to draw neighborhood and administrative boundaries on a map.
Afi Labs provides consulting, training and custom software development for OpenStreetMap and related mapping products. 👋 Say Hello! to start working together.
👋 As always, if you have any questions or suggestions for me, please reach out or say hello on LinkedIn.
Part 4: How to draw and view boundary data with OpenStreetMap OSM