Using Twilio to send ETA notifications to your customers
A tutorial showing you how to build a backend that sends real time ETAs from your driver app.


Now that your driver app can retrieve the estimated arrival time (ETA) to the customer's location (Part 1: Using the Google Maps API to get Driver ETAs), here comes the fun part - using the Twilio API to send a text message to your customers with this ETA. As always, you can find working sample code for the iOS app and backend on Github. To get the web backend running, run the code by following the readme instructions and don't forget to set up your Google Maps and Twilio API keys in the .env file.
Part 1: Using the Google Maps API to get driver ETAs
Part 2: Using the Twilio API to send ETA notifications to your customers (this article)
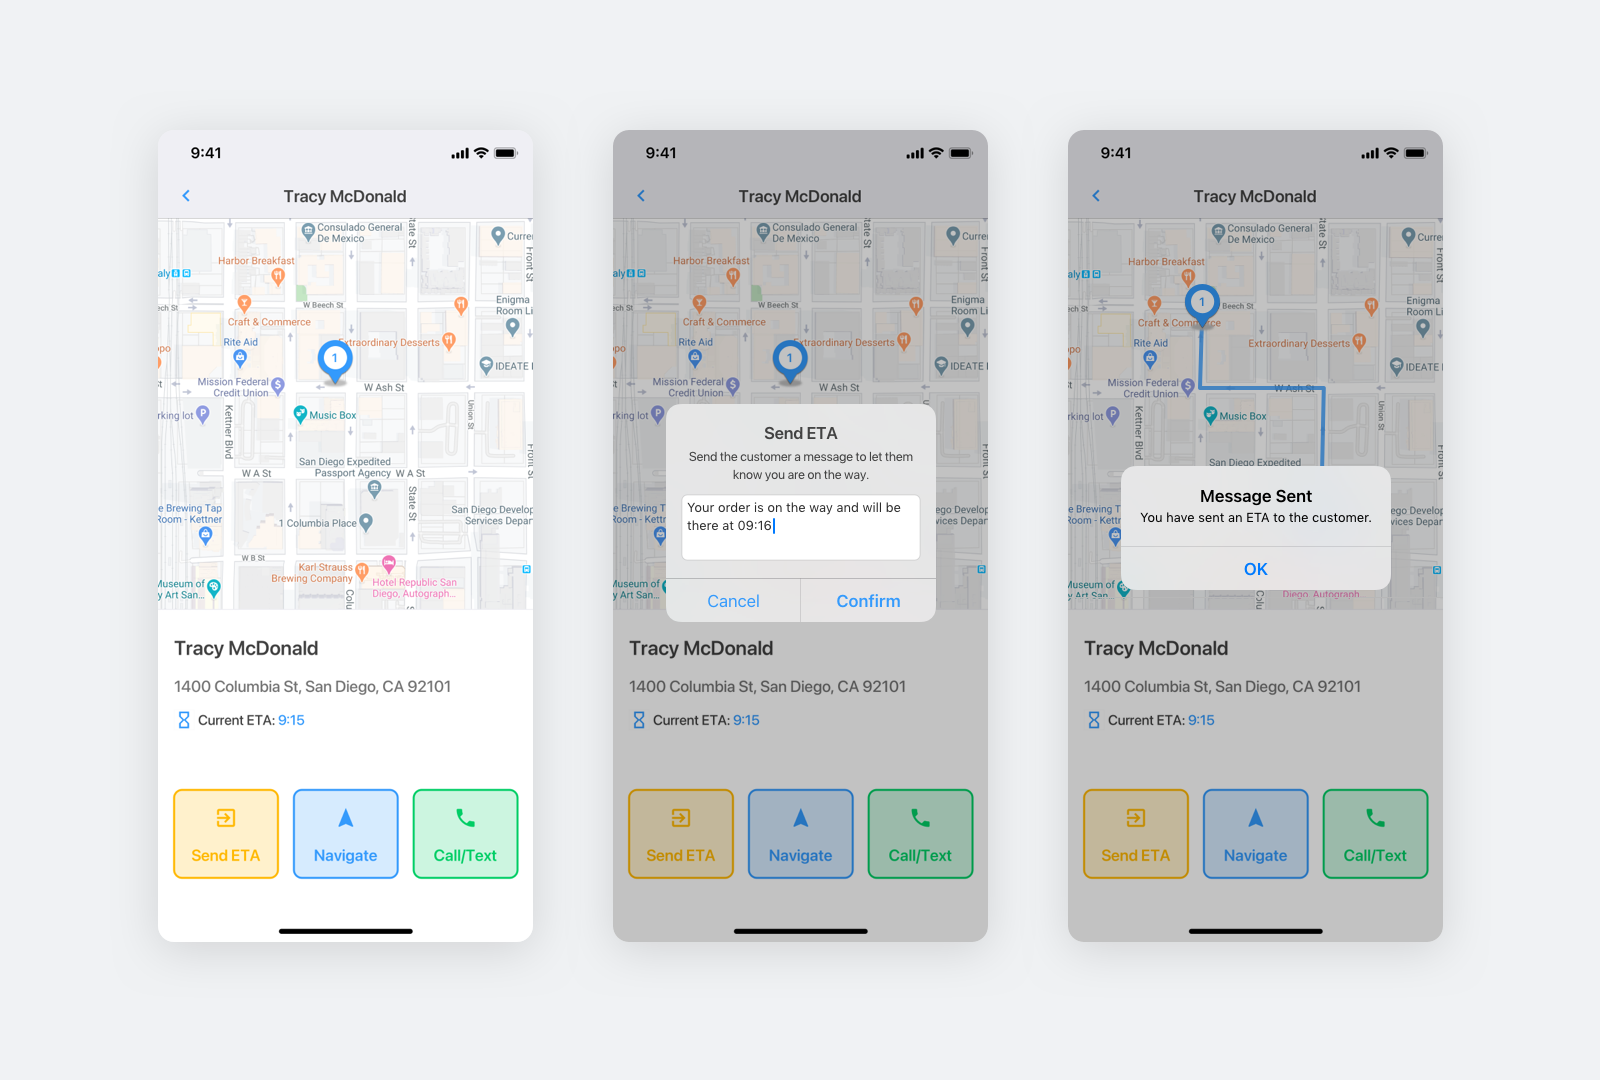
Just to recap, here's what the app does. The driver clicks on the Send ETA button. This triggers a modal with a short, editable message e.g. "Your order is on the way and will arrive at 10:10 AM". In StopDetailVC.swift:
func stopDetailActionCell(cell: StopDetailActionCell, didSelectGoingNext btn: UIButton ? ) {
    showAlertConfirm(mess: "Your order is on the way and will be there at \(stop?.eta ?? "
        00: 00 ")", title: "Send ETA", description: "Send the customer a messages to let them know you are on the way")
}
The driver clicks Confirm and this sends the ETA notification to the customer (his phone number was added earlier in the New Stop screen). To be more precise, the sendMessageToCustomer() method of StopDetailVC+Ext.swift makes a POST request to the customers/send-eta endpoint of our backend with this payload:
{
	"eta": "14:20",
	"msg": "Your order is on the way and will be there at 17:40",
	"address": "Vancouver, BC, Canada",
	"phone": "+1 (604) 918-8950"
}
Customer Notifications Backend
Our web backend is written in Typescript using the Nest framework (NestJS). This is not a Typescript tutorial, but it would be helpful to understand a few things about Typescript and Nest before we dive into the code.
Afi Labs delivers custom software to meet your logistics needs. From vehicle routing, live tracking to proof of delivery, we've got you covered!
👋 Say Hello!
Typescript offers the ability to add static types to Javascript, which allows you to catch errors earlier in the debugging process. For example, suppose we have a function to add two numbers together:
function addTwoNumbers(a, b) {
    return a + b;
}
The variables a and b could be anything! They could be strings e.g. Hello and World in which case the addTwoNumbers() function would return HelloWorld, which was definitely not our intention. In typescript, we would write our method as:
function addTwoNumbers(a: number, b: number): number {
    return a + b;
}
This way, the compiler will squeal if I try to pass in non number values for a and b .

Catching the error instantly allows me to save time and check why my input is not the type I think it is, rather than having to trace my steps back much later in the process without being sure where the error is occurring.
Nest is a web framework built on Typescript that makes it easy to build efficient, scalable Node.js server-side applications. It forces you to structure your code in a standardized way. For instance, when our client iOS app calls the customers/send-eta endpoint, it hits customers.controller.ts:
customers.controller.ts
@Controller('customers')
export class CustomersController {
    constructor(private readonly customersService: CustomersService) {}

    @Post('send-eta')
    sendEta(@Body() sendEtaCustomerDto: SendEtaCustomerDto) {
        return this.customersService.sendEta(sendEtaCustomerDto);
    }
}
From the code, you can see the @Controller decorator creates a route called /customers which has a /send-eta POST endpoint, so our client app can make a POST request to /customers/send-eta. The @Body decorator extracts data from the json body of our request in the form of a data transfer object which has a schema consistent with SendEtaCustomerDto ( send-eta-customer.dto.ts).
customers.service.ts
Next, the sendEta() method of customers.service.ts is called. In Nest, services are responsible for data storage and retrieval, as well as implementing light business logic. Here we find:
import * as Twilio from 'twilio';

async sendEta(sendEtaCustomerDto: SendEtaCustomerDto, toPhone: string) {
    const client = Twilio(
        configService.getValue('TWILIO_ACCOUNT_SID'),
        configService.getValue('TWILIO_AUTH_TOKEN'),
    );
    const response = client.messages.create({
        body: sendEtaCustomerDto.msg,
        from: '+15017122661',
        to: toPhone,
    });
    //.then((message) => console.log(message.sid));
    return {
        msg: 'Message sent successfully'
    };
}
We first import the twilio library as a Twilio object (you need to run npm install to make sure it is loaded correctly). Next, we pull off the body and to fields from the SendEtaCustomerDto to create an outbound SMS message (docs). The from field is taken from the phone number that you purchased from Twilio. If there were no errors, we return a success message to let our client know that the notification was successfully sent.
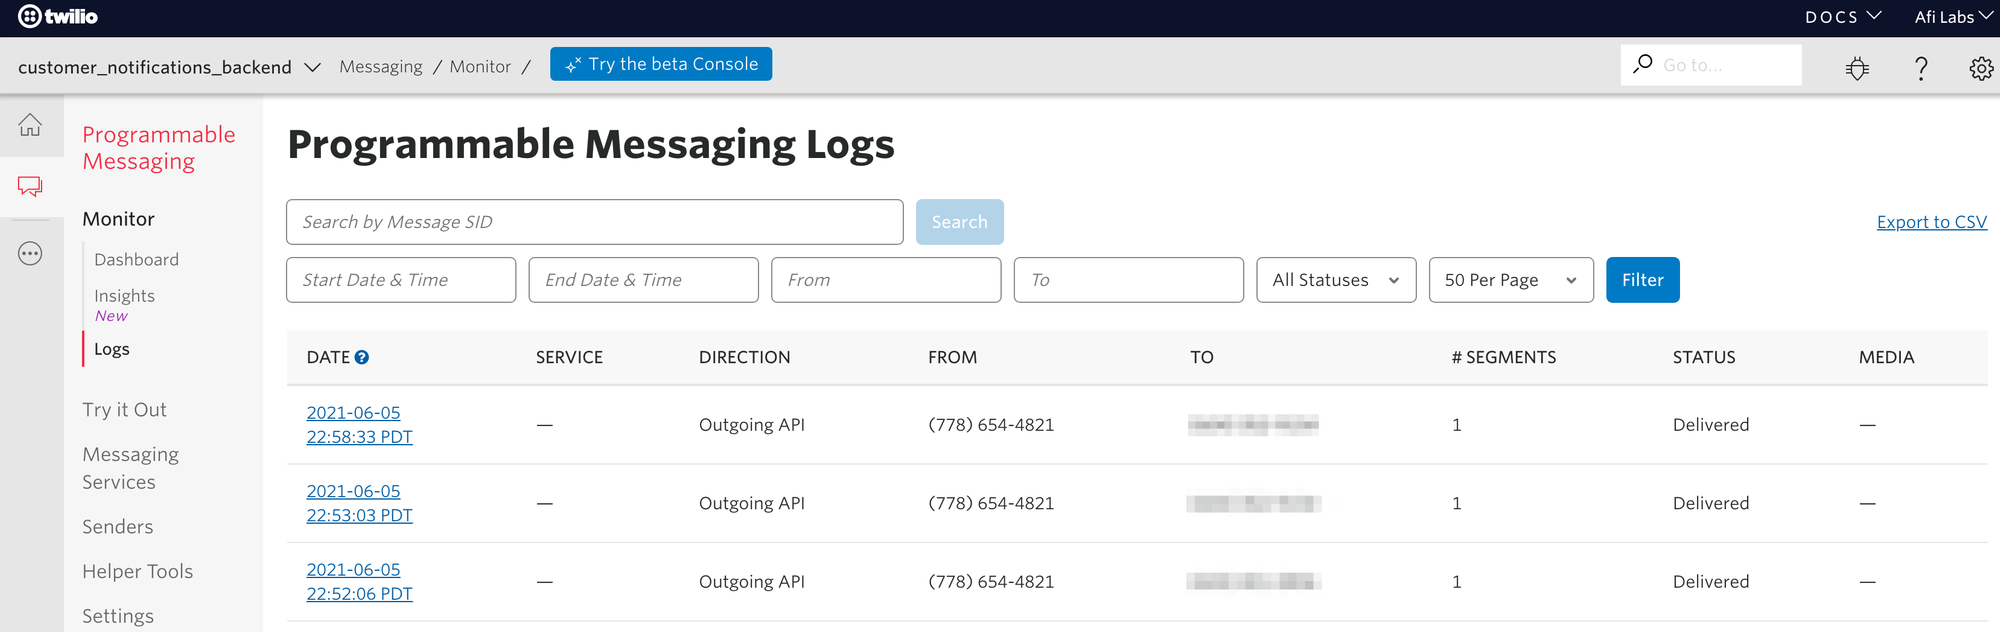
You can verify this by logging into your Twilio account and checking the programmable messaging logs.
That's all there is to sending live customer ETA notifications to your customers. It's a great feature that is quickly becoming a standard in any last mile delivery service.
👋 As always, if you have any questions or suggestions for me, please reach out or say hello on LinkedIn.