Track anyone or anything with the Google Geolocation API
How to use the Google Geolocation API to estimate device location based on cell tower and WiFi network signals when GPS is not available.

In 2021 a snowboarder from Singapore crossed the resort boundary at Whistler Blackcomb and disappeared into the backcountry. He uncharacteristically missed lunch with a friend, who immediately alerted Whistler Search and Rescue. The rescue team had little information about the man's whereabouts on the mountain, except for one detail: local police managed to ping his phone and get a "last location" at the top of Peak Chair. He was eventually found alive two days later on the backside of Whistler Mountain in an area known as the Cake Hole.
That cell tower ping is geolocation in action. In this post I'll explain how it works and show you how the Google Geolocation API uses the same technology to locate any device without GPS.
What is geolocation?
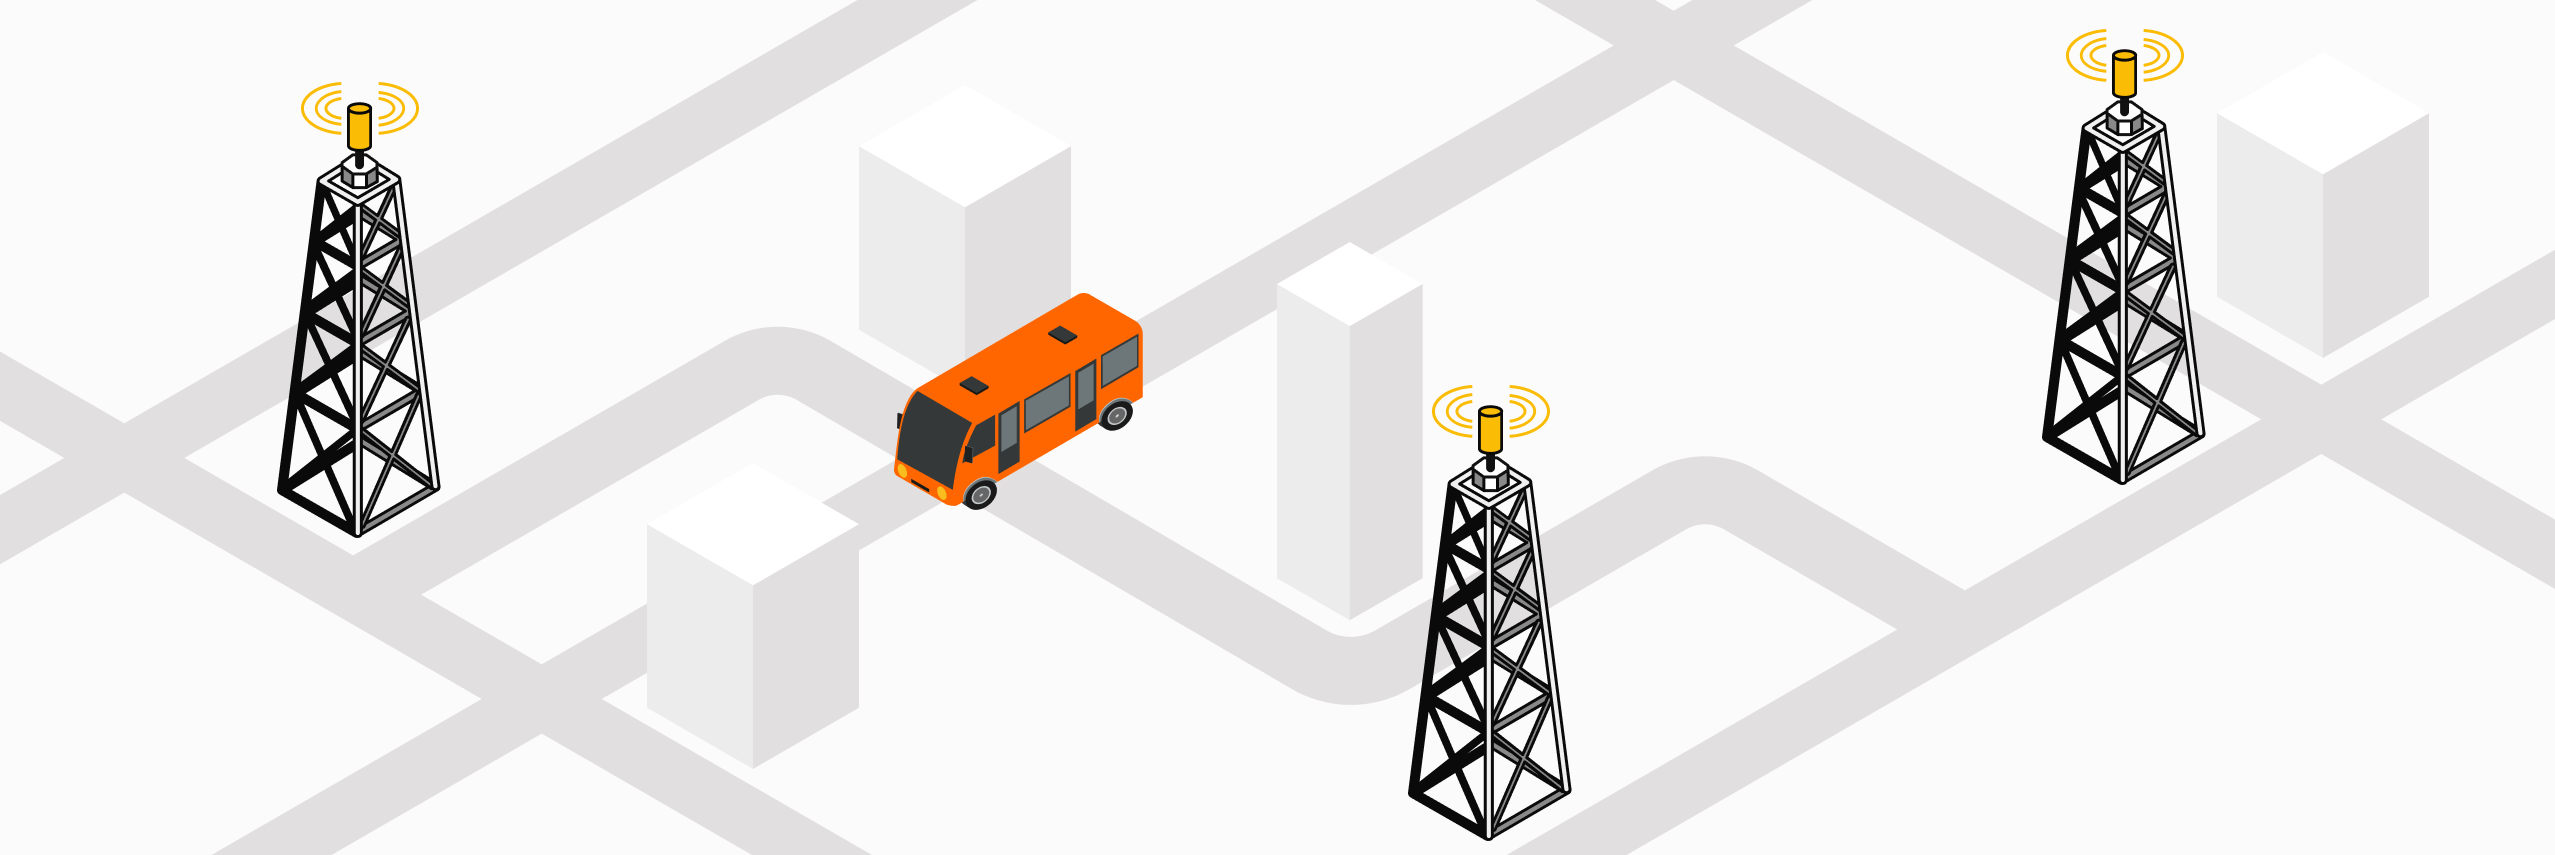
Geolocation is the process of estimating the geographic position of a person or device using signals from known infrastructure such as cell towers, WiFi access points or satellites. In the snowboarder example, police were able to find his last known location via cell phone triangulation. Every phone constantly registers with nearby cell towers as a byproduct of staying connected to the network. Each tower has a known fixed location. By measuring signal strength and timing across multiple towers, a device's position can be estimated. Here's a simplified example that shows how this works.
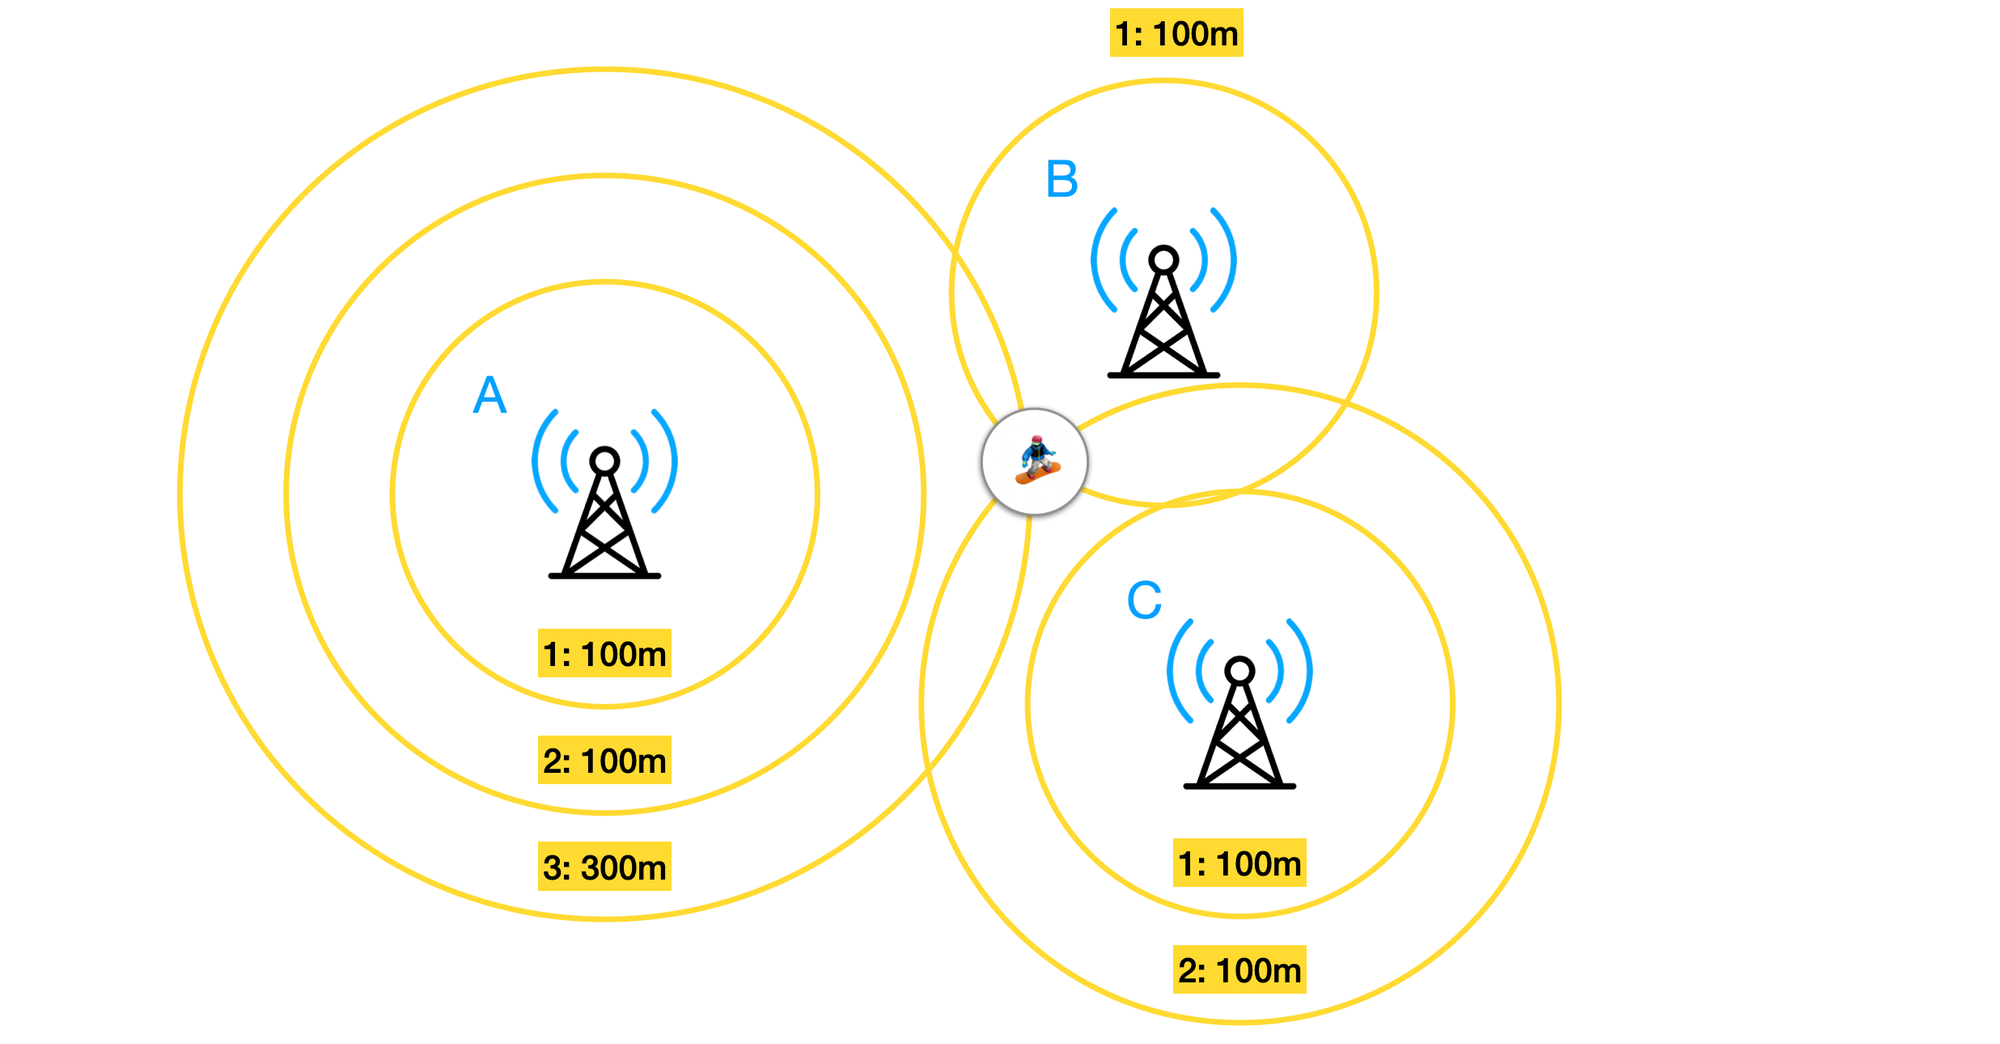
Suppose three cell towers - A, B, and C, that are within range of a device. Each tower broadcasts a continuous radio signal at a constant power level from a fixed, known location. As that signal travels outward, it weakens with distance. The device measures the received signal strength from each tower and uses those three readings to estimate how far it is from each one. For simplicity, assume there are three signal strength readings: strong (1), medium (2), and weak (3) - placing the device 100m, 200m, and 300m from the tower respectively.
One tower gives you a circle - the device is somewhere on its edge, but you don't know where. Two towers narrow it down to two possible points where those circles intersect. Three towers resolve the ambiguity completely. The device is at the single point where all three circles overlap (see the illustration above) hence the name for this method, triangulation.
What is the Google Geolocation API?
The Google Geolocation API is a location lookup service. Tell it which cell towers and WiFi access points your device can detect, along with their signal strengths, and it returns location coordinates along with an accuracy radius indicating how precise the estimate is.
How does the Google Geolocation API work?
Google has a massive database of every cell tower and WiFi access point in the world. Initially, this data was collected by Street View cars, which in addition to collecting road imagery, were also running network scanning equipment that passively recorded data from every WiFi access point and cell tower they drove past, logging the MAC address, signal strength, and GPS coordinates at that moment. Google had to stop this when they were sued by the US Federal Communications Commission (FCC) which eventually fined Google $25,000. This was followed by similar legal action in the UK, Australia and Canada.
But the data collection continued, this time with Android phones. When you carry an Android phone with location services on, it periodically does something called a network scan - it notes all the WiFi access points and cell towers visible around it, along with their Cell ID, LAC (Location Area Code), MCC (Mobile Country Code), MNC (Mobile Network Code) and signal strengths. If the phone also has a GPS fix at that moment, it records the GPS coordinates too. That data is sent back to Google. Every Android phone essentially became a mobile survey vehicle, and there are billions of them. This means that Google's network database updates in near real time as new network equipment gets added quickly after activation. This database covers places Street View cars never went - inside malls, hospitals, office buildings and private roads.
So when you send the Google Geolocation API a list of cell tower or WiFi access points your device is able to connect to, Google looks up each tower and access point in its database and matches your signal observations to known physical tower or access point locations. It then uses triangulation to figure out your device's location and returns latitude and longitude coordinates plus an accuracy radius in meters.
When would you use the Google Geolocation API?
The Google Geolocation API is ideal for internet connected devices that need location tracking but don't have a GPS chip, either because GPS hardware is too expensive at scale, or because the device will spend most of its time indoors where GPS doesn't work anyway. Think robot vacuum cleaners, smart home appliances, and asset trackers.
A hospital wheelchair tracker is a perfect example. Wheelchairs are expensive, frequently misplaced, and almost always indoors. GPS is useless inside a building. But as long as the tracker can reach the hospital's WiFi network, it can call the Geolocation API to estimate its position using nearby access points - no GPS chip required.
What data does the Google Geolocation API need?
To call the Google Geolocation API we need two things: a way to collect signal data, and a way to connect to the internet to send it.
To collect signal data, your device needs a cellular modem that can scan nearby cell towers or a WiFi chip to scan nearby access points. Either works, and combining both gives better accuracy. Neither needs an active data plan just to scan because the towers and access points broadcast their identifiers continuously and any radio chip in range can detect them.
For the purposes of this blog post, we'll be using the free Android app Network Cell Info Lite to simulate a cellular modem. It reads and displays the raw cell tower data that your phone sees (and is silently collected by Android in the background) but never shows you.
- Download the app from the Google Play Store.
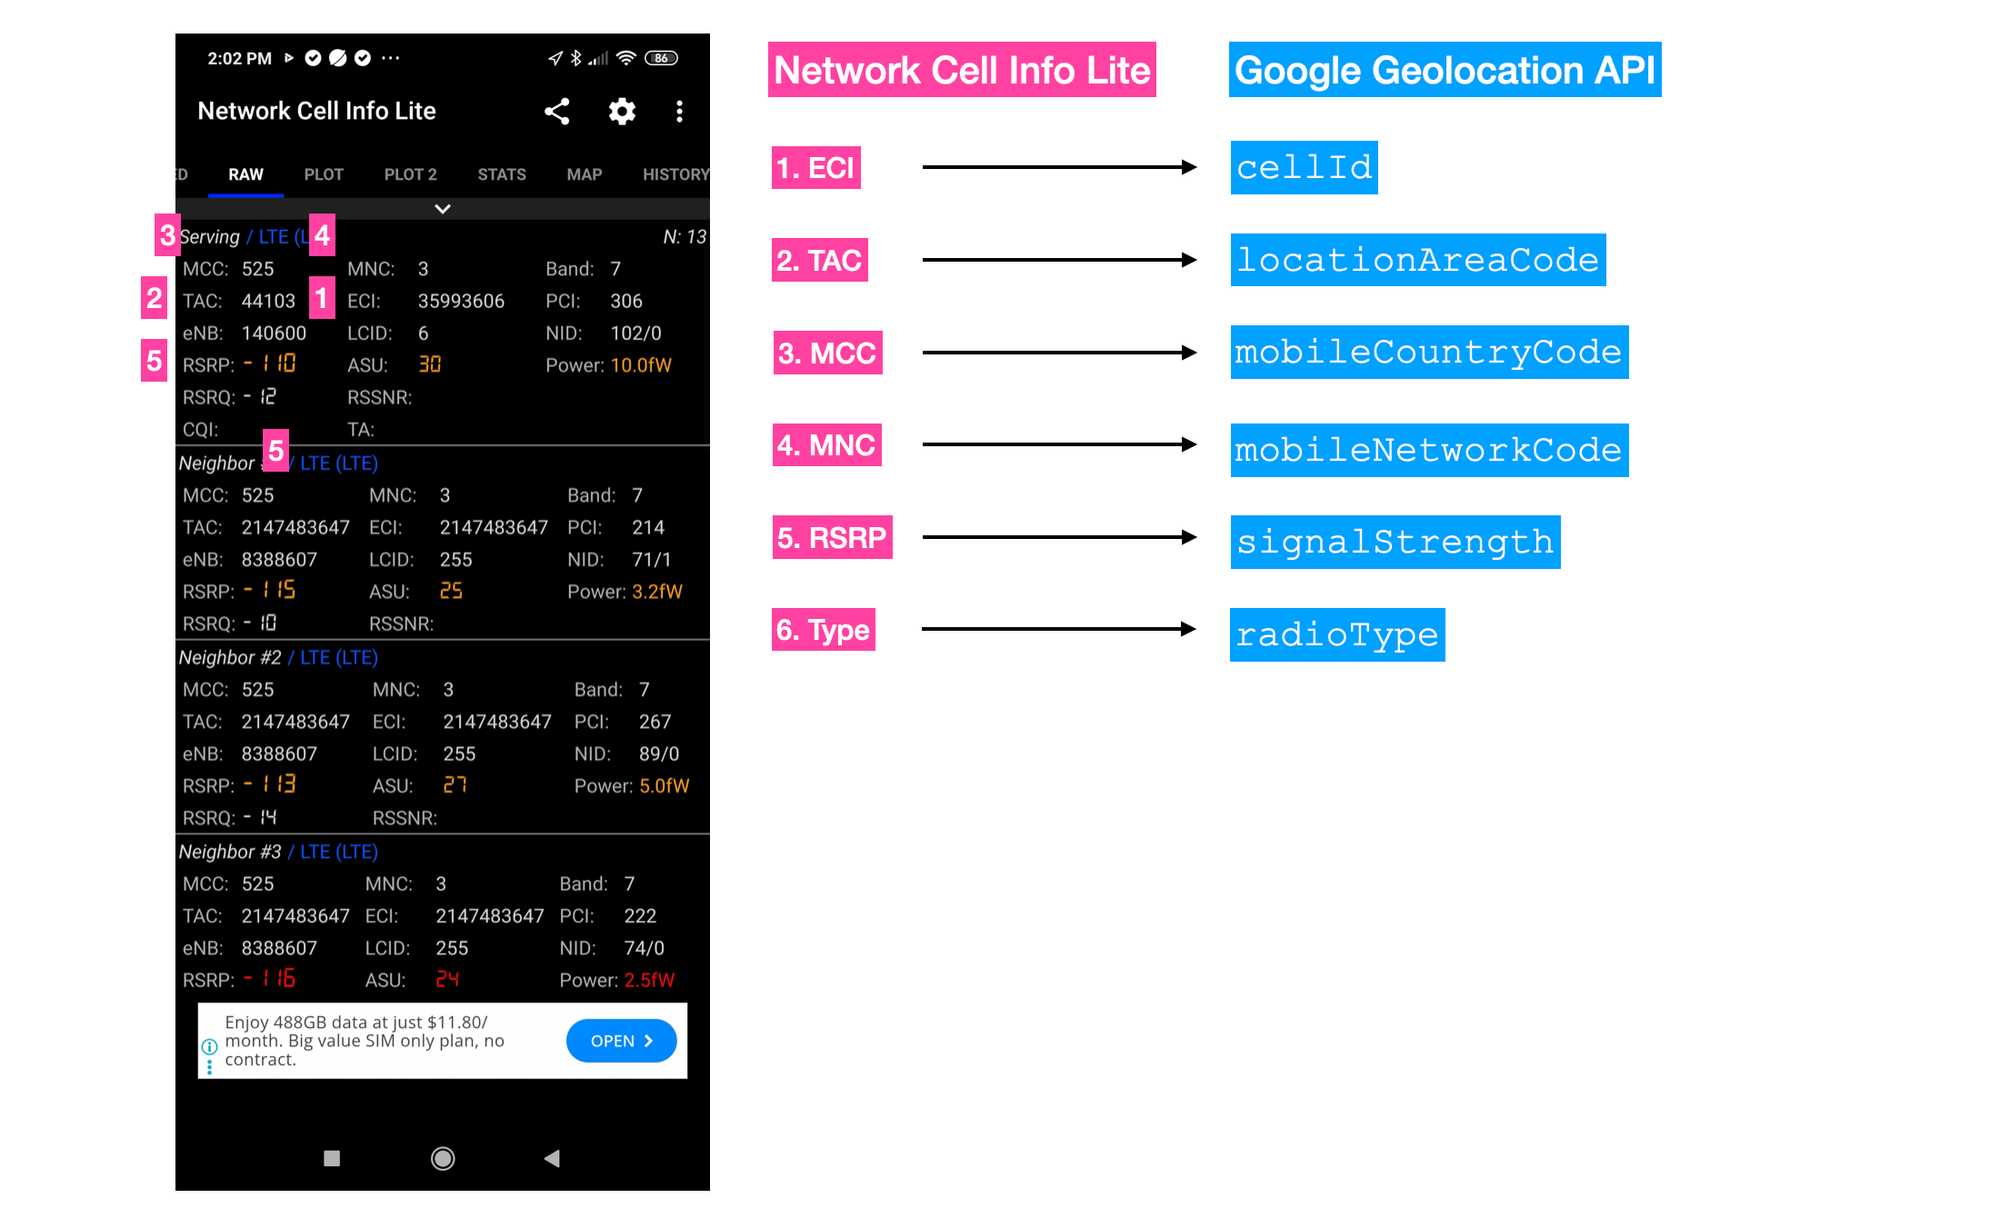
- Open the app and navigate to the Raw tab and take note of the following fields: ECI (Evolved Cell Identifier), TAC (Tracking Area Code), MCC (Mobile Country Code), MNC (Mobile Network Code), RSRP (Reference Signal Received Power) and network type (LTE, 3G, 2G etc).
- Switch to the Device + Sim tab and do the same for the operator field.
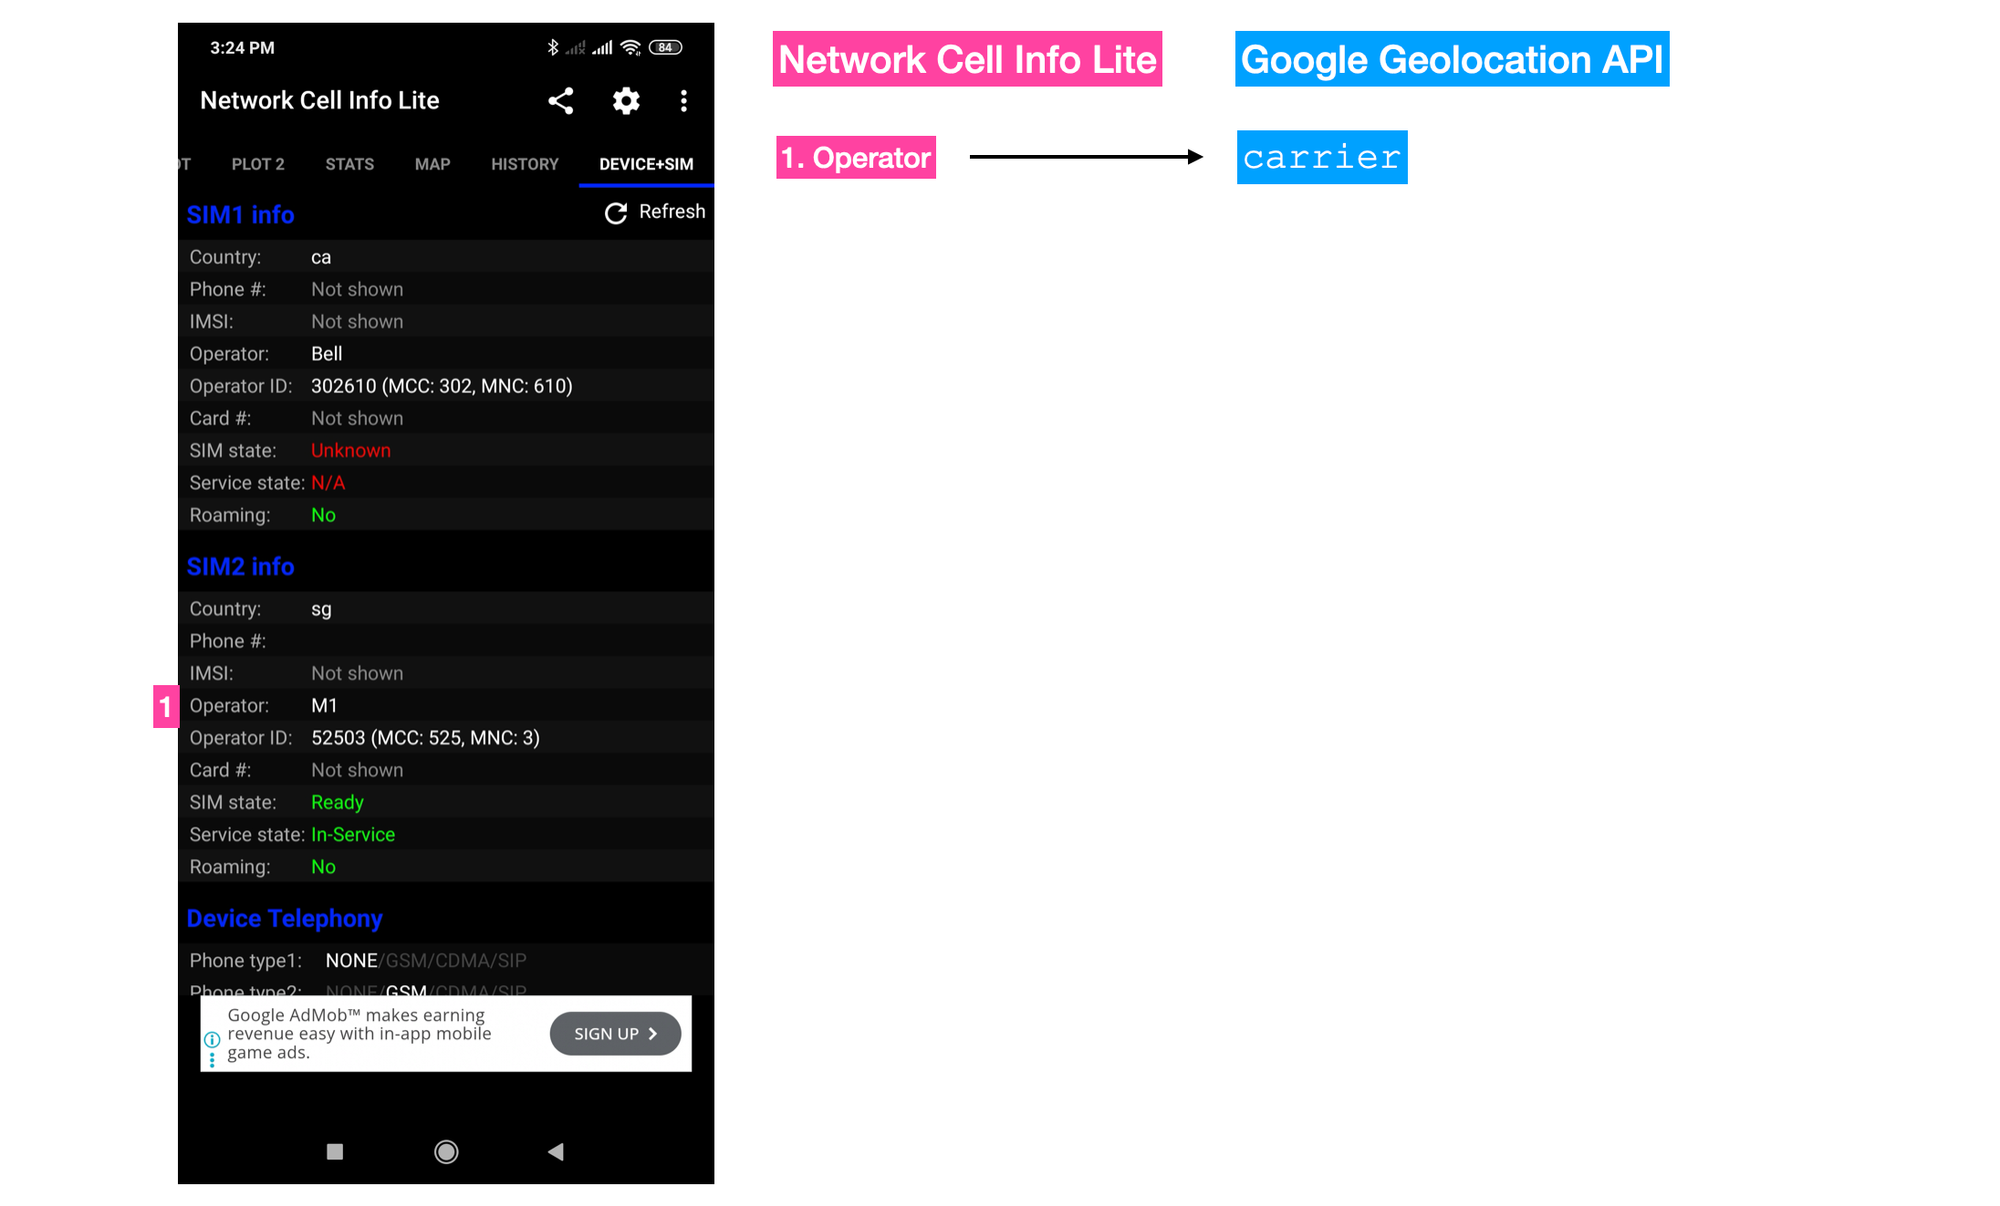
The screenshots above show Network Cell Info Lite on the left and the corresponding Google Geolocation API request fields on the right. Each value from the app maps directly to a field in the API.
Google Geolocation API worked example
Here's a simple example of me calling the Google Geolocation API from my home in Singapore.
Endpoint: POST
https://www.googleapis.com/geolocation/v1/geolocate?key={YOUR_API_KEY}
&Content-Type=application/json
{YOUR_API_KEY} is your Google Maps API key with the Google Geolocation API enabled.
Body
{
  "homeMobileCountryCode": 525,
  "homeMobileNetworkCode": 3,
  "radioType": "lte",
  "carrier": "M1",
  "cellTowers": [
    {
      "cellId": 35993606,
      "locationAreaCode": 44103,
      "mobileCountryCode": 525,
      "mobileNetworkCode": 3,
      "age": 0,
      "signalStrength": -110,
      "timingAdvance": 0
    },
    // ... 2 - 3 cellTower objects if available
  ]
}
homeMobileCountryCode is the Mobile Country Code (MCC) for the device's home network. See the full list here.
homeMobileNetworkCode is the Mobile Network Code (MNC) for the device's home network. Each carrier has a unique MNC per country (search for yours here). It's always a number 0 - 999.
radioType is the mobile radio type. Supported values are gsm, cdma, wcdma, lte and nr.
carrier is the name of your carrier (phone company).
cellTowers is an array of cell tower objects:
{
      "cellId": 35993606,
      "locationAreaCode": 44103,
      "mobileCountryCode": 525,
      "mobileNetworkCode": 3,
      "age": 0,
      "signalStrength": -110,
      "timingAdvance": 0
}
cellId (required) is the unique identifier of the cell tower you are connecting to. LTE (4G) networks use the E-UTRAN Cell Identity (ECI) which has a valid range: 0 - 268435455.
locationAreaCode (required) is also known as the Tracking Area Code (TAC) for LTE networks. Has a valid range of 0 - 65535.
mobileCountryCode (required) is the cell tower's Mobile Country Code (MCC). Valid range: 0 - 999.
mobileNetworkCode (required) is the cell tower's Mobile Network Code (MNC). The valid range for MNC is 0 - 999.
signalStrength is how strong the signal is from each tower or access point, measured in dBm - a negative number. -65 to -75 is excellent, -75 to -85 is good, and anything below -110 is very poor.
age (the number of milliseconds since the device connected to the network) and timingAdvance (a measurement of how far your device is from the cell tower it's connected to expressed as a time delay rather than a distance) can be ignored.
Response
{
    "location": {
        "lat": 1.2960349,
        "lng": 103.8164533
    },
    "accuracy": 270.382
}
location is the device's estimated latitude and longitude coordinates, in degrees.
accuracy is the accuracy of the estimated location, in meters. This represents the radius of a circle around the given location.
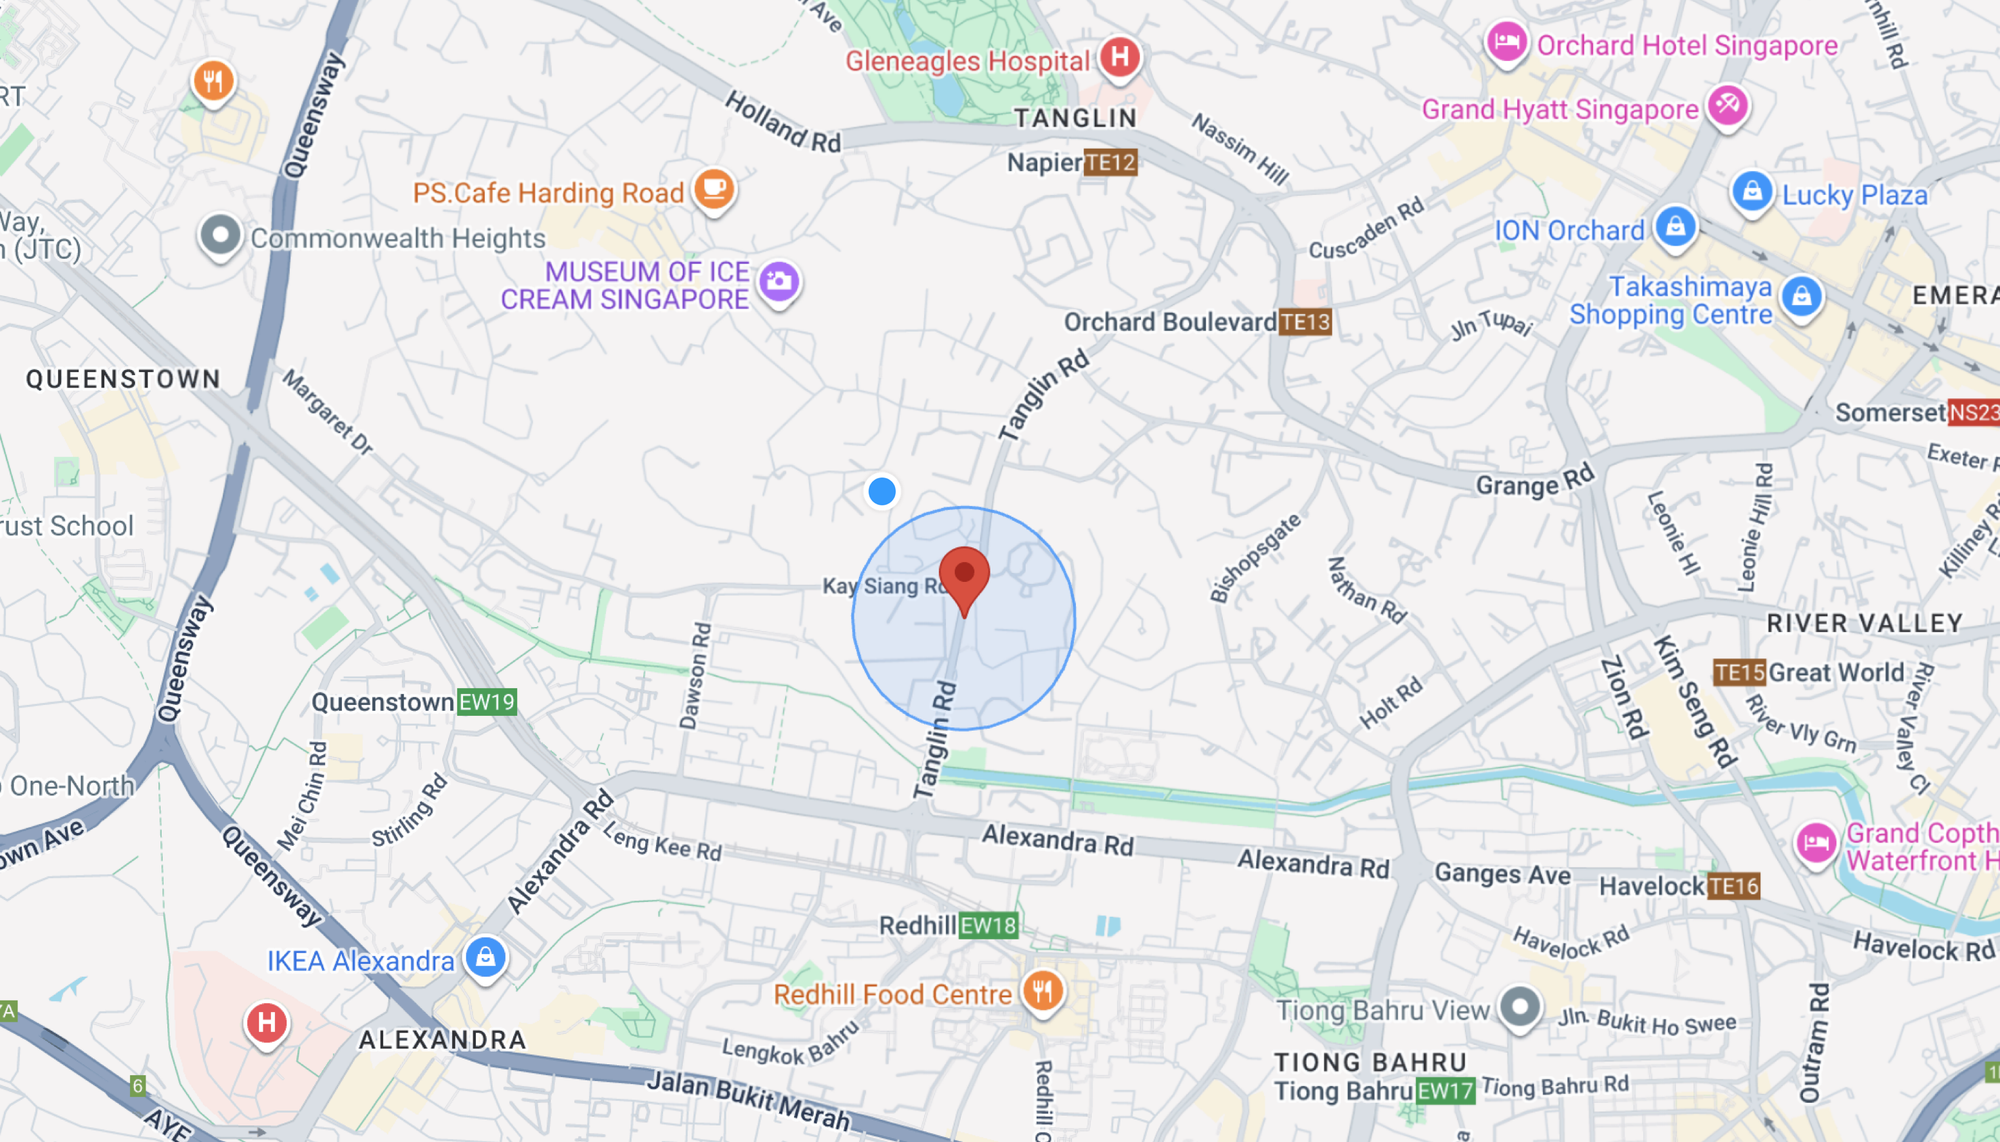
The Geolocation API gave a result that was pretty close to where I actually was, but was still a few hundred meters off. The response came with an accuracy radius of 270m, which means that I could be anywhere within a 270 meter radius of the returned location. That's not good enough for most tracking applications, especially when alternatives like Apple AirTags can locate a device to within a few meters for under $30.
Note: You can get more accurate results if you include a list of WiFi access points like so:
{
  "wifiAccessPoints": [
    {
      "macAddress": "80:69:1a:39:26:33",
      "signalStrength": -43,
      "channel": 13
    },
    {
      "macAddress": "fc:12:63:36:1:54",
      "signalStrength": -56,
      "channel": 11
    }
  ]
}
WiFi data can improve accuracy to 15 - 40 meters in most urban environments, but only if Google's database has already mapped your nearby access points. Mine hadn't been mapped yet because I'd reset my router a few weeks earlier, assigning it a new MAC address. New MAC addresses don't appear in Google's database until an Android device with location services passes by and logs them.
Google Geolocation API pricing
Like other Google Maps Platform APIs, the Elevation API follows a pay-as-you-go pricing model, with volume discounts that lower the cost as your usage increases. Pricing starts at $5.00 CPM (cost per thousand) and there's a free usage cap of 10,000 API calls per month.
| 0 - 10k | 10k - 100k | 100k - 500k | 500k - 1M | 1M - 5M | 5M+ | |
|---|---|---|---|---|---|---|
| Geolocation API | FREE | $5.00 | $4.00 | $3.00 | $1.50 | $0.38 |
As with other Google Maps services, working with a Google Maps Partner can provide access to discounted pricing at higher volumes.
To get started with the Google Elevation API, you need to first enable it in on your Google Cloud Console. Search for the "Geolocation API" in the search bar at the top and click [Enable] to begin using it in your Google Cloud project.
Epilogue

Two days after he disappeared, Wen Yi Toh, the snowboarder mentioned at the start of this blog post, was found alive by Whistler Search and Rescue. He later wrote a note of thanks published in The Pique, Whistler's local newspaper, crediting the rescue team, paramedics at Whistler Medical Center, and Singapore's Consul-General in Vancouver. He saved special thanks for his friend Kevin Yap - the person who noticed he was missing, raised the alarm, and refused to stop following up until Wen Yi was safe.
One contributor went unmentioned - the cell tower geolocation technology that gave rescuers their only lead. The same technology that powers the Google Geolocation API may well have saved his life.
This article was written by Afi Labs, a Google Maps Platform Premier Partner and reseller. We build route optimization, navigation, and fleet tracking software on Google Maps, and offer volume pricing on GMP licensing. Talk to an engineer or follow Afian on LinkedIn.