Google address autocomplete with the Places API
How to use Google Places API to autocomplete addresses and help users find the exact place they are looking for.

Google Places Autocomplete is an API that offers location-based suggestions as users type into a search input field. As the user types, an autocomplete widget displays a dropdown menu with predicted place options. It's widely used in e-commerce for checkout and delivery, in logistics and ride-sharing for validating addresses, and in travel and hospitality for discovering places. In this blog post, I'll explain how address autocomplete works, talk about pricing, and run through a simple worked example that uses the Google Autocomplete API to display a location on a map (demo / source code).

Part 1: Finding the right place with the Google Places API
Part 2: Google address autocomplete with the Places API (this article)
Part 3: Google Place Details and Place Photos API
Part 4: Google Nearby Search API
Part 5: Google Places Text Search

How does Google address autocomplete work?
In my last post, I said that although Google Maps is best known as a mapping tool, it actually functions more like a modern address book. The Google Autocomplete API compares input text against Google's vast database of addresses, landmarks, businesses, and other points of interest, and combines this with a proprietary algorithm to generate predictions based on partial user input.
The predictions from the Google Places Autocomplete API consider not only the similarity between the typed text and place names but also prioritize results based on the user's current location and the relevance of the place. For example, typing "San" into the search box might return "San Francisco" as the top result, but if you're using the API from Puerto Rico, it would prioritize "San Juan" (the capital of Puerto Rico) instead.
Google Places autocomplete example
Here's what a typical request to the Google Autocomplete API looks like:
Method: GET
https://maps.googleapis.com/maps/api/place/autocomplete/json
?input={input}&
location={location}&
radius={radius}&
region={region}&
types={types}&
&key={YOUR_API_KEY}
{input} is the partial text string being typed in e.g. input=Vanc for "Vancouver".
{location} represents the encoded latitude and longitude coordinates of the central point around which the API retrieves place information. For example, the coordinates for Vancouver, BC are 49.257706,-123.2064756, which would be encoded as location=49.257706%2C-123.2064756.
{radius} is the search radius (in meters) within which to return place results. If radius is not provided, the {location} parameter is ignored. Note: The maximum search radius is 50,000 meters.
{region} is the region code, specified as a ccTLD ("top-level domain") two-character value. For example, if you want to limit search results to Canada, you would use region=ca.
{types} is an array of place types that you can use to restrict search results by. For instance, if you only want to search for cafes, you can set types to types=cafe. If you want to search for both cafes and bakeries, you would use types=bakery|cafe.
{YOUR_API_KEY} is a valid Google Maps API key with the Places API enabled.
A request for cafes containing the string "fore" within an area centered in Vancouver, BC, Canada might look something like this:
Method: GET
https://maps.googleapis.com/maps/api/place/autocomplete/json
?input=fore&
location=49.257541%2C-123.4353644&
radius=25&
region=CA&
types=cafe&
&key={YOUR_API_KEY}
You'll get back a response that looks like this:
{
  "predictions": [
    {
      "description": "Forecast Coffee, Main Street, Vancouver, BC",
      "matched_substrings": [
        {
          "length": 4,
          "offset": 0
        }
      ],
      "place_id": "ChIJsfgDqXtzhlQROoYf0PVhqPw",
      "reference": "ChIJsfgDqXtzhlQROoYf0PVhqPw",
      "structured_formatting": {
        "main_text": "Forecast Coffee",
        "main_text_matched_substrings": [
          {
            "length": 4,
            "offset": 0
          }
        ],
        "secondary_text": "Main Street, Vancouver, BC"
      },
      "terms": [
        {
          "offset": 0,
          "value": "Forecast Coffee"
        },
        {
          "offset": 17,
          "value": "Main Street"
        },
        {
          "offset": 30,
          "value": "Vancouver"
        },
        {
          "offset": 41,
          "value": "BC"
        }
      ],
      "types": [
        "point_of_interest",
        "bar",
        "cafe",
        "store",
        "food",
        "establishment"
      ]
    },
    {
      "description": "Forecast Coffee, Headland Drive, West Vancouver, BC",
      "matched_substrings": [
        {
          "length": 4,
          "offset": 0
        }
      ],
      "place_id": "ChIJmW2moSpthlQRxxXjtrlk-Kw",
      "reference": "ChIJmW2moSpthlQRxxXjtrlk-Kw",
      "structured_formatting": {
        "main_text": "Forecast Coffee",
        "main_text_matched_substrings": [
          {
            "length": 4,
            "offset": 0
          }
        ],
        "secondary_text": "Headland Drive, West Vancouver, BC"
      },
      "terms": [
        {
          "offset": 0,
          "value": "Forecast Coffee"
        },
        {
          "offset": 17,
          "value": "Headland Drive"
        },
        {
          "offset": 33,
          "value": "West Vancouver"
        },
        {
          "offset": 49,
          "value": "BC"
        }
      ],
      "types": [
        "food",
        "cafe",
        "point_of_interest",
        "establishment"
      ]
    },
    {
      "description": "Forecast Coffee, Village Square, Whistler, BC",
      "matched_substrings": [
        {
          "length": 4,
          "offset": 0
        }
      ],
      "place_id": "ChIJw0gX0i09h1QRKkHdp2qdq5w",
      "reference": "ChIJw0gX0i09h1QRKkHdp2qdq5w",
      "structured_formatting": {
        "main_text": "Forecast Coffee",
        "main_text_matched_substrings": [
          {
            "length": 4,
            "offset": 0
          }
        ],
        "secondary_text": "Village Square, Whistler, BC"
      },
      "terms": [
        {
          "offset": 0,
          "value": "Forecast Coffee"
        },
        {
          "offset": 17,
          "value": "Village Square"
        },
        {
          "offset": 33,
          "value": "Whistler"
        },
        {
          "offset": 43,
          "value": "BC"
        }
      ],
      "types": [
        "establishment",
        "point_of_interest",
        "cafe",
        "bar",
        "food"
      ]
    },
    {
      "description": "Forecast Coffee, Alpha Lake Road, Whistler, BC",
      "matched_substrings": [
        {
          "length": 4,
          "offset": 0
        }
      ],
      "place_id": "ChIJX1b2oLg9h1QRAJdKAF16zQ4",
      "reference": "ChIJX1b2oLg9h1QRAJdKAF16zQ4",
      "structured_formatting": {
        "main_text": "Forecast Coffee",
        "main_text_matched_substrings": [
          {
            "length": 4,
            "offset": 0
          }
        ],
        "secondary_text": "Alpha Lake Road, Whistler, BC"
      },
      "terms": [
        {
          "offset": 0,
          "value": "Forecast Coffee"
        },
        {
          "offset": 17,
          "value": "Alpha Lake Road"
        },
        {
          "offset": 34,
          "value": "Whistler"
        },
        {
          "offset": 44,
          "value": "BC"
        }
      ],
      "types": [
        "point_of_interest",
        "cafe",
        "bar",
        "food",
        "store",
        "establishment"
      ]
    },
    {
      "description": "La Forêt Jubilee, Jubilee Avenue, Burnaby, BC",
      "matched_substrings": [
        {
          "length": 4,
          "offset": 3
        }
      ],
      "place_id": "ChIJsxzBrFx2hlQRgcWfYg58Se4",
      "reference": "ChIJsxzBrFx2hlQRgcWfYg58Se4",
      "structured_formatting": {
        "main_text": "La Forêt Jubilee",
        "main_text_matched_substrings": [
          {
            "length": 4,
            "offset": 3
          }
        ],
        "secondary_text": "Jubilee Avenue, Burnaby, BC"
      },
      "terms": [
        {
          "offset": 0,
          "value": "La Forêt Jubilee"
        },
        {
          "offset": 18,
          "value": "Jubilee Avenue"
        },
        {
          "offset": 34,
          "value": "Burnaby"
        },
        {
          "offset": 43,
          "value": "BC"
        }
      ],
      "types": [
        "point_of_interest",
        "cafe",
        "food",
        "restaurant",
        "establishment",
        "store",
        "bakery"
      ]
    }
  ],
  "status": "OK"
}
The Autocomplete API returns an array of predictions. The two key fields in the prediction object are place_id, which is essential for retrieving the latitude and longitude of a location via the Place Details API, and description, which is what appears in the autocomplete dropdown menu.
As expected, the Places Autocomplete API returns the following place predictions:
- Forecast Coffee, Main Street, Vancouver, BC
- Forecast Coffee, Headland Drive, West Vancouver, BC
- Forecast Coffee, Village Square, Whistler, BC
- Forecast Coffee, Alpha Lake Road, Whistler, BC
- La Forêt Jubilee, Jubilee Avenue, Burnaby, BC
Google Places autocomplete widget
The fastest way to get Google address autocomplete up and running in your app is by using the Google Places autocomplete widget (instructions taken from How to add a place autocomplete widget to your website).
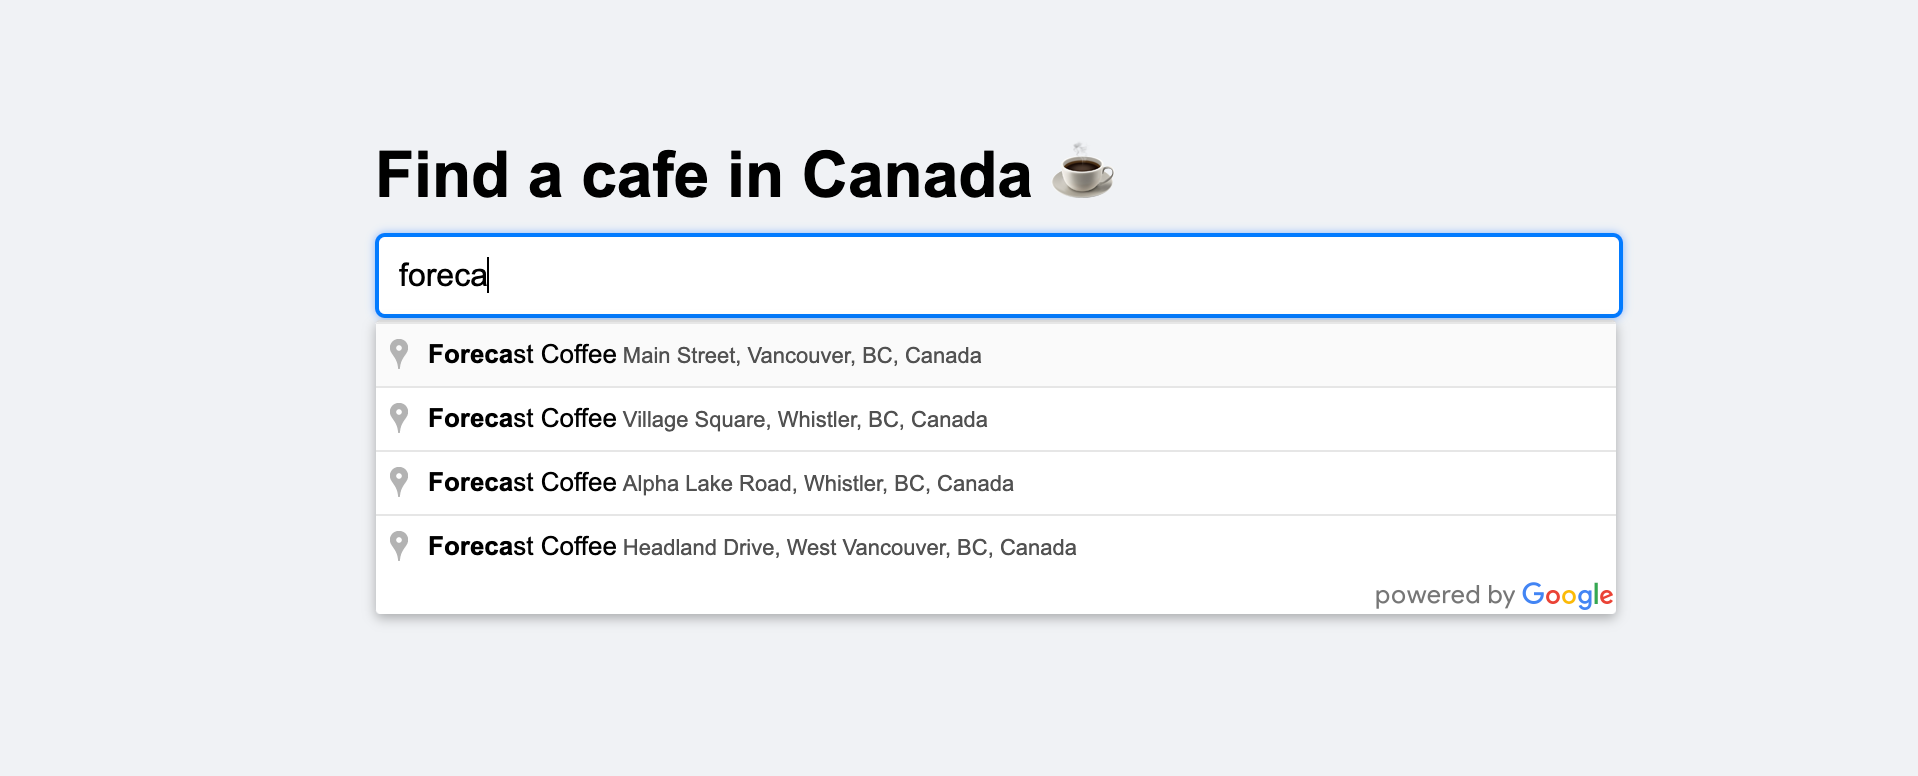
Follow along as I use the autocomplete widget to build a simple cafe finder for Canada 🇨🇦.

- Import the Places library loaded with the Google Maps javascript API.
<script src="https://maps.googleapis.com/maps/api/js?
key=YOUR_API_KEY&
libraries=places&
callback=initAutocomplete" async defer>
</script>- Add a text input field and give it the
id="autocomplete".
<input id="autocomplete" placeholder="Enter a place" type="text" /> - In the callback function from loading the Maps javascript API, initialize a new Place Autocomplete service, and attach it the text field that has
id="autocomplete". We are also going to addtypesandcomponentRestrictionsto restrict our search to cafes in Canada.
<script>
let autocomplete;
function initAutocomplete() {
  autocomplete = new google.maps.places.Autocomplete(
    document.getElementById('autocomplete'),
    {
      types: ['cafe'],
      componentRestrictions: {'country': ['CA']},
      fields: ["place_id", "geometry", "name", "formatted_address"]
    });
}
</script>
Now we have an input field that displays a drop down of predictions as the user types 👏.

Next, we need to handle what happens when the user selects one of the predictions.
- In that same callback function, add a listener to the Autocomplete service for an event called
place_changed,
/* In initAutocomplete() */
autocomplete.addListener('place_changed', onPlaceChanged);- and create a new function,
onPlaceChanged()to display information about the place that was selected.
function onPlaceChanged() {
  var place = autocomplete.getPlace();

  if (!place.geometry) {
    // User did not selecr a prediction; reset the input field
    document.getElementById('autocomplete').placeholder = 'Enter a place';
  } else {
    // Display details about the place
    document.getElementById('details').innerHTML = place.name;
  }
}
Full source code for the example above is provided below in place_autocomplete_widget.html. To run the code, open the file in your favorite text editor and replace {YOUR_API_KEY} with the Places API enabled API key created in the previous post. Open place_autocomplete_widget.html in your browser and the app should work out of the box.
Using vanilla JavaScript to learn how Places Autocomplete works is awesome, but for production, it's a good idea to use a modern framework like react-google-maps. In the last part of this post, I’ll walk you through a step by step example of how to do this in React. See places_api_autocomplete_demo.
Google Autocomplete API pricing
There are two ways to pay for Google address autocomplete - per request and per session (official price sheet).
Per request pricing starts at $2.83 CPM (per thousand requests). A request is triggered each time someone types into the search box and generates a list of predictions. For example, if you have a slow typer who enters the search term "Vancouver" one character at a time, you will be charged for 9 separate requests for a total cost of ($2.83 x 9)/1000 = $0.0255 (about 2.5 cents). There's a cap of 12 requests per successful query i.e. you will never pay more than ($2.83 x 12)/1000 = $0.0339 (about 3.4 cents).
Fortunately, the worse case scenario of having someone type in the entire search string is very rare. Because the predictions from address autocomplete are so good, most users find the place they want after just 3 or 4 keystrokes.
If your app has high usage, you might want to explore Google Autocomplete API's per-session pricing, which starts at $17.00 CPM. With per-session pricing, you're only charged the full price when a user selects one of the predictions. If he doesn't, you'll be charged at the $2.83 CPM per request rate. Per session pricing generally is more cost-effective if your users generate 6 or more predictions per session.
Using Google Places autocomplete in an app
In this final section, we'll build a simple web application that uses Google Places Autocomplete to help users quickly find locations and display them on a map (live demo: https://autocomplete-place.afi.dev).
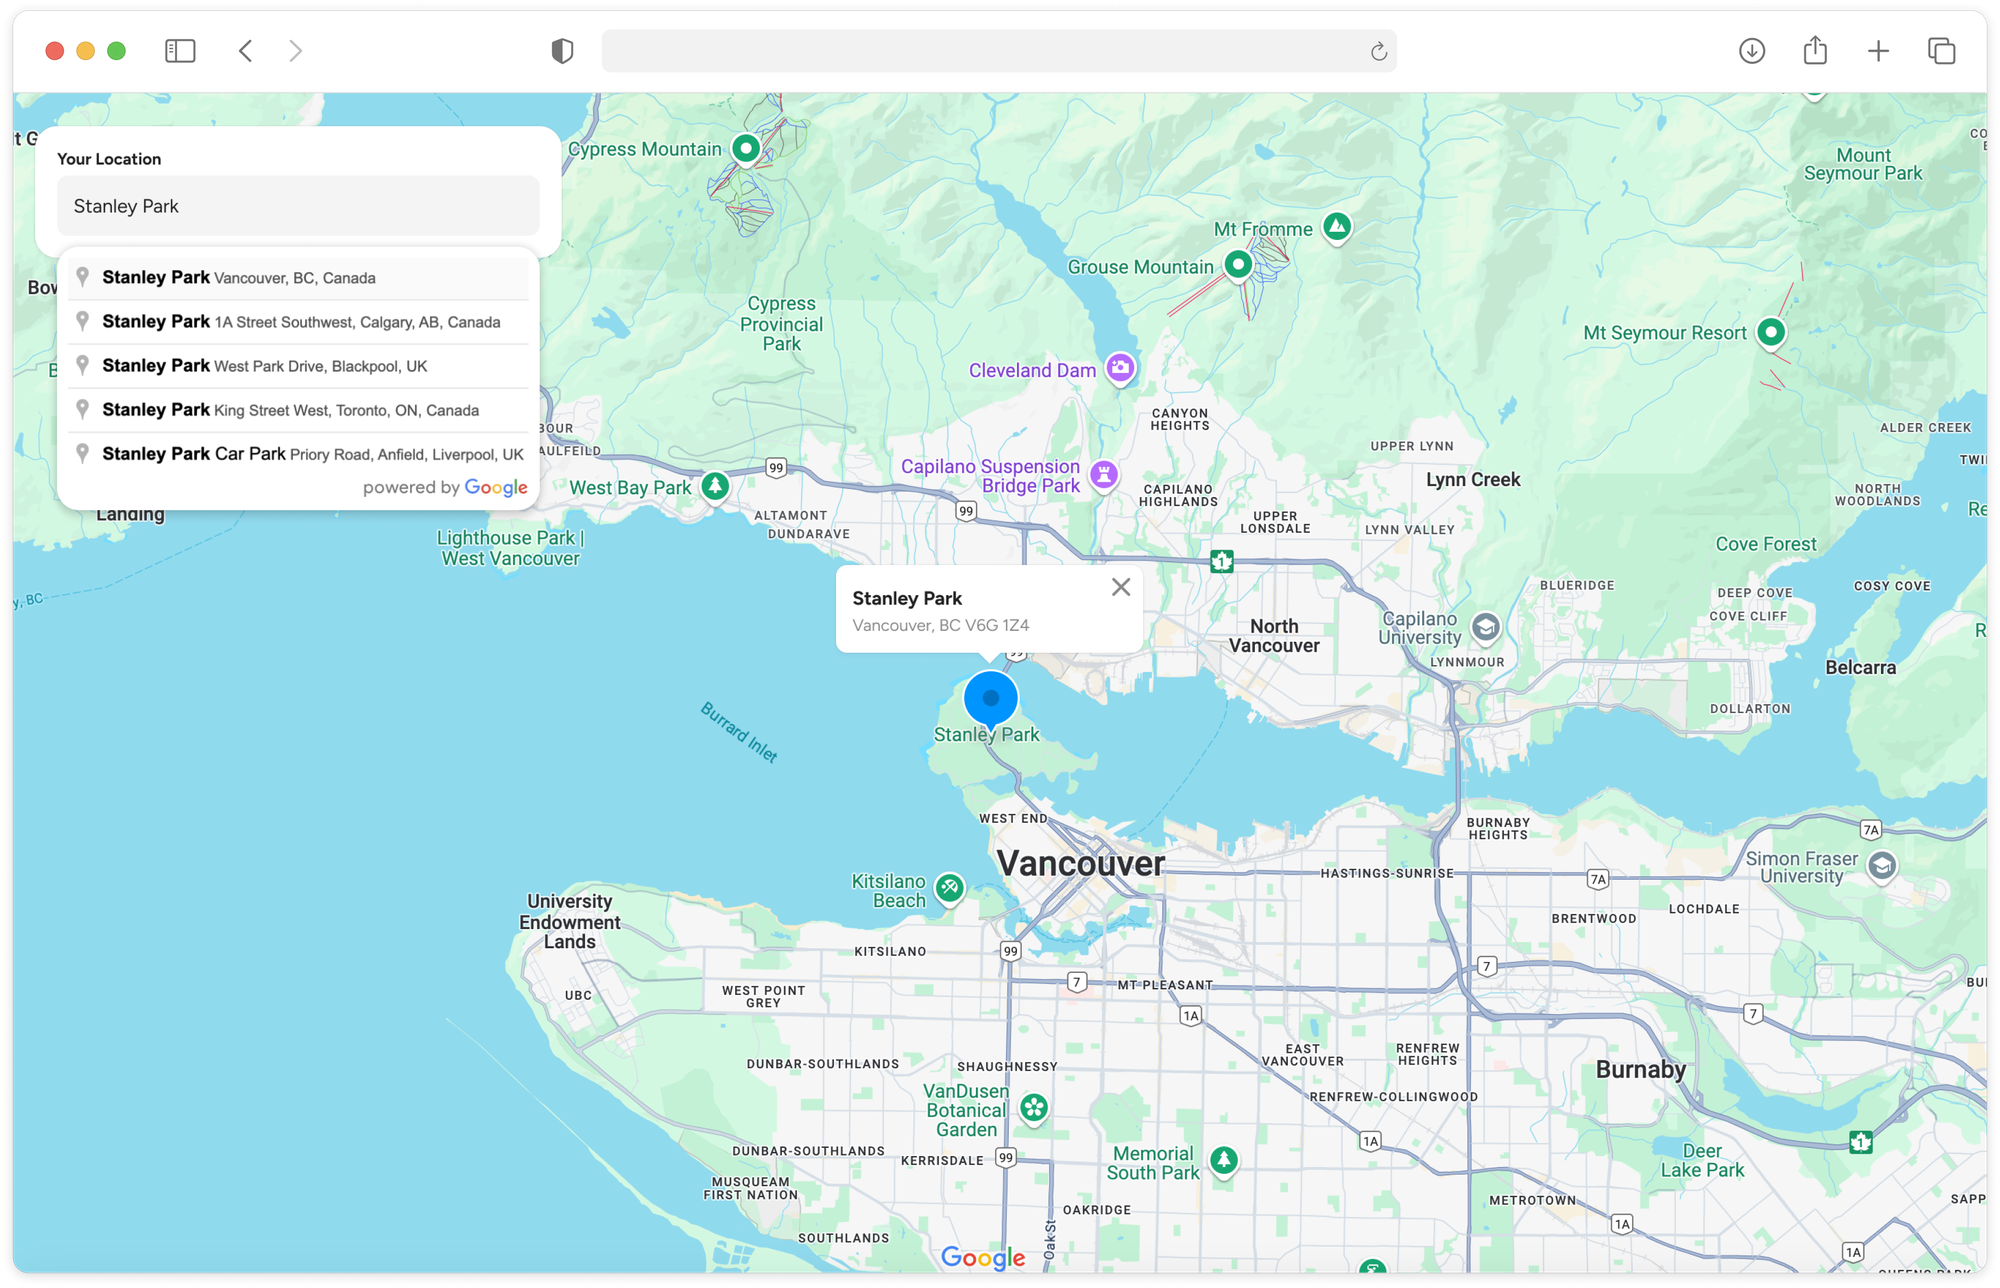
places_api_autocomplete_demo is a basic React app created with the Create React App build tool. It features two main components: a search bar in the top-left corner that uses Google Places Autocomplete, and a full-screen interactive map. As you type a location or address into the search bar, a list of suggestions appears. When you select a place, its location is displayed on the map.
We'll be using the new Google Maps React component library from @vis.gl/react-google-maps to quickly scaffold our app. This library simplifies the integration of Google Maps components into a React web app, and lets us use a wide variety of prebuilt components that make it easy to manage map interactions and UI in a way that is consistent with React. Specifically, we'll be using the <Map/>, <Marker/> and <InfoWindow/> components to display data on a Google Map based interface, and the useMapLibrary hook to load the Places Library and the autocomplete functionality that comes with it.
Note: Not all code is included in the code snippets below. For the full source code, please visit places_api_autocomplete_demo on Github.
App.jsx

App.jsx in the /frontend folder serves as the main entry point for the application, managing the overall structure, layout (above), and routing.
/* frontend/App.jsx */
import React, { useState } from "react";
import { APIProvider } from "@vis.gl/react-google-maps";
import Map from "./components/Map";
import LocationSearchPanel from "./components/LocationSearchPanel";
import "./App.scss";

const App = () => {
  const [selectedPlace, setSelectedPlace] = useState(null);

  const handlePlaceSelection = async (placeResult) => {
    try {

      if (placeResult) {
        setSelectedPlace({
          name: placeResult.name,
          address: placeResult.formatted_address,
          latitude: placeResult.geometry?.location?.lat(),
          longitude: placeResult.geometry?.location?.lng(),
        });
      }
    } catch (error) {
      console.error("Error fetching place details:", error);
    }
  };

  return (
    <div className="app">
      <APIProvider apiKey={process.env.REACT_APP_GOOGLE_API_KEY}>
        <div className="location-panel">
          <LocationSearchPanel onPlaceSelect={handlePlaceSelection} />
        </div>
        <Map place={selectedPlace} />
      </APIProvider>
    </div>
  );
};

export default App;
In the return statement of App.jsx, <APIProvider/> uses React's Context API to provide access to Google Maps services to any child components within its hierarchy. This allows components like <Map/> and <LocationSearchPanel/> to access the Google Maps API without needing to directly pass down the API key as a prop to each individual component.
The onPlaceSelect prop which is passed into <LocationSearchPanel/> receives a the handlePlaceSelection() function as its value. This means when a user selects a place from the autocomplete widget inside LocationSearchPanel, the handlePlaceSelection() function will be called.
handlePlaceSelection() processes the details of a place selected by the user from the Google Places autocomplete, checks if its valid, and if so, extracts the name, address, latitude, and longitude from placeResult and updates the state selectedPlace with this information. meanwhile, the <Map/> component monitors changes to the value of selectedPlace, and automatically pans and places a marker at the corresponding latitude and longitude.
LocationSearchPanel.jsx
LocationSearchPanel.jsx serves two main functions. First, it captures data from the Google Places autocomplete widget using the onPlaceSelect prop and sends that information to the parent <App/> component. Second, it acts as a container component, wrapping the <PlaceAutocompleteInput/> component inside it.
/* frontend/components/LocationSearchPanel.jsx */
import React from "react";
import PlaceAutocompleteInput from "./PlaceAutocompleteInput";
import "./LocationSearchPanel.scss";

const LocationSearchPanel = ({ onPlaceSelect }) => {
  return (
    <div className="location-search-panel">
      <h3>Your Location</h3>
      <PlaceAutocompleteInput onPlaceSelect={onPlaceSelect} />
    </div>
  );
};

export default LocationSearchPanel;
PlaceAutocompleteInput.jsx
This is where the autocomplete magic happens. First, in the return statement of PlaceAutocomplete.jsx, we add a text input field and give it the id="inputRef".
Second, in a useEffect hook, we create a new Google Places Autocomplete instance with the line: new places.Autocomplete(inputRef.current, options) and bind it to the text input field.
Third, we set up an event listener on the placeAutocomplete object which listens for the "place_changed" event that is triggered whenever the user selects a place from the list of autocomplete suggestions. The result is passed to the onPlaceSelect() prop, which eventually bubbles up to App.jsx.
/* frontend/components/PlaceAutocompleteInput.jsx */
import React, { useRef, useEffect, useState } from "react";
import { useMapsLibrary } from "@vis.gl/react-google-maps";

import "./PlaceAutocompleteInput.scss";

const PlaceAutocompleteInput = ({ onPlaceSelect }) => {
  const [placeAutocomplete, setPlaceAutocomplete] = useState(null);
  const inputRef = useRef(null);
  const places = useMapsLibrary("places");

  useEffect(() => {
    if (!places || !inputRef.current) return;

    const options = {
      fields: ["place_id", "geometry", "name", "formatted_address"],
    };

    setPlaceAutocomplete(new places.Autocomplete(inputRef.current, options));
  }, [places]);

  useEffect(() => {
    if (!placeAutocomplete) return;

    placeAutocomplete.addListener("place_changed", () => {
      onPlaceSelect(placeAutocomplete.getPlace());
    });
  }, [onPlaceSelect, placeAutocomplete]);

  return (
    <div className="autocomplete-container">
      <input ref={inputRef} />
    </div>
  );
};

export default PlaceAutocompleteInput;
Note: If you wanted to set restrictions to the autocomplete search e.g. by limiting results to "cafes near Vancouver", you can pass these constraints as fields in the options object like this:
/* frontend/components/PlaceAutocompleteInput.jsx */
const options = {
  fields: ["place_id", "geometry", "name", "formatted_address"],
  types: ["cafe"],
  bounds: {
    north: 50.2502694,
    east: -121.1844395,
    south: 48.7005625,
    west: -125.0573283,
  },
  strictBounds: true,
};
Map.jsx
Map.jsx initializes a <Map/> component centered on Vancouver, BC. When a user selects a new place from the autocomplete search box, the map pans to the selected location and places a <Marker/> component at that spot by passing the location details as props.
/* frontend/components/Map.jsx */
import React, { useEffect } from "react";
import { Map as GMap, useMap } from "@vis.gl/react-google-maps";
import Marker from "./Marker";

const Map = ({ place }) => {
  const mapInstance = useMap();

  useEffect(() => {
    if (place && mapInstance) {
      const { latitude, longitude } = place;
      mapInstance.panTo({ lat: latitude, lng: longitude });
    }
  }, [place, mapInstance]);

  return (
    <GMap
      defaultCenter={{ lat: 49.2569501547411, lng: -123.11058970045666 }}
      defaultZoom={12}
      disableDefaultUI
    >
      {place && <Marker place={place} />}
    </GMap>
  );
};

export default Map;
Marker.jsx
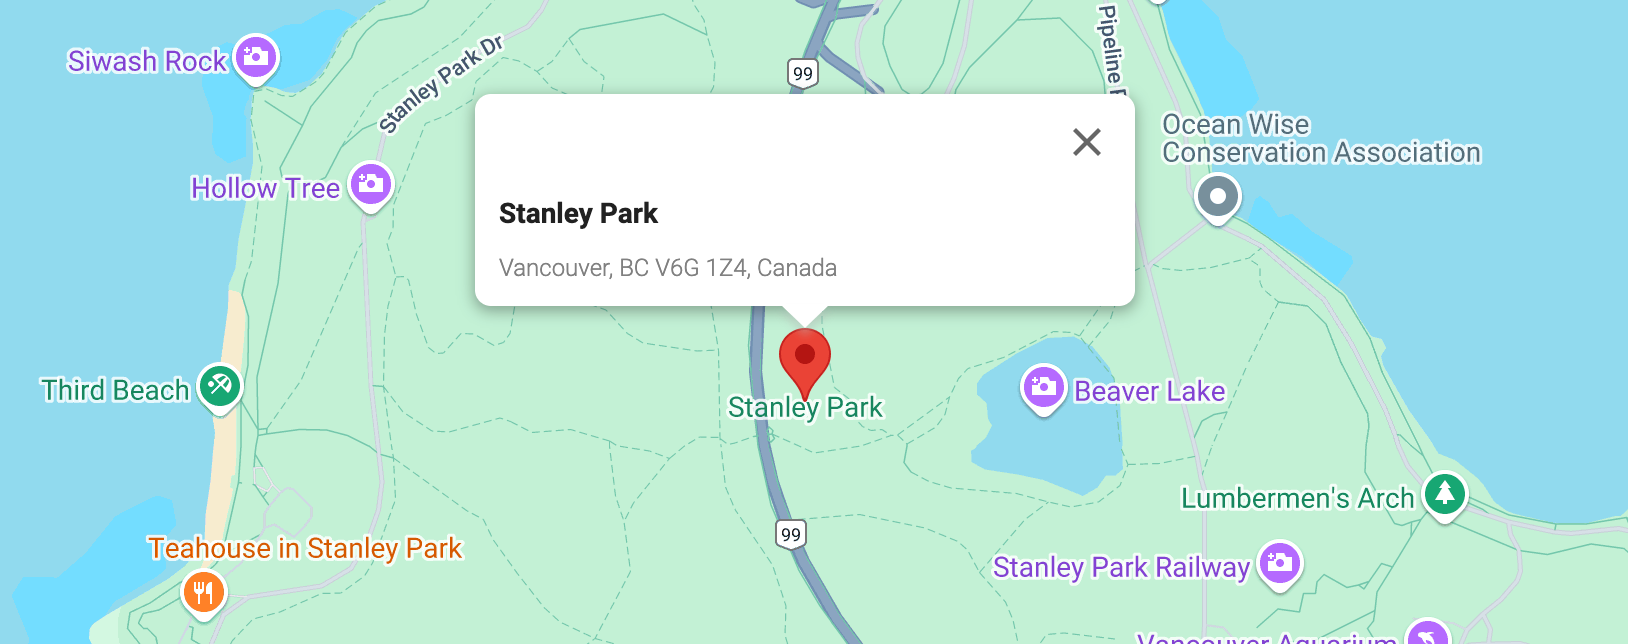
Marker.jsx creates a clickable marker by initializing a <Marker/> component at place.latitude and place.longitude. When clicked, it opens up an <InfoWindow/> component with the name and address of the selected place.
/* components/Marker.jsx */
import React, { useState } from "react";
import {
  Marker as GMarker,
  useAdvancedMarkerRef,
} from "@vis.gl/react-google-maps";
import InfoWindow from "./InfoWindow";

const Marker = ({ place }) => {
  const [markerRef, markerInstance] = useAdvancedMarkerRef();
  const [isInfoWindowOpen, setIsInfoWindowOpen] = useState(false);

  return (
    <>
      <GMarker
        position={{
          lat: place.latitude,
          lng: place.longitude,
        }}
        ref={markerRef}
        onClick={() => {
          setIsInfoWindowOpen(true);
        }}
      />
      {isInfoWindowOpen && (
        <InfoWindow
          anchor={markerInstance}
          onCloseClick={() => setIsInfoWindowOpen(false)}
          place={place}
        />
      )}
    </>
  );
};

export default Marker;
InfoWindow.jsx

InfoWindow.jsx is a simple presentational component that displays the name and address of the selected place in a popup window. It uses the onCloseClick prop to toggle the isInfoWindowOpen state in the parent <Map/> component, allowing the info window to open and close.
/* frontend/components/InfoWindow.jsx */
import React from "react";
import { InfoWindow as GInfoWindow } from "@vis.gl/react-google-maps";
import "./InfoWindow.scss";

const InfoWindow = ({ place, anchor, onCloseClick }) => {
  const { name, rating, reviewsCount, category, address, imageUrl } = place;

  return (
    <GInfoWindow anchor={anchor} onCloseClick={onCloseClick}>
      <div className="info-window">
        <div className="info-window-content">
          {imageUrl && (
            <img src={imageUrl} alt={name} className="info-window-image" />
          )}
          <div className="info-window-details">
            <h2 className="info-window-title">{name}</h2>

            <div className="info-window-category">{category}</div>
          </div>
        </div>
        <div className="info-window-address">{address}</div>
      </div>
    </GInfoWindow>
  );
};

export default InfoWindow;
To run the app on your local machine, simply clone the repository, places_api_autocomplete_demo, update the .env file with your Google Maps API key and run npm install followed by npm run. Alternatively, you can view the Places Autocomplete demo on the web at https://autocomplete-place.afi.dev.
What we've learned
In this blog post, I explained how to use the Google Maps Places Autocomplete API to enhance the user experience by providing location-based suggestions as users type in a search box. I also covered the two pricing models for address autocomplete - per request and per session, and walked through the basic steps needed to integrate the Autocomplete API into an app, showing how to capture user input, select a place, and display its location on a map.
The Google Places Autocomplete API is used widely all over the web. It simplifies the process of finding accurate location information, improves usability and reduces input errors. In the next section, I’ll explore the Google Maps Place Details and Place Photos APIs, which allow you to retrieve detailed information about a specific location and access high-quality images submitted by users to the Google Maps database.
👋 As always, if you have any questions or suggestions for me, please reach out or say hello on LinkedIn.


