Driver tracking with Google Maps
A simple guide on building a delivery driver tracking app using Google Maps.

You've built an iOS app that tracks the realtime location of your drivers and hooked it up to a simple backend using Firebase. The final step in implementing a live delivery driver tracking app that would make the NSA proud is to write some frontend code to display your driver locations on Google Maps so that you can track them from anywhere.
Part 1: Implementing driver live tracking on iOS
Part 2: Building a live driver tracking backend
Part 3: Driver tracking with Google Maps (this article)
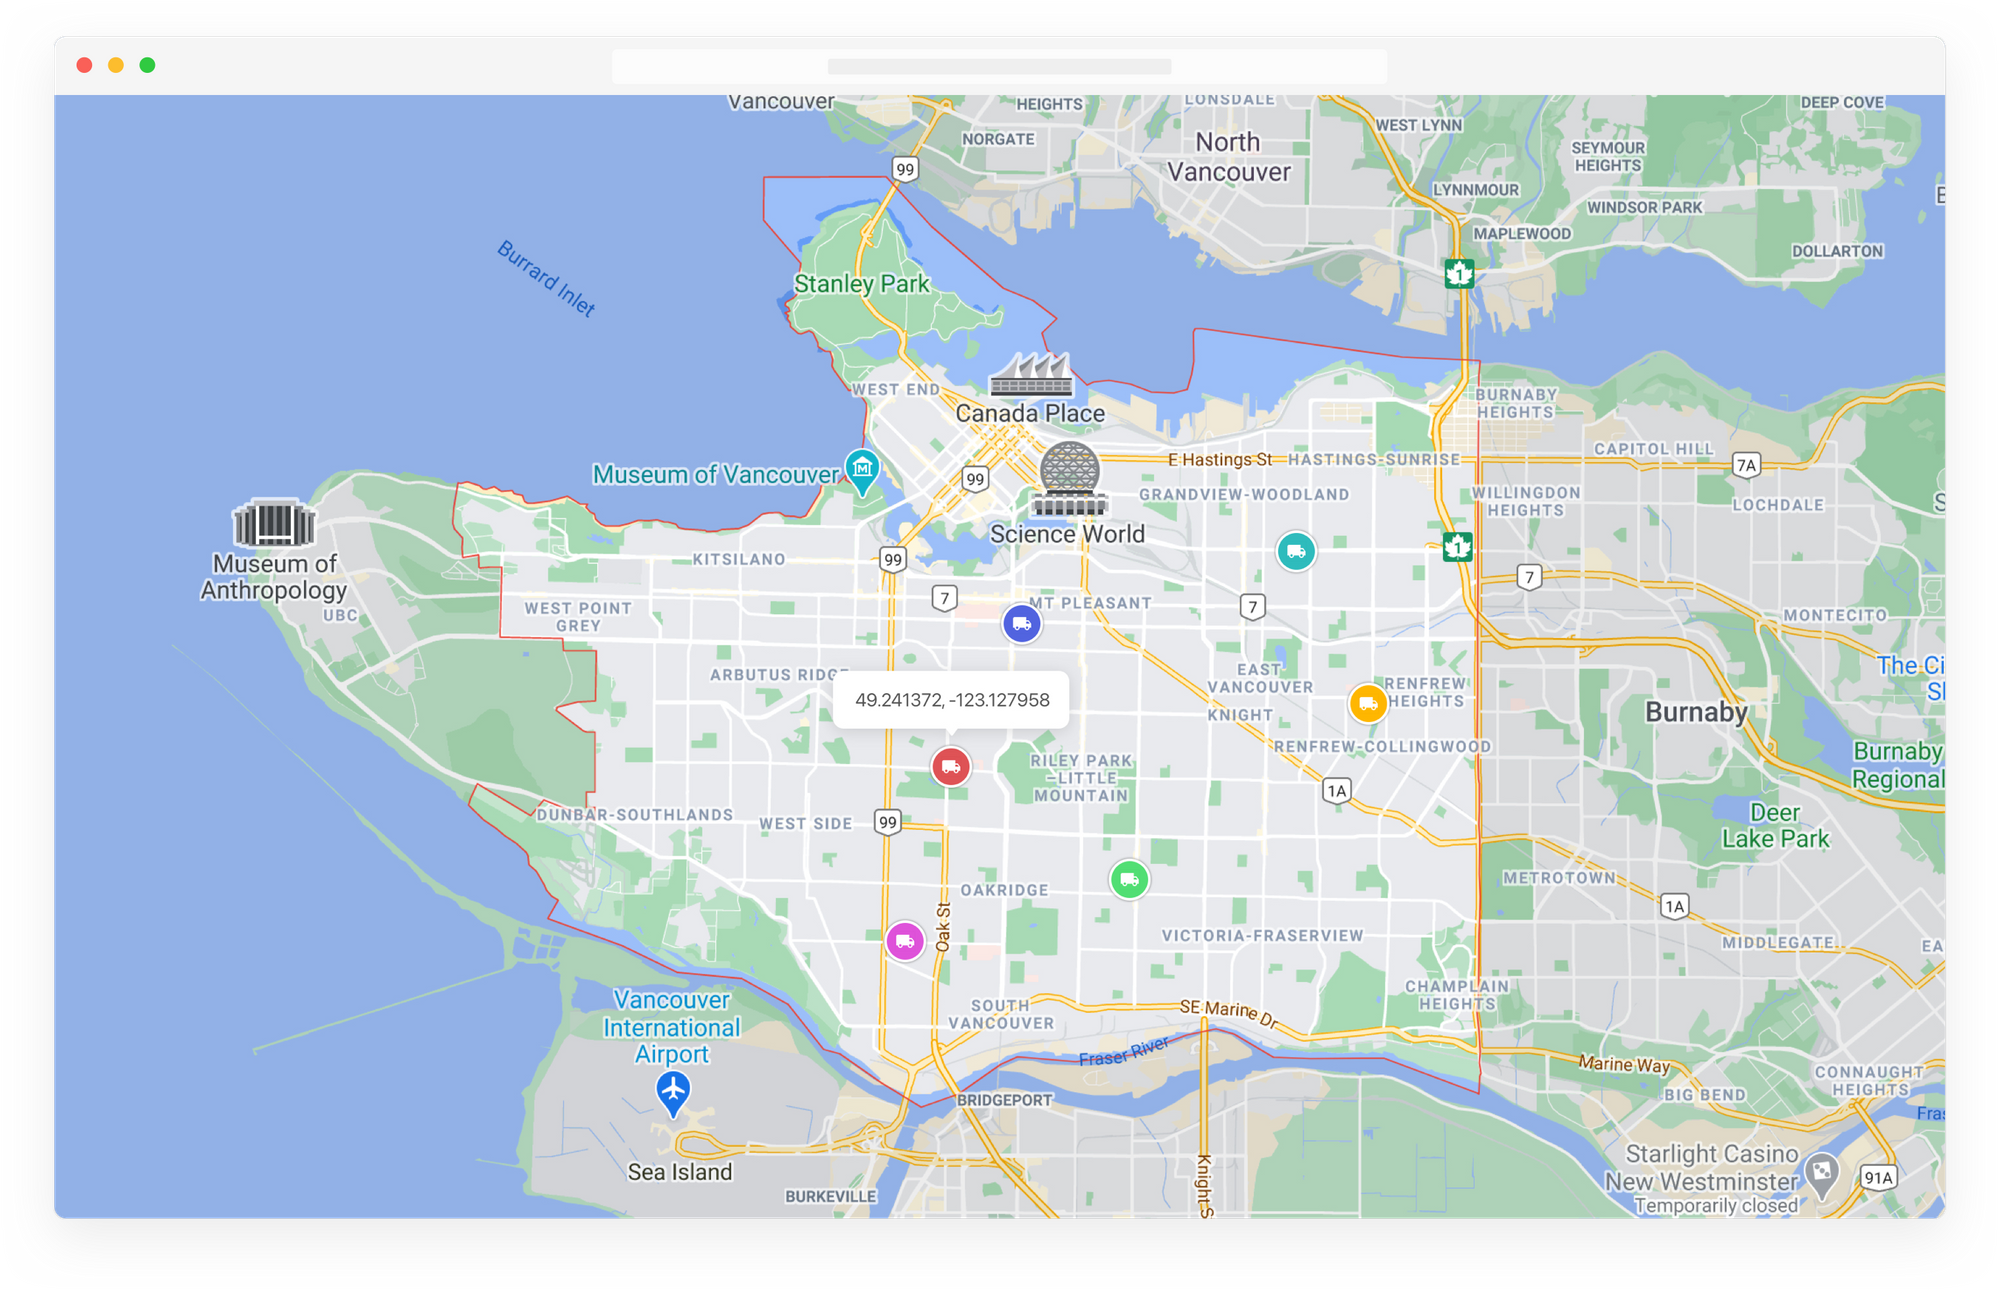
For this tutorial, we will scaffold the delivery driver tracking app using a simple React web app that displays the realtime location of your drivers on a Google map. The last known location of each driver will be shown as a colored marker, and the marker's position will move as your drivers move, without having to refresh the page. As usual, sample code is available for you to download and run.
Getting started
The web app we are building uses starter code from the Create React App project. This tutorial assumes some understanding of how React works and how to run a single page app, but even if you aren't a React guru, you should be able to follow the readme instructions to run it locally and play around with it.
Afi Labs builds custom transportation and logistics management software. From route optimization, live tracking to proof of delivery and driver apps, we've got you covered!
👋 Say Hello!
Configuring your .env file
The first thing we need to do is create a .env file to store the API keys and endpoints for the various services we will use. Using your favorite text editor, copy and paste the following and save the file as .env in the root folder of our app.
REACT_APP_NAME='GPS Tracking App'
REACT_APP_GOOGLE_API_KEY='GOOGLE_API_KEY'
REACT_APP_FIREBASE_API_KEY='FIREBASE_API_KEY'
REACT_APP_FIREBASE_AUTH_DOMAIN='FIREBASE_AUTH_DOMAIN'
REACT_APP_FIREBASE_DATABASE_URL='FIREBASE_DB_URL'
We need a Google API key to use Google Maps. You can follow these instructions to get one and replace GOOGLE_API_KEY. Google Maps isn't free, but if you put up a credit card you can get over $200 in usage credits each month, which is more than enough for light production usage.
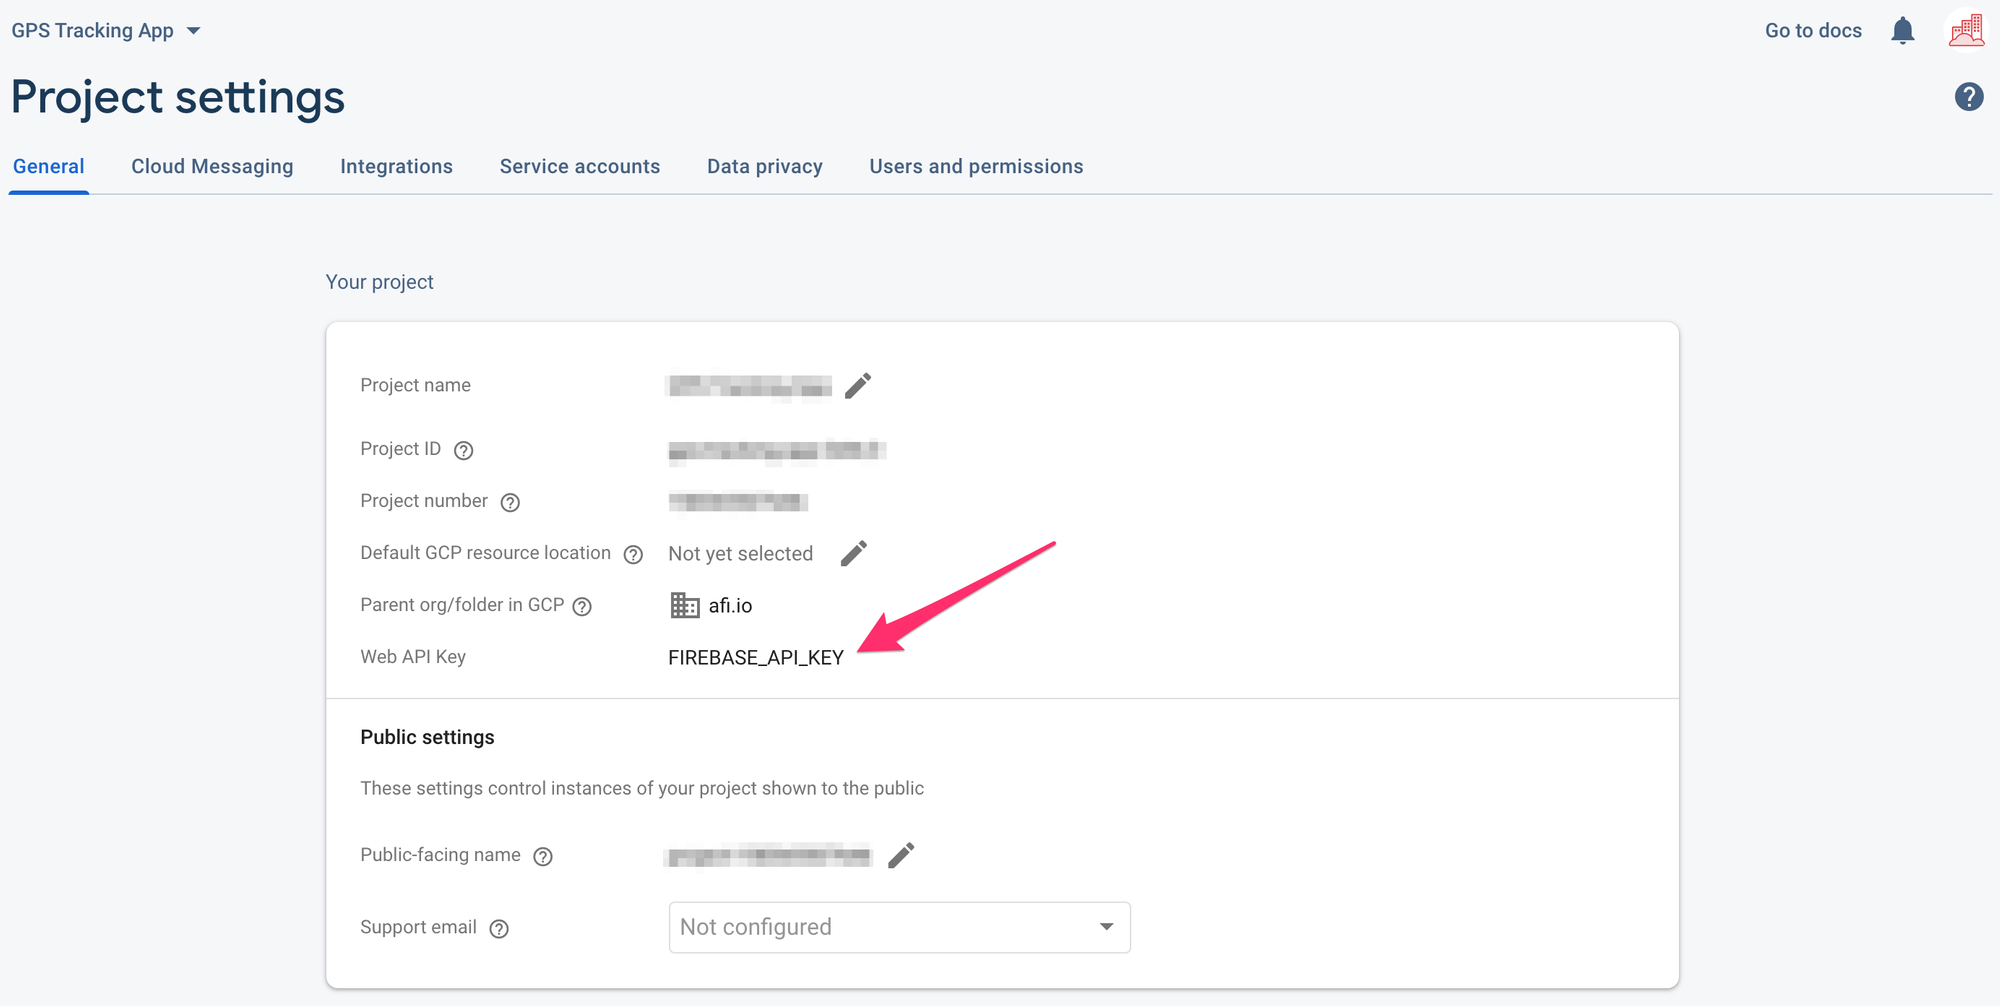
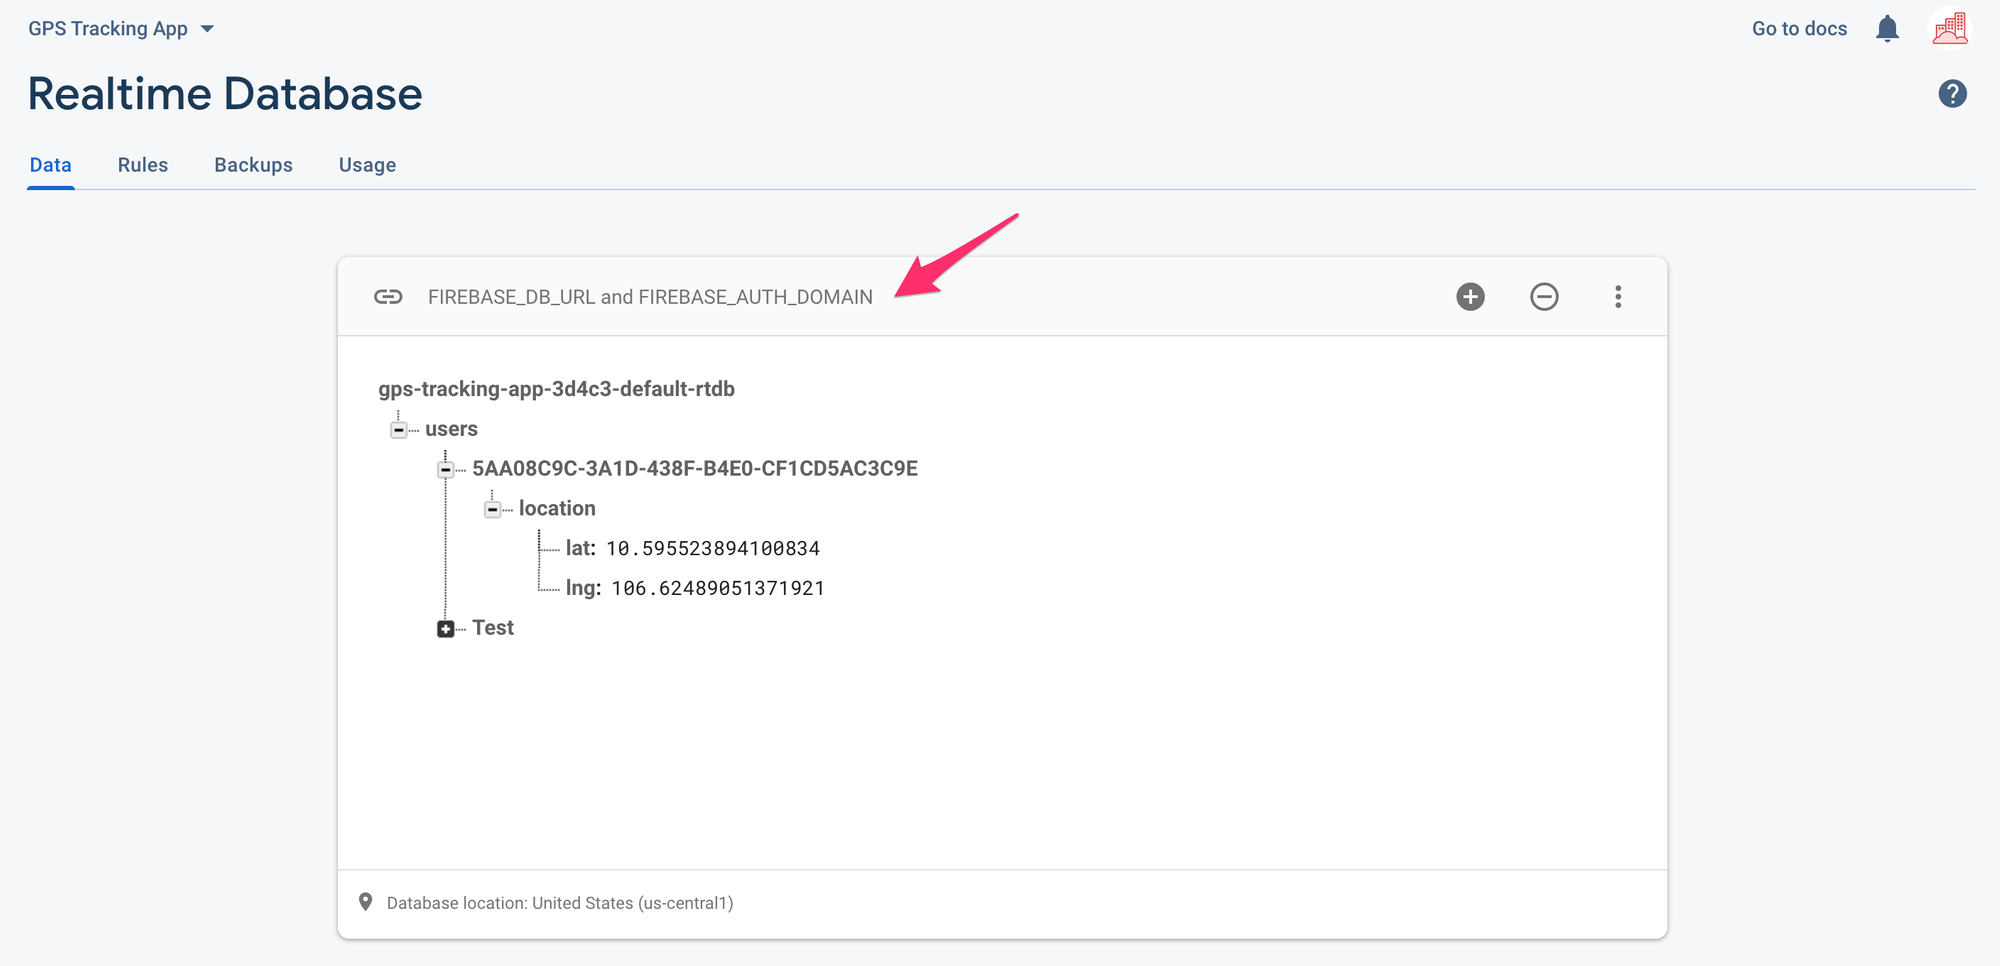
Next, log into https://console.firebase.google.com/ to retrieve your Firebase credentials. FIREBASE_API_KEY can be found on the "General" tab of your Realtime Database project settings (click the gear icon on the left navigation panel - read my previous blog post on how to set up Firebase) under the heading "Web API Key".
FIREBASE_DB_URL can be found in the "Data" tab of your Realtime Database project. FIREBASE_AUTH_DOMAIN is the same thing, but with the https:// omitted.
These configuration variables are used in firebase.js to correctly load the Firebase SDK and point it to our Firebase account.
import firebase from 'firebase/app';
import 'firebase/auth';
import 'firebase/database';

const config = {
  apiKey: process.env.REACT_APP_FIREBASE_API_KEY,
  authDomain: process.env.REACT_APP_FIREBASE_AUTH_DOMAIN,
  databaseURL: process.env.REACT_APP_FIREBASE_DATABASE_URL,
};

const app = firebase.initializeApp(config);
How our code is organized
This isn't a React tutorial, but it's worth spending a few minutes explaining how our code works. There is only a single page on our web app, index.html found at public/index.html. The code to create and display our map (index.js, app.js, livemap.js) is found in the /src folder . When you use webpack to compile the code, it appends index.js to index.html.
index.html
In index.html, we see:
ReactDOM.render(
  <React.StrictMode>
    <App />
  </React.StrictMode>,
  document.getElementById('root')
);
What this code does is it looks for the <div> element with the id of root and it inserts the React component called <App/>. The code for <App/> is found in App.js, and it is here that we find our API calls to Firebase.
App.js
import React, { useEffect, useState } from "react";
const App = () => {
    const [users, setUsers] = useState([]);

    useEffect(() => {
      firebase.database().ref("users").on("value", snapshot => {
        let users = [];
        snapshot.forEach(snap => {
          users.push(snap.val());
        });
        setUsers(users);
      });
    }, []);
Here's what's going on.
const [users, setUsers] = useState([]);
The useState React hook lets you add state to functions. It returns a pair of values, for which I have used destructuring assignment to create two local variables. For example, users lets the component access the current list of drivers (the list of user_ids in the users object in Firebase), which conveniently also stores a references to the location object with the driver's most recent lat/lng. The setUsers variable is a function that is used to update the list of drivers.
After that,
useEffect(() => {
      firebase.database().ref("users").on("value", snapshot => {
        let users = [];
        snapshot.forEach(snap => {
          users.push(snap.val());
        });
        setUsers(users);
      });
    }, []);
we use React's built-in useEffect Hook to tells React to perform some action or “side effect” after a component has been rendered in the browser. The useEffect Hook accepts two parameters. The first is a function that accepts no parameters and defines what the side effect actually does. The second is an array of dependencies i.e. variables that will be used in the first parameter (we have none, so we pass in an empty array).
Let's look carefully at our "side effect" code.
firebase.database()To read or write data from the Realtime Database, you need an instance of firebase.database.Reference.
firebase.database().ref("users")A reference (the ref() method) refers to the location inside our database. Here, we are pointing to the users object, which is a list of key value pairs of user_ids and their locations.
firebase.database().ref("users").on("value", snapshot => { // some stuff in here })The on() method reads data at a path and listens for changes to users and any child objects of users. This is awesome because if any of your drivers move, their location object will update and we can render their new locations in realtime on our map. Any time you read data from the database, you receive the data as a DataSnapshot, which in our example above is stored in the snapshot function.
firebase.database().ref("users").on("value", snapshot => {
        let users = [];
        snapshot.forEach(snap => {
          users.push(snap.val());
        });
        setUsers(users);
      });
Next, I create an empty local array called users and iterate over my snapshot, pushing the value of each item (retrieved by calling snap.val()) into the users array. Each item is a key - value pair like the one shown below.

Lastly, I call setUsers(users) to update the users hook. Now we are ready to display our drivers on the map by passing the locations object as a prop to our <LiveMap/> component. The code for LiveMap lives in src/livemap.js.
return (
    <div className="App">
      <div className="LiveMap">
        <LiveMap locations={users.map(u => u.location)} />
      </div>
    </div>
  );
livemap.js
This is just a simple Google Maps React component (very similar to the Google Map React project) that iterates over locations, extract each {location.lat}, {location.lng} and plots them on a map.
return (
      <GoogleMap ref={elem => this.map = elem} >
        {this.props.locations.map((location, index) => (
          <Marker
            icon={{
              url: driver,
              scaledSize: { width: 35, height: 44 },
            }}
            key={index}
            position={{ ...location }}
            onClick={() => this.setState({ selectedLocation: location })}
          >
            {this.state.selectedLocation === location &&
              <InfoWindow onCloseClick={() => this.setState({ selectedLocation: null })}>
                <div style={{ color: 'black' }}>
                  {location.lat}, {location.lng}
                </div>
              </InfoWindow>
            }
          </Marker>
        ))}
      </GoogleMap>
    );
The magic about all this is that there is no need to poll the server to get updated locations. When data changes in Firebase, our ref in App.js listens for changes and everything updates automagically.
So there you have it! You now have live delivery driver tracking app for your fleet. This is a must have for more advanced features like dispatch, customer notifications and delivery live tracking by your customers.
👋 As always, if you have any questions or suggestions for me, please reach out or say hello on LinkedIn.
Part 1: Implementing driver live tracking on iOS
Part 2: Building a live driver tracking backend
Part 3: Driver tracking with Google Maps (this article)